SSBU Icon.png

Luigi (SSBU)/Neutral attack/Hit 1: Difference between revisions

From SmashWiki, the Super Smash Bros. wiki
Jump to navigationJump to search
m (Time to cover Zeck's husbando :3. Zeck if you're watching, please don't kill me)
(→‎Hitboxes: Well since this template seems to be staying might as well cover my main)
Line 14: Line 14:
|damage=2.0%
|damage=2.0%
|angle=361
|angle=361
|af=3
|bk=25
|bk=25
|ks=25
|ks=25
Line 32: Line 33:
|damage=2.0%
|damage=2.0%
|angle=361
|angle=361
|af=3
|bk=25
|bk=25
|ks=25
|ks=25
Line 50: Line 52:
|damage=2.0%
|damage=2.0%
|angle=180
|angle=180
|af=3
|bk=20
|bk=20
|ks=20
|ks=20
Line 68: Line 71:
|damage=2.0%
|damage=2.0%
|angle=361
|angle=361
|af=3
|bk=20
|bk=20
|ks=20
|ks=20
Line 83: Line 87:
}}
}}
|}
|}
==Timing==
==Timing==
{|class="wikitable"
{|class="wikitable"

Revision as of 01:30, January 22, 2022

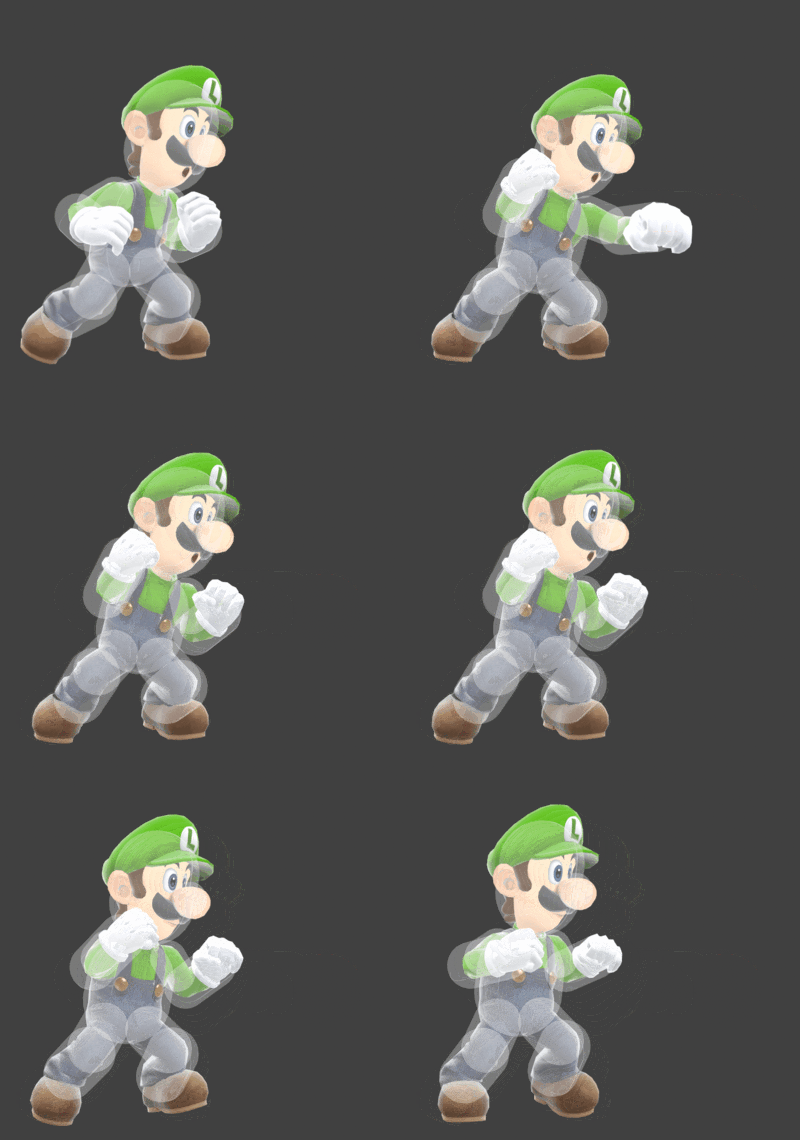
Hitbox visualization showing Luigi's first jab.

Overview

Luigi throws a quick jab with his arm farthest from the camera. It is Luigi's fastest grounded option at frame 2, and can make for a somewhat safe poke in neutral. It is possible to hold the attack button down to repeatedly perform the move, making it a safe way to deal with spotdodges, techs in place, or stuff out short-ranged grounded approach options. It is also used to jablock opponents, however the small hitboxes can cause the move to whiff on skinnier characters, provided they don't bounce from the missed tech animation. It leads into the second hit very reliably.

Update History

Super Smash Bros. Ultimate 3.1.0

  • Buff Neutral attack's first hit has decreased base knockback on the arm hitboxes (30 → 25) to allow them to connect into the second hit more reliably.

Hitboxes

ID Part Rehit rate Damage SD Angle Angle type BK KS FKV Set weight Radius Bone Offset SDI× T% Clang Rebound Effect Type G A Sound Direct Hit bits Hit part Blockable Reflectable Absorbable Flinchless No GFX Heedless
0 0 0 2.0% 0 Sakurai angle Forward 25 25 0 HitboxTableIcon(False).png 1.4 top 0.0 6.6 6.5 2.0× 1.0× 0% HitboxTableIcon(Clang).png HitboxTableIcon(Rebound).png EffectIcon(Normal).png TypeIcon(Hand).png HitboxTableIcon(GroundedTrue).png HitboxTableIcon(AerialTrue).png S Punch SpecialsDirect.png All All HitboxTableIcon(Blockable).png HitboxTableIcon(Unreflectable).png HitboxTableIcon(Unabsorbable).png HitboxTableIcon(False).png HitboxTableIcon(False).png HitboxTableIcon(False).png
1 0 0 2.0% 0 Sakurai angle Forward 25 25 0 HitboxTableIcon(False).png 1.7 top 0.0 6.6 9.1 2.0× 1.0× 0% HitboxTableIcon(Clang).png HitboxTableIcon(Rebound).png EffectIcon(Normal).png TypeIcon(Hand).png HitboxTableIcon(GroundedTrue).png HitboxTableIcon(AerialTrue).png S Punch SpecialsDirect.png All All HitboxTableIcon(Blockable).png HitboxTableIcon(Unreflectable).png HitboxTableIcon(Unabsorbable).png HitboxTableIcon(False).png HitboxTableIcon(False).png HitboxTableIcon(False).png
2 0 0 2.0% 0 AngleIcon180.png Forward 20 20 0 HitboxTableIcon(False).png 2.0 top 0.0 6.6 12.3 2.0× 1.0× 0% HitboxTableIcon(Clang).png HitboxTableIcon(Rebound).png EffectIcon(Normal).png TypeIcon(Hand).png HitboxTableIcon(GroundedTrue).png HitboxTableIcon(AerialTrue).png S Punch SpecialsDirect.png All All HitboxTableIcon(Blockable).png HitboxTableIcon(Unreflectable).png HitboxTableIcon(Unabsorbable).png HitboxTableIcon(False).png HitboxTableIcon(False).png HitboxTableIcon(False).png
3 0 0 2.0% 0 Sakurai angle Forward 20 20 0 HitboxTableIcon(False).png 2.0 top 0.0 6.6 12.3 2.0× 1.0× 0% HitboxTableIcon(Clang).png HitboxTableIcon(Rebound).png EffectIcon(Normal).png TypeIcon(Hand).png HitboxTableIcon(GroundedTrue).png HitboxTableIcon(AerialTrue).png S Punch SpecialsDirect.png All All HitboxTableIcon(Blockable).png HitboxTableIcon(Unreflectable).png HitboxTableIcon(Unabsorbable).png HitboxTableIcon(False).png HitboxTableIcon(False).png HitboxTableIcon(False).png

Timing

Hitboxes 2-3
Earliest continuable 5
Interruptible 19
Animation length 23
FrameIcon(Lag).png FrameIcon(Hitbox).png FrameIcon(Hitbox).png FrameIcon(LagContinuableS).png FrameIcon(LagContinuableE).png FrameIcon(Lag).png FrameIcon(Lag).png FrameIcon(Lag).png FrameIcon(Lag).png FrameIcon(Lag).png FrameIcon(Lag).png FrameIcon(Lag).png FrameIcon(Lag).png FrameIcon(Lag).png FrameIcon(Lag).png FrameIcon(Lag).png FrameIcon(Lag).png FrameIcon(Lag).png FrameIcon(Interruptible).png FrameIcon(Interruptible).png FrameIcon(Interruptible).png FrameIcon(Interruptible).png FrameIcon(Interruptible).png
Legend (1 square = 1 frame)
FrameIcon(Lag).png
Lag time
FrameIcon(Hitbox).png
Hitbox
FrameIcon(BlankContinuableS).pngFrameIcon(BlankContinuableE).png
Earliest continuable point
FrameIcon(Interruptible).png
Interruptible