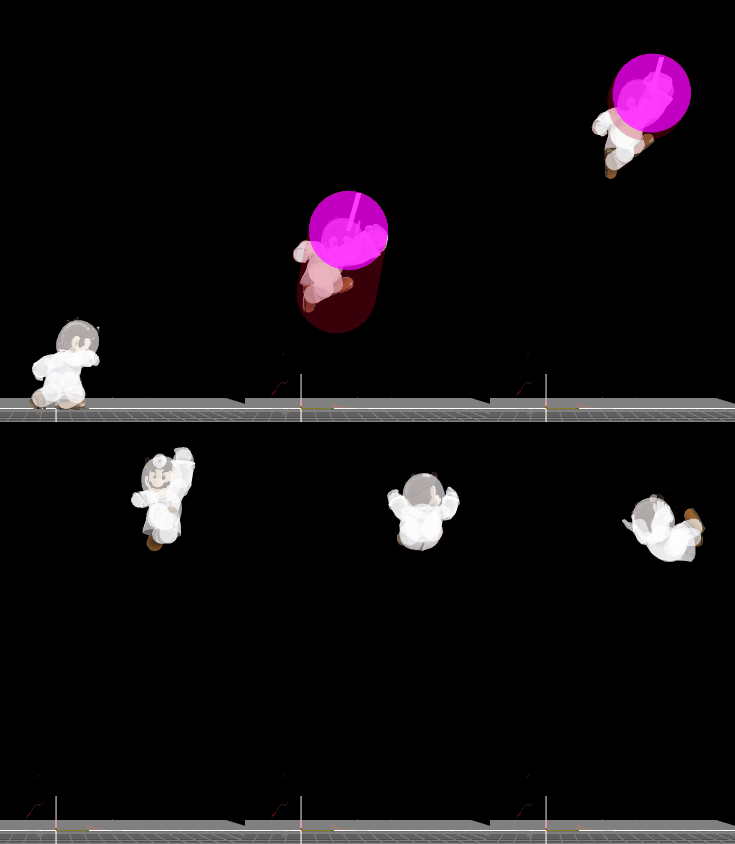
Dr. Mario (SSB4)/Up special/Default: Difference between revisions
From SmashWiki, the Super Smash Bros. wiki
Jump to navigationJump to search
m (Text replacement - " " to " ") |
No edit summary |
||
| Line 2: | Line 2: | ||
{{disambig2|the hitbox visualization in ''[[Super Smash Bros. 4]]''|the move itself|Super Jump Punch}} | {{disambig2|the hitbox visualization in ''[[Super Smash Bros. 4]]''|the move itself|Super Jump Punch}} | ||
[[File:Dr.MarioSuperJumpPunch.gif|thumb|270px|Hitbox visualization showing Dr. Mario's Super Jump Punch.]] | [[File:Dr.MarioSuperJumpPunch.gif|thumb|270px|Hitbox visualization showing Dr. Mario's Super Jump Punch.]] | ||
==Overview== | |||
{{competitive expertise}} | {{competitive expertise}} | ||
==Hitboxes== | ==Hitboxes== | ||
| Line 21: | Line 21: | ||
|xpos=0.0 | |xpos=0.0 | ||
|ypos=6.0 | |ypos=6.0 | ||
|zpos=9.0 | |zpos=9.0 to 5.0 | ||
|type=Hand | |type=Hand | ||
|sdi=1.0 | |sdi=1.0 | ||
|ff=1.5 | |ff=1.5 | ||
|sfx=Kick | |sfx=Kick | ||
|slvl=L | |slvl=L | ||
| Line 45: | Line 44: | ||
|type=Hand | |type=Hand | ||
|sdi=1.0 | |sdi=1.0 | ||
|sfx=Punch | |sfx=Punch | ||
|slvl=M | |slvl=M | ||
| Line 51: | Line 49: | ||
{{HitboxTableRowNote|The damage values are untouched before being affected by Dr. Mario's 1.12x damage multiplier.|24}} | {{HitboxTableRowNote|The damage values are untouched before being affected by Dr. Mario's 1.12x damage multiplier.|24}} | ||
|} | |} | ||
==Timing== | |||
{|class="wikitable" | |||
!Clean hit | |||
|3-5 | |||
|- | |||
!Late hit | |||
|6-19 | |||
|- | |||
!Animation length | |||
|37 | |||
|} | |||
{{FrameStripStart}} | |||
{{FrameStrip|t=Lag|c=2}}{{FrameStrip|t=Hitbox|c=3|e=HitboxChangeS}}{{FrameStrip|t=Hitbox|c=14|s=HitboxChangeE}}{{FrameStrip|t=Lag|c=18}} | |||
{{FrameStripEnd}} | |||
{{FrameIconLegend|lag=y|hitbox=y|hitboxchange=y}} | |||
{{MvSubNavDrMario|g=SSB4}} | {{MvSubNavDrMario|g=SSB4}} | ||
[[Category:Dr. Mario (SSB4)]] | [[Category:Dr. Mario (SSB4)]] | ||
[[Category:Special moves (SSB4)]] | [[Category:Special moves (SSB4)]] | ||
[[Category:Up special moves (SSB4)]] | [[Category:Up special moves (SSB4)]] | ||
Revision as of 01:13, April 22, 2021
Overview
Hitboxes
Timing
| Clean hit | 3-5 |
|---|---|
| Late hit | 6-19 |
| Animation length | 37 |
Lag time |
Hitbox |
Hitbox change |
|

