Dr. Mario (SSB4)/Up smash: Difference between revisions
m (→Update history) |
SuperSqank (talk | contribs) No edit summary |
||
| (2 intermediate revisions by one other user not shown) | |||
| Line 3: | Line 3: | ||
==Overview== | ==Overview== | ||
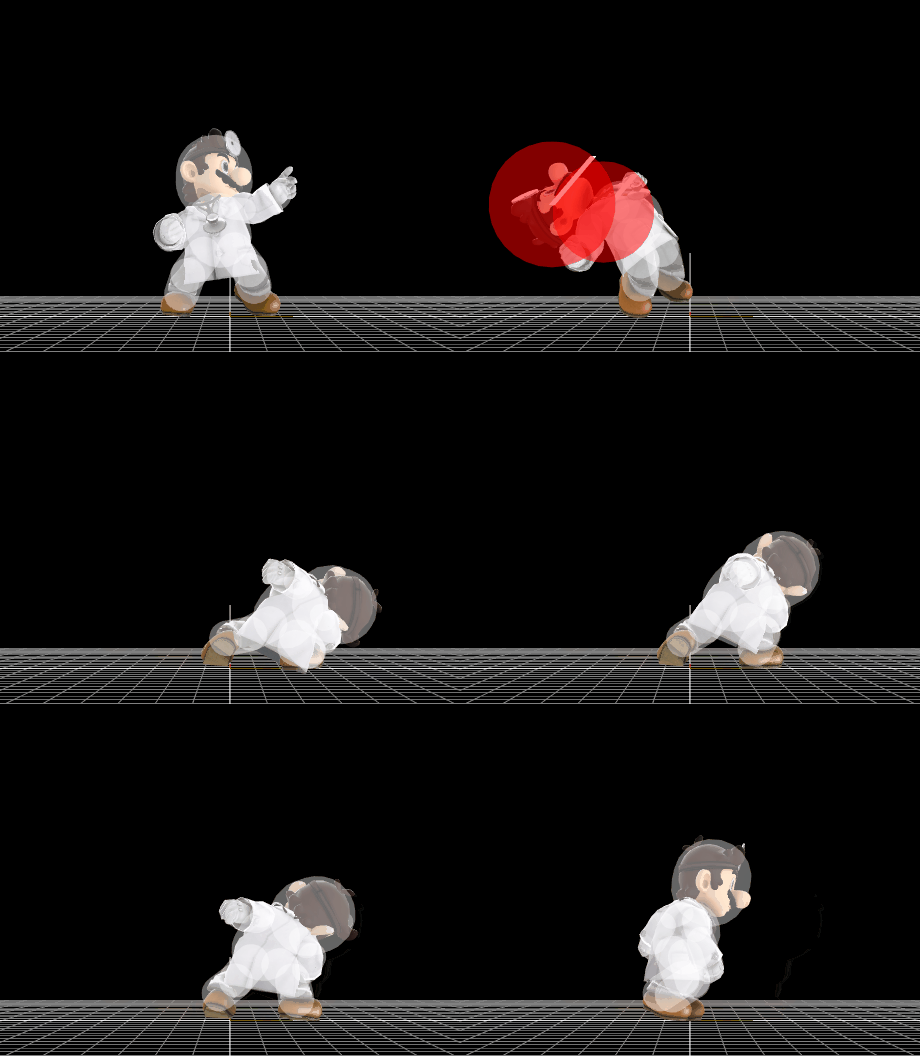
An upward headbutt. It renders Dr. Mario's head intangible throughout its duration, quite similarly to {{SSB4|Mario}}'s. It also launches at a much lower [[angle]] than Mario's, 130°, which makes it better than Mario's in regard to starting [[combo]]s when uncharged at low [[percent]]ages, with its most notable follow-up being itself. This also makes it even more reliable at [[KO]]ing near the edge, whereas Mario's can KO reliably from any part of a stage. It KOs middleweights at 119% while near the edge, and has the lowest amount of ending lag out of his smash attacks. At 0% on most middleweights and heavier without rage, down throw is able to combo into this move, which can then be followed up with another up smash, forward tilt or up tilt. The move can also be used as a general anti air move, due to the good hitbox and head intangibility, and is relatively safe due to the low endlag. | |||
An upward headbutt. It renders Dr. Mario's head intangible throughout its duration, quite similarly to {{SSB4|Mario}}'s. It also launches at a much lower [[angle]] than Mario's, 130°, which makes it better than Mario's in regard to starting [[combo]]s when uncharged at low [[percent]]ages, with its most notable follow-up being itself. This also makes it even more reliable at [[KO]]ing near the edge, whereas Mario's can KO reliably from any part of a stage. It KOs middleweights at 119% while near the edge, and has the lowest amount of ending lag out of his smash attacks. | |||
==Update history== | ==Update history== | ||
'''{{GameIcon|ssb4}} [[1.0.6]]''' | '''{{GameIcon|ssb4}} [[1.0.6]]''' | ||
*{{buff|Knockback angle lowered|110°|130° improving its horizontal KO potential.}} | *{{buff|Knockback angle lowered|110°|130°, improving its horizontal KO potential.}} | ||
'''{{GameIcon|ssb4}} [[1.1.0]]''' | '''{{GameIcon|ssb4}} [[1.1.0]]''' | ||
| Line 19: | Line 18: | ||
|id=0 | |id=0 | ||
|part=0 | |part=0 | ||
|damage={{ChargedSmashDmgSSB4| | |damage={{ChargedSmashDmgSSB4|14}} | ||
|angle=130 | |angle=130 | ||
|bk=0 | |bk=0 | ||
| Line 38: | Line 37: | ||
|id=1 | |id=1 | ||
|part=0 | |part=0 | ||
|damage={{ChargedSmashDmgSSB4| | |damage={{ChargedSmashDmgSSB4|14}} | ||
|angle=130 | |angle=130 | ||
|bk=0 | |bk=0 | ||
| Line 54: | Line 53: | ||
|slvl=L | |slvl=L | ||
}} | }} | ||
{{HitboxTableRowNote|The damage values are untouched before being affected by Dr. Mario's 1.12x damage multiplier.|24}} | |||
|} | |} | ||
| Line 78: | Line 78: | ||
|Hitboxes {{FrameStrip|t=Lag|c=6|e=LagChargeS}}{{FrameStrip|t=Lag|c=2|s=LagChargeE}}{{FrameStrip|t=Hitbox|c=5}}{{FrameStrip|t=Lag|c=26}}{{FrameStrip|t=Interruptible|c=9}} | |Hitboxes {{FrameStrip|t=Lag|c=6|e=LagChargeS}}{{FrameStrip|t=Lag|c=2|s=LagChargeE}}{{FrameStrip|t=Hitbox|c=5}}{{FrameStrip|t=Lag|c=26}}{{FrameStrip|t=Interruptible|c=9}} | ||
|- | |- | ||
| | |Head {{FrameStrip|t=Vulnerable|c=8}}{{FrameStrip|t=Intangible|c=5}}{{FrameStrip|t=Vulnerable|c=35}} | ||
{{FrameStripEnd}} | {{FrameStripEnd}} | ||
Latest revision as of 08:21, August 4, 2020
Overview[edit]
An upward headbutt. It renders Dr. Mario's head intangible throughout its duration, quite similarly to Mario's. It also launches at a much lower angle than Mario's, 130°, which makes it better than Mario's in regard to starting combos when uncharged at low percentages, with its most notable follow-up being itself. This also makes it even more reliable at KOing near the edge, whereas Mario's can KO reliably from any part of a stage. It KOs middleweights at 119% while near the edge, and has the lowest amount of ending lag out of his smash attacks. At 0% on most middleweights and heavier without rage, down throw is able to combo into this move, which can then be followed up with another up smash, forward tilt or up tilt. The move can also be used as a general anti air move, due to the good hitbox and head intangibility, and is relatively safe due to the low endlag.
Update history[edit]
 Knockback angle lowered: 110° → 130°, improving its horizontal KO potential.
 Knockback scaling increased: 108 → 117, greatly improving its KO potential.
 Hitbox frame duration increased: 9-12 → 9-13.
Hitboxes[edit]
Timing[edit]
| Charges between | 6-7 |
|---|---|
| Hitboxes | 9-13 |
| Head intangible | 9-13 |
| Interruptible | 40 |
| Animation length | 48 |
| Hitboxes | ||||||||||||||||||||||||||||||||||||||||||||||||
| Head |
Lag time |
Charge interval |
Hitbox |
Vulnerable |
Intangible |
Interruptible |
|
