SSBU Icon.png

Luigi (SSBU)/Down tilt: Difference between revisions

From SmashWiki, the Super Smash Bros. wiki
Jump to navigationJump to search
Tag: Mobile edit
Tag: Mobile edit
Line 3: Line 3:
{{competitive expertise}}
==Overview==
==Overview==
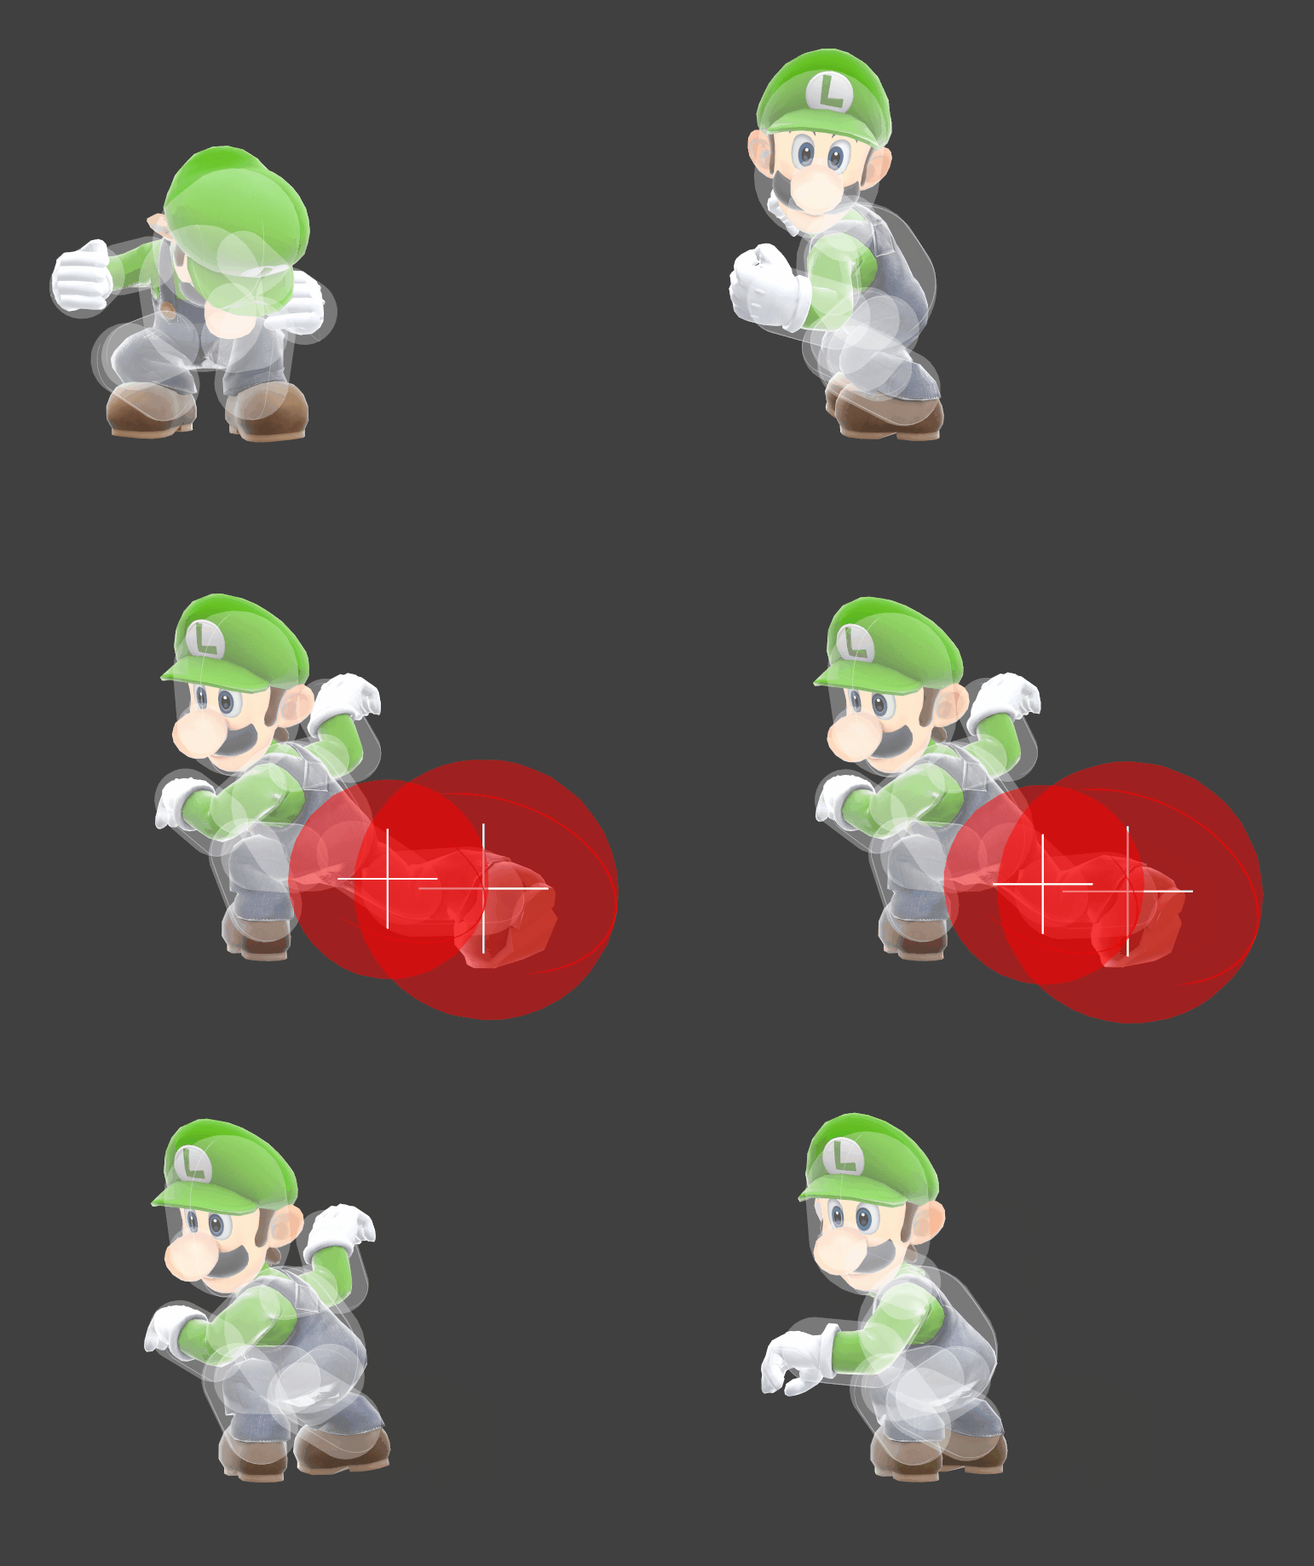
Luigi performs a heel kick in front of him. Similarly to Ness and Lucas's down tilts, it has almost no ending lag, being interruptible as soon as Luigi reposition his leg, although with more knockback, but also more damage. This move's low ending lag and knockback allow it to start many combos. The low hitbox and long duration make it a good tool at the ledge. A good tool for pressuring shields but has poor range.
Luigi performs a heel kick in front of him. Similarly to Ness and Lucas's down tilts, it has almost no ending lag (only 5 frames of vulnerability), being interruptible as soon as Luigi reposition his leg, although with more knockback, but also more damage. This move's low ending lag and knockback allow it to start many combos. The low hitbox and deceptively long duration make it a good tool at the ledge. A good tool for pressuring shields but has poor range.


==Hitboxes==
==Hitboxes==

Revision as of 03:33, December 14, 2019

Hitbox visualization showing Luigi's down tilt.
Competitive.png This article or section may require competitive expertise.
You can discuss this issue on the talk page or edit this page to improve it.

Overview

Luigi performs a heel kick in front of him. Similarly to Ness and Lucas's down tilts, it has almost no ending lag (only 5 frames of vulnerability), being interruptible as soon as Luigi reposition his leg, although with more knockback, but also more damage. This move's low ending lag and knockback allow it to start many combos. The low hitbox and deceptively long duration make it a good tool at the ledge. A good tool for pressuring shields but has poor range.

Hitboxes

ID Part Rehit rate Damage SD Angle Angle type BK KS FKV Set weight Radius Bone Offset SDI× T% Clang Rebound Effect Type G A Sound Direct Hit bits Hit part Blockable Reflectable Absorbable Flinchless No GFX Heedless
0 0 0 5.0% 0 Sakurai angle Standard 32 72 0 HitboxTableIcon(False).png 4.8 kneer 3.0 0.0 0.0 1.0× 1.0× 0% HitboxTableIcon(Clang).png HitboxTableIcon(Rebound).png EffectIcon(Normal).png TypeIcon(Foot).png HitboxTableIcon(GroundedTrue).png HitboxTableIcon(AerialTrue).png M Kick SpecialsDirect.png All All HitboxTableIcon(Blockable).png HitboxTableIcon(Unreflectable).png HitboxTableIcon(Unabsorbable).png HitboxTableIcon(False).png HitboxTableIcon(False).png HitboxTableIcon(False).png
1 0 0 5.0% 0 Sakurai angle Standard 32 72 0 HitboxTableIcon(False).png 3.8 legr 3.0 0.0 0.0 1.0× 1.0× 0% HitboxTableIcon(Clang).png HitboxTableIcon(Rebound).png EffectIcon(Normal).png TypeIcon(Foot).png HitboxTableIcon(GroundedTrue).png HitboxTableIcon(AerialTrue).png M Kick SpecialsDirect.png All All HitboxTableIcon(Blockable).png HitboxTableIcon(Unreflectable).png HitboxTableIcon(Unabsorbable).png HitboxTableIcon(False).png HitboxTableIcon(False).png HitboxTableIcon(False).png

Timing

Hitboxes 5-8
Interruptible 14
Animation length 27
FrameIcon(Lag).png FrameIcon(Lag).png FrameIcon(Lag).png FrameIcon(Lag).png FrameIcon(Hitbox).png FrameIcon(Hitbox).png FrameIcon(Hitbox).png FrameIcon(Hitbox).png FrameIcon(Lag).png FrameIcon(Lag).png FrameIcon(Lag).png FrameIcon(Lag).png FrameIcon(Lag).png FrameIcon(Interruptible).png FrameIcon(Interruptible).png FrameIcon(Interruptible).png FrameIcon(Interruptible).png FrameIcon(Interruptible).png FrameIcon(Interruptible).png FrameIcon(Interruptible).png FrameIcon(Interruptible).png FrameIcon(Interruptible).png FrameIcon(Interruptible).png FrameIcon(Interruptible).png FrameIcon(Interruptible).png FrameIcon(Interruptible).png FrameIcon(Interruptible).png
Legend (1 square = 1 frame)
FrameIcon(Lag).png
Lag time
FrameIcon(Hitbox).png
Hitbox
FrameIcon(Interruptible).png
Interruptible