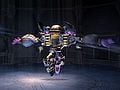
Galleom (SSBB)
| Galleom in Super Smash Bros. Brawl | |
|---|---|
 
| |
| Universe | Super Smash Bros. |
| A boss in | Brawl |
| Availability | Hacking |
| Tier | Banned |
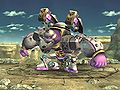
Galleom (ガレオム, Galleom), is an unplayable character in Brawl and only playable in Boss Battles via hacking. It has no specific voice actor, roaring and bellowing in animalistic fashion.
When playable, Galleom's power level scales with the difficulty setting chosen for Boss Battles. It has some of the most damaging moves of the Brawl bosses, featuring huge hitboxes with decently fast start-up frames and extreme knockback. He is also uniquely one of the few bosses capable of occupying centre-stage, allowing for Galleom to close out stocks much quicker and reducing the opponent's potential positioning with its large model. Thus, it is among the most effective Brawl bosses.
Attributes[edit]
Galleom is distinguished by its massive model and extremely strong, and decently fast, physical attacks. On Intense, it has several one-hit KO attacks like Collapse and Double Lariat, the former of which is decently fast and possible to spam against inexperienced players. Galleom's Trample and Uppercut have large hitboxes that can cover a wide amount of aerial space, covering jump-in attacks; the latter is particularly notable for having a deceptive amount of reach, factoring in the wind-up animation. Hammer Knuckle is exceptional for its shockwave, which can deal well over 60% on Intense and set an opponent up for a Rush. All in all, Galleom's standout traits are its powerful brawling capabilities.
However, Galleom has some flaws, namely moves with extremely high lag, even for Brawl bosses, which can arguably lose it the game. While Galleom can occupy centre-stage, it requires the use of Rush and Slam, which has around 3 seconds of end-lag and allows for extreme damage to be piled on. Its Missile-based attacks are quite slow and lack the hitboxes of bosses like Duon, being arguably useless, although they cannot be reflected.
Health values[edit]
| HP Values | |||||||||||||||||||
|---|---|---|---|---|---|---|---|---|---|---|---|---|---|---|---|---|---|---|---|
| Round | 1-3 | 4-6 | 7-9 | 1-3 | 4-6 | 7-9 | 1-3 | 4-6 | 7-9 | 1-3 | 4-6 | 7-9 | 1-3 | 4-6 | 7-9 | ||||
| Boss Battles | 114.8 | 120.4 | 132 | 126 | 134 | 146 | 138 | 146.5 | 160 | 150 | 160 | 177 | 182 | 196 | 215 | ||||
| Multiplied by 0.6× when a second player is present. | |||||||||||||||||||
| Damage taken | ×1.0 | ×1.0 | ×1.0 | ×1.3 | ×0.75 | ×1.0 | ×1.3 | ×1.0 | ×1.0 | ×1.0 | ×0.95 |
Moveset[edit]

Like all bosses, Galleom's moves are inputted using a set of commands with a GameCube controller, chiefly with the D-Pad. Move names are taken from the Japanese strategy guide for Brawl. Damage varies by difficulty, the following being taken from the game's files. Samus's Grapple Beam restores AI control. Unlike its boss appearance, Galleom can't use its Stomping Jump attack.
| Image | Move | Damage | Input | Description |
|---|---|---|---|---|
 |
Trample (踏みつぶし) |
16% | Galleom stomps forward with one foot. This is Galleom's fastest and least telegraphed attack, but it is also one of his least powerful (though still strong enough to KO at 60% on Intense and around 100% on Easy). | |
 |
Hammer Knuckle (ハンマーナックル) |
16%, 22% (Hammer Knuckle) 7%, 12% (Shockwave, multiple hits) |
Galleom spins, then punches the ground with both fists to create a shockwave. The fists hit has extreme power, inflicting up to 55%. The shockwave deals decent damage (up to 25%) and hit with completely horizontal knockback. On higher difficulties, the shockwave can send the player very far, potentially past the blast lines. The shockwave covers the length of the entire stage. | |
 |
Double Arm Press (ダブルアームプレス) |
14%, 16% | Galleom slams his fists on both sides of him, similar to Donkey Kong's down smash. This is one of Galleom's fastest attacks, though it can be avoided by just being right near Galleom. If the player hits the lower part of Galleom's arms, they could potentially be meteor smashed. | |
 |
Uppercut (アッパーカット) |
16% (Sourspot), 25% (Fist) | Galleom does a huge, jet-propelled uppercut. Noticeable windup, but the uppercut travels fast when unleashed. The fist is a sweetspot with extreme knockback, OHKOing on Intense when Galleom is at low health, but not when it's at full health. In Boss Battles this attack is curiously made much faster, unlike all the others. If Galleom is fought as one of the last three bosses before Tabuu, it is even swifter and more unpredictable. However, it is also his most nerfed move, with the sweetspot KOing at 35% on Intense. | |
 |
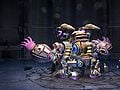
Double Lariat (ダブルラリアット) |
1.7 / 1.9% (Multihits) 12% (Later hits & Final hit) |
Galleom charges up, then spins around. It creates a very powerful vacuum to suck players in, though its range is very short and it lasts briefly; furthermore, any character can just walk away to not get sucked in even on Intense difficulty. If players get sucked in near the beginning of the attack and multiple hits chain, they will sustain an extreme amount of damage (quite over 150%) with guaranteed OHKO power on Intense. The last KOing hit deals perfectly vertical knockback. This move is somewhat similar to Spinning Kong. | |
 |
Giant Jump (大ジャンプ) |
10% (Leap), 16% (Landing), 3% (Shockwave) | Galleom jumps high, and then lands with a big stomp. Regardless of where he lands, he will slide to the side opposite of where he jumped. It deals up to 61%, OHKOing on Intense when Galleom is at low health, but not when at full health. | |
 |
Shooting (射撃) |
12%, 13% | Galleom transforms into a tank, then shoots four missiles. On the higher difficulties, every missile can inflict up to 30% damage, KOing slightly under 60%. | |
 |
Missile (ミサイル) |
12%, 13% (Missiles) 10% (Mask) |
Galleom shoots two missiles two times. During this time, his "mask" has a hitbox and can still damage on contact. The missiles have roughly the same power of their Tank version, but are easier to avoid. | |
 |
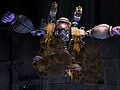
Collapse (倒れこみ) |
24%, 26%, 22%, 16% | Galleom stiffens, and tries to fall on the player. Huge knockback, being an invariable one-hit KO on Intense difficulty. It's similar to Luigi's side taunt but as an actual attack. Damage can reach 62%, while knockback is very horizontal. If the player touches Galleom's back, they will only take minor knockback and less than 20%, being the only possibility to survive on the higher difficulties. | |
 |
Rush (突進) |
16% | Galleom transforms into a tank, then rushes forward, dealing vertical knockback. Has extremely long start-up frames. | |
 |
Rush and Slam | 16% (Charge) 26% (Drop) |
Used at low health, Galleom uses Rush then also tries to fall on the player from above - which deals enormous spiked or horizontal knockback, and will OHKO on Intense, much like Collapse. Damage can reach a huge 70%. Afterwards, he will stay vulnerable on the ground for a long time (up to three seconds). It is easy for him to be KO'd during this down time, as he must be at low HP already to initiate the fall (usually 25% or lower). Because this move doesn't track when manually used and Galleom doesn't have to reposition himself, he can use this move to occupy centre-stage and continue using his attacks. However, due to the extreme lag, this strategy is extremely risky, and can result in Galleom taking too much damage to make up for the lost time. |
Codes[edit]
Like all Brawl bosses, Galleom can be accessed using a Gecko code that enables debug mode controls for Player 3 in Boss Battles. It is encountered randomly without additional external modifications, meaning other bosses need to be defeated or forced to self-destruct with their own codes to reach Galleom's stage. The following codes are for the NTSC-U version of Brawl and both codes must be on.
| Enable Boss Control | |
|---|---|
| 4A000000 | 810F1F3C |
| D2000000 | 00000002 |
| 901F058C | 5400843E |
| 90020070 | 00000000 |
| C277F780 | 00000010 |
| 7CDFF050 | 2C06414C |
| 4082006C | 2C1C0002 |
| 40810064 | 39820074 |
| 809E0038 | A0EC0000 |
| 7C043800 | 41810050 |
| A0EC0002 | 7C1C3800 |
| 41820044 | 3CC0804E |
| A0C6E4C0 | A8EC0004 |
| 2C070000 | 41820030 |
| A8EC0004 | 7C063800 |
| 4082000C | A38C0006 |
| 4800001C | 2C07FFFF |
| 4082000C | AB8C0006 |
| 4800000C | 398C0004 |
| 4BFFFFD8 | 939E0038 |
| 60000000 | 00000000 |
| 4A000000 | 805A9320 |
| 14000078 | 00000000 |
| E0000000 | 80008000 |
| Galleom control for Player 3 | |
|---|---|
| 4A000000 | 805A9320 |
| 30000070 | 00005C04 |
| 66000001 | 00000000 |
| 30000071 | 00005C03 |
| 16000074 | 00000040 |
| 0013002D | 1080002D |
| 01800014 | 01810015 |
| 01820015 | 02810016 |
| 02820016 | 02800017 |
| 0288001A | 00A0001E |
| 00C00023 | 01840027 |
| 01880028 | 02840029 |
| 0480002C | FFFFFFFF |
| E0000000 | 80008000 |
In competitive play[edit]
Because Galleom is only playable through hacking, it's banned by default in all competitive Brawl tournaments. While some boss characters have arguments to be legalised, Brawl's bosses have unique challenges that make them particularly unlikely cases. They do not conform to the usual ruleset, are exclusive to Boss Battles and thus their specific stage, are subject to Boss Battles's random boss selection without further modifications, and have varying difficulty levels that would require rulings to decide on them properly. This boils down to a very clunky experience that would likely end up delaying tournaments due to the length of time it takes for them to be set up. Furthermore, Samus's Grapple Beam can reset the controls of Brawl bosses, which could cause further ruling issues. Galleom's extremely powerful and fast one-hit KO attacks are also concerning from a competitive perspective and could arguably be considered uncompetitive. Ergo, Galleom has seen little to no competitive experimentation outside of casual matches.
In The Subspace Emissary[edit]

Galleom appears as a boss thrice in The Subspace Emissary. It first appears as the fourth boss against Marth, Ike, and Meta Knight in The Wilds, before the ground crumbles beneath it and sends it to The Ruined Hall. Later, in that same location, it fights Lucas and Pokémon Trainer. After being weakened, in a desperate attempt to defeat them, it grabs them and tries to detonate its Subspace Bomb, but Lucas's PK Thunder destroys its arm. As the ground crumbles beneath Galleom, Lucas, and Pokémon Trainer, Meta Knight rescues the latter two and escapes, causing Galleom to explode without taking any lives in the process. Galleom is later revived to battle once again in The Great Maze.
Gallery[edit]
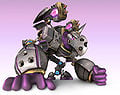
Official Brawl artwork
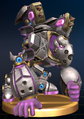
Galleom trophy
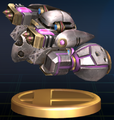
Galleom Tank Form trophy.
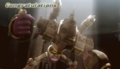
Galleom on the Congratulations screen after clearing Boss Battles on Hard difficulty.
Galleom in The Wilds
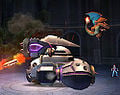
Galleom in its Tank Form.
Galleom's Stomping Jump
Galleom mid-jump
Galleom's collapse
Galleom's Double Lariat


_-_Brawl_Trophy.png)


| Fighters in Super Smash Bros. Brawl | |
|---|---|
| Veterans | Bowser · Captain Falcon · Donkey Kong · Falco · Fox · Ganondorf · Ice Climbers · Jigglypuff · Kirby · Link · Luigi · Mario · Marth · Mr. Game & Watch · Ness · Peach · Pikachu · Samus · Yoshi · Zelda / Sheik |
| Newcomers | Diddy Kong · Ike · King Dedede · Lucario · Lucas · Meta Knight · Olimar · Pit · Pokémon Trainer (Charizard · Ivysaur · Squirtle) · R.O.B. · Snake · Sonic · Toon Link · Wario · Wolf · (Zero Suit Samus) |
| Bosses | |
|---|---|
| Super Smash Bros. | Master Hand · Metal Mario · Giant Donkey Kong · Fighting Polygon Team |
| Melee | Master Hand · Crazy Hand · Giga Bowser · Fighting Wire Frames (Male · Female) |
| Brawl | Master Hand · Crazy Hand · Petey Piranha · Rayquaza · Porky · Galleom · Ridley · Duon · Meta Ridley · Tabuu · Fighting Alloy Team (Red · Blue · Yellow · Green) · False characters |
| Smash 4 | Master Hand · Crazy Hand · Master Core · Fighting Mii Team |
| Ultimate | Master Hand · Crazy Hand · Rathalos · Galleom · Giga Bowser · Galeem · Dharkon · Dracula · Ganon · Marx · Fighting Mii Team · False characters |