Wall of pain

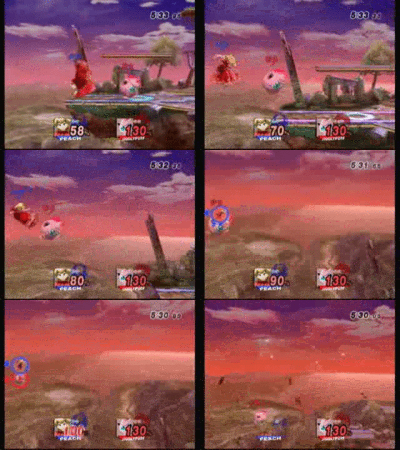
The wall of pain, often abbreviated to WoP, is a Jigglypuff technique in Super Smash Bros. Melee, which involves barraging the opponent with repeated back aerials, exploiting Jigglypuff's high horizontal air speed to continuously follow the opponent in their knockback trajectory. The Wall of Pain is one of the most powerful edgeguarding techniques in the game, as multiple bairs will often send the opponent too far off stage to recover, while Jigglypuff can almost always make it back safely, due to its aforementioned air speed and high amount of jumps. Even if the wall of pain doesn't manage to KO, it can still rack up significant damage and leave the opponent in a poor position to try and get back on stage.
The wall of pain can technically be performed in all Super Smash Bros. games, but it is most effective in Melee due to the games hitstun and air dodge mechanics.
Overview
Tetsuya and AOB were the earliest prominent users of the technique, and they are largely responsible for its widespread use. The term "wall of pain" was coined by SmashBoards administrator and retired smasher Amorasaki, a longtime friend of AOB.
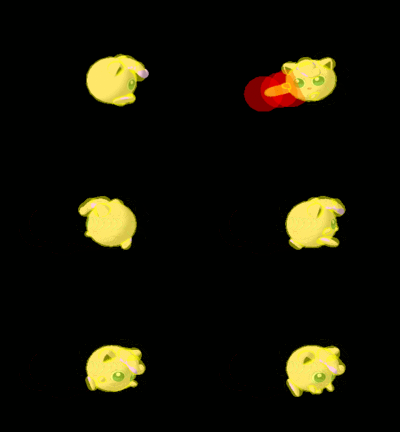
To initiate the wall of pain, the Jigglypuff player hits the opponent with a back aerial in the direction of the edge of the stage, typically at low to mid percents. After each bair, the Jigglypuff moves and jumps in the direction of the opponent's knockback trajectory and follows up with another bair. The Jigglypuff continues interspacing bairs and jumps until it runs out of jumps, or the opponent has been sent far enough offstage where they cannot recover.
After a wall of pain, the opponent will often be too far offstage to properly recover, resulting in a stock loss. If the opponent does recover, they will have sustained significant damage, and upon reaching the ledge, are subject to more pressure from the Jigglypuff in order to make it safely back onstage.
The wall of pain is not nearly as effective in the other Smash games when compared to Melee. In Smash 64, Jigglypuff's lesser jumping abilities prevent it from continuing the combo for as long, while more effective finishing combos exist due to the game's increased hitstun.
In Brawl, the back aerial has lost its knockback, and the move is no longer a true combo; opponents can simply air dodge to escape the wall of pain, or counterattack with a move of their own. Thus, while the wall of pain can technically still be performed, the technique is no longer a viable edgeguarding maneuver, as Jigglypuff now has other, superior options.
In Smash 4 Jigglypuff's back aerial has much more knockback again and is designed as a finisher rather than a combo move, making it easier to finish a WoP with a back aerial but harder to keep one going. As such, most WoP's in Smash 4 generally utilize Jigglypuff's forward aerial (and neutral aerial as a finisher) instead.
Other characters
While other characters also have midair jumps, they do not have the appropriate recovery potential, with exception of fellow featherweight Mewtwo, the other characters do not have the require air speed, or falling speed in order to fully emulate Jigglypuff's wall of pain and be able to return to the stage safely. Bayonetta, Pit and Dark Pit, King Dedede, Kirby, Meta Knight, and Mewtwo can perform similar techniques in Smash 4, and some other characters, such as Captain Falcon in Melee, may have "pseudo-Wall of Pains" with similar outcomes, which are not based on a back air. These characters lack either the horizontal air speed or multiple jumps, rendering these techniques less effective compared to the original wall of pain in Melee.
- Bayonetta: Bayonetta can use her forward aerial a few times knocking her and her opponent towards the corner bottom blast line. it can be mixed up with Witch Twist and After Burner Kick. With Bayonetta having arguably the best recovery in Smash 4, it is likely she will make it back to the stage or use wall clinging to jump to the edge.
- Dark Pit/Pit: Dark Pit and Pit are very capable of creating a wall of pain with their forward aerials and multiple jumps.
- King Dedede: King Dedede has many jumps and can use either forward or back aerial; his back aerial, however, is much harder to land consistently. Depending on the situation, King Dedede can also meteor smash the opponent as a finisher.
- Kirby: Kirby has similar jumps to Jigglypuff, but Kirby's forward aerial hits three times, keeping opponents at bay.
- Meta Knight: Meta Knight has three hits in his forward and back aerial, making them great for wall of pain moves. His back aerial can also be fast falled for a meteor smash.
- Mewtwo: Mewtwo, like Jigglypuff, is a featherweight, and Mewtwo’s long tail gives it much more reach. Mewtwo can wall of pain very quickly and easily due to its air attributes, and having the second highest double jump behind Yoshi. Mewtwo can use Confusion in the wall of pain, though the opponent can jump away.

