Sonic (SSB4)/Back throw: Difference between revisions
From SmashWiki, the Super Smash Bros. wiki
Jump to navigationJump to search
Serpent King (talk | contribs) (Partly undid edit by Drill Blaster Mark 2: Rollover doesn't work on links) |
SuperSqank (talk | contribs) No edit summary |
||
| (6 intermediate revisions by 3 users not shown) | |||
| Line 1: | Line 1: | ||
{{ArticleIcons|ssb4=y}} | |||
[[File:SonicThrowBack.gif|thumb|270px|Hitbox visualization showing Sonic's back throw.]] | |||
==Overview== | ==Overview== | ||
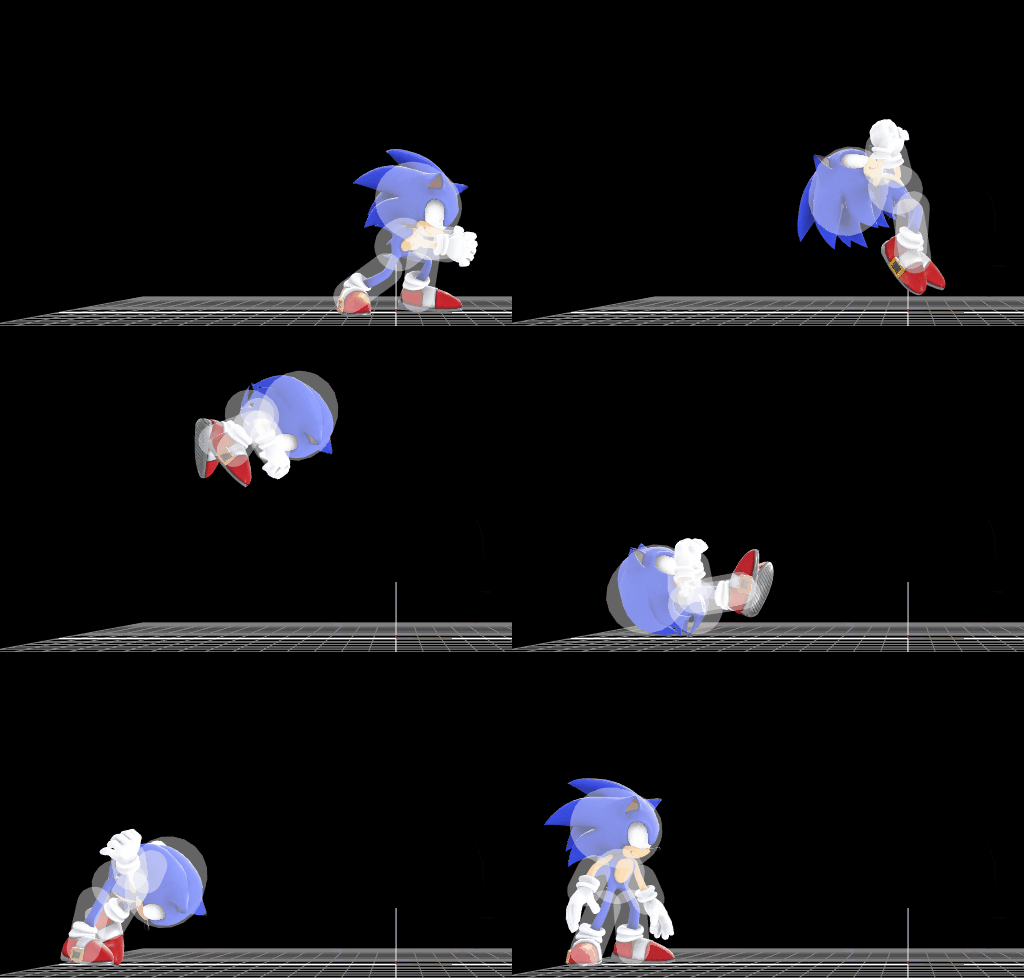
Sonic performs a multi-flipping high speed version of {{s|wikipedia|tomoe nage}}. This throw has some usage potential, mostly as a K.O.er. It's high base knockback and the fact that it moves Sonic back makes if useful to setup an [[edgeguard]] attempt and it's knockback scaling is high enough to allow it to K.O. near edges. Combined with Sonic's relatively average grab range, this throw is fairly useful in competitive play. | |||
Sonic performs a multi-flipping high speed version of {{s|wikipedia|tomoe nage}}. | |||
== | ==Update history== | ||
{|class="wikitable | Prior to update 1.0.6, Back throw was noticeably stronger, not only being one of Sonic's strongest throws, but it was also one of the strongest back throws in the game. | ||
'''{{GameIcon|ssb4}} [[1.0.6]]''' | |||
*{{nerf|Knockback scaling|90|79}}. | |||
==Throw Data== | |||
{{SSB4ThrowTableHeader}} | |||
{{SSB4ThrowTableRow | |||
|id=0 | |||
|damage=7% | |||
|af=3 | |||
|angle=140 | |||
|bk=70 | |||
|ks=79 | |||
|fkv=0 | |||
|bn=0 | |||
|noff=true | |||
|trip=0 | |||
|type=Throwing | |||
|effect=Normal | |||
|slvl=S | |||
|sfx=None | |||
}} | |||
{{SSB4ThrowTableRow | |||
|id=1 | |||
|damage=3% | |||
|af=3 | |||
|angle=361 | |||
|bk=60 | |||
|ks=100 | |||
|fkv=0 | |||
|bn=0 | |||
|noff=true | |||
|trip=0 | |||
|type=Throwing | |||
|effect=Normal | |||
|slvl=S | |||
|sfx=None | |||
}} | |||
|} | |||
==Timing== | |||
{|class="wikitable" | |||
!Invincibility | |||
|1-18 | |||
|- | |||
!Throw Release | |||
|43 | |||
|- | |||
!Animation length | |||
|66 | |||
|- | |- | ||
! | !Interruptible | ||
| | |67 | ||
|} | |} | ||
{{FrameStripStart}} | |||
{{FrameStrip|t=Lag|c=42|e=LagThrowS}}{{FrameStrip|t=Lag|c=24|s=LagThrowE}} | |||
|- | |||
{{FrameStrip|t=Invincible|c=18}}{{FrameStrip|t=Vulnerable|c=48}} | |||
{{FrameStripEnd}} | |||
{{FrameIconLegend|lag=y|throw=y|vulnerable=y|invincible=y}} | |||
{{MvSubNavSonic|g=SSB4}} | {{MvSubNavSonic|g=SSB4}} | ||
[[Category:Sonic (SSB4)]] | [[Category:Sonic (SSB4)]] | ||
[[Category:Back throws (SSB4)]] | [[Category:Back throws (SSB4)]] | ||
[[Category:Normal attacks (SSB4)]] | [[Category:Normal attacks (SSB4)]] | ||
Latest revision as of 05:45, August 18, 2020
Overview[edit]
Sonic performs a multi-flipping high speed version of tomoe nage. This throw has some usage potential, mostly as a K.O.er. It's high base knockback and the fact that it moves Sonic back makes if useful to setup an edgeguard attempt and it's knockback scaling is high enough to allow it to K.O. near edges. Combined with Sonic's relatively average grab range, this throw is fairly useful in competitive play.
Update history[edit]
Prior to update 1.0.6, Back throw was noticeably stronger, not only being one of Sonic's strongest throws, but it was also one of the strongest back throws in the game.
 Knockback scaling: 90 → 79.
Throw Data[edit]
| ID | Damage | Angle | BK | KS | FKV | Bone | FFx | Type | Effect | Sound | |
|---|---|---|---|---|---|---|---|---|---|---|---|
| 0 | 7% | Forwards | 70 | 79 | 0 | 0 | None | ||||
| 1 | 3% | Forwards | 60 | 100 | 0 | 0 | None | ||||
Timing[edit]
| Invincibility | 1-18 |
|---|---|
| Throw Release | 43 |
| Animation length | 66 |
| Interruptible | 67 |
Lag time |
Vulnerable |
Invincible |
Throw point |
|
