Peach (SSB4)/Neutral attack/Hit 2: Difference between revisions
From SmashWiki, the Super Smash Bros. wiki
Jump to navigationJump to search
No edit summary |
Derekblue1 (talk | contribs) m (Added the damage amount.) |
||
| (8 intermediate revisions by 7 users not shown) | |||
| Line 1: | Line 1: | ||
{{ArticleIcons|ssb4=y}} | |||
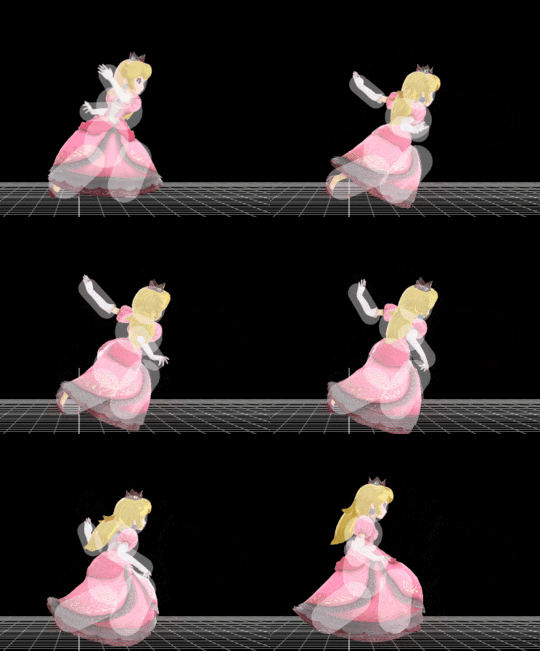
[[File:PeachJab2.gif|thumb|270px|Hitbox visualization showing Peach's second jab.]] | |||
{{competitive expertise}} | {{competitive expertise}} | ||
==Overview== | |||
The second hit of {{SSB4|Peach}}'s [[neutral attack]] is an outward hand slap. It has little utility outside of spacing since it cannot [[KO]] reliably. It deals 3% damage. | |||
==Update history== | ==Update history== | ||
| Line 57: | Line 62: | ||
!Interruptible | !Interruptible | ||
|30 | |30 | ||
|- | |||
!Animation length | |||
|37 | |||
|} | |} | ||
{{FrameStripStart}} | {{FrameStripStart}} | ||
{{FrameStrip|t=Lag|c=1}}{{FrameStrip|t=Hitbox|c=2}}{{FrameStrip|t=Lag|c=26}}{{FrameStrip|t=Interruptible|c= | {{FrameStrip|t=Lag|c=1}}{{FrameStrip|t=Hitbox|c=2}}{{FrameStrip|t=Lag|c=26}}{{FrameStrip|t=Interruptible|c=8}} | ||
{{FrameStripEnd}} | {{FrameStripEnd}} | ||
| Line 66: | Line 74: | ||
{{MvSubNavPeach|g=SSB4}} | {{MvSubNavPeach|g=SSB4}} | ||
[[Category:Peach (SSB4)]] | |||
[[Category:Neutral attacks (SSB4)]] | |||
Latest revision as of 20:30, June 16, 2019
Overview[edit]
The second hit of Peach's neutral attack is an outward hand slap. It has little utility outside of spacing since it cannot KO reliably. It deals 3% damage.
Update history[edit]
 Hitbox 1 radius: 2.4 → 3.0.
 Hitbox 2 radius: 2.4 → 4.0.
Hitboxes[edit]
Timing[edit]
| Hitboxes | 2-3 |
|---|---|
| Interruptible | 30 |
| Animation length | 37 |
Lag time |
Hitbox |
Interruptible |
|

