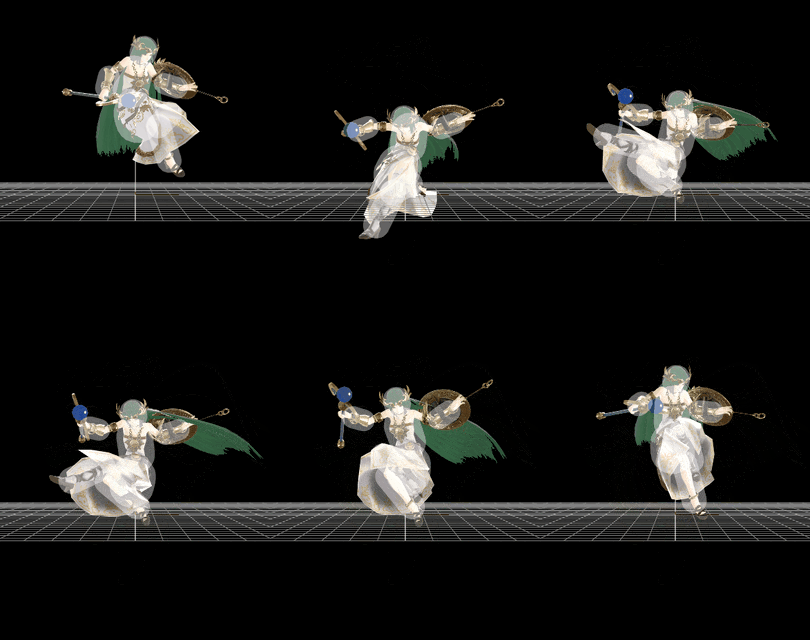
Palutena (SSB4)/Down aerial: Difference between revisions
(Undid edit by Nymbare: Whoever has the fastest meteor is not of interest, actually. And important info about her unarguably worst aerial was removed.) |
Omega Tyrant (talk | contribs) m (Reverted edits by 93.148.98.27 (talk) to last version by SuperSqank.) Tag: Rollback |
||
| (5 intermediate revisions by 5 users not shown) | |||
| Line 1: | Line 1: | ||
{{ArticleIcons|ssb4=y}} | {{ArticleIcons|ssb4=y}} | ||
[[File:PalutenaDAir.gif|thumb|270px|Hitbox visualization showing Palutena's down aerial.]] | |||
==Overview== | ==Overview== | ||
An arcing kick below herself. This is the fourth fastest [[meteor smash]] in the game, tied with {{SSB4|Luigi}}'s and {{SSB4|Cloud}}'s down aerials. Its quick startup also makes it a good [[out of shield]] option. However, it lasts for only one frame, has disproportionately high landing lag, starts [[autocancelling]] incredibly late -though still before the move ends- and it is the laggiest aerial in the entire game, having 48 frames of ending lag, meaning she will not be able to react until she lands or passes the platform she was in before entering the air. | An arcing kick below herself. This is the fourth fastest [[meteor smash]] in the game, tied with {{SSB4|Luigi}}'s and {{SSB4|Cloud}}'s down aerials. Its quick startup also makes it a good [[out of shield]] option. However, it lasts for only one frame, has disproportionately high landing lag, starts [[autocancelling]] incredibly late -though still before the move ends- and it is the laggiest aerial in the entire game, having 48 frames of ending lag, meaning she will not be able to react until she lands or passes the platform she was in before entering the air. | ||
As a result of its unprecedentedly low post-hitbox speed, its sees extremely little usage in competitive play outside of [[edgeguarding]]. Despite this, it is still capable of comboing if one times the move well as Palutena lands during the move, | As a result of its unprecedentedly low post-hitbox speed, its sees extremely little usage in competitive play outside of [[edgeguarding]]. Despite this, it is still capable of comboing if one times the move well as Palutena lands during the move, occasionally leading into an aerial at mid percentages, though this is difficult to pull off. | ||
==Hitboxes== | ==Hitboxes== | ||
{{SSB4HitboxTableHeader}} | {{SSB4HitboxTableHeader|special=y}} | ||
{{ | {{SSB4SpecialHitboxTableRow | ||
|id=0 | |id=0 | ||
|damage=9% | |damage=9% | ||
|sd=0 | |sd=0 | ||
|angle=270 | |angle=270 | ||
|bk=20 | |bk=20 | ||
|ks=100 | |ks=100 | ||
| Line 21: | Line 21: | ||
|ypos=-3.7 | |ypos=-3.7 | ||
|zpos=0.5 | |zpos=0.5 | ||
|ystretch=-5.2 | |||
|zstretch=0.5 | |||
|trip=0 | |trip=0 | ||
|clang=f | |clang=f | ||
| Line 31: | Line 33: | ||
|rebound=t | |rebound=t | ||
}} | }} | ||
{{ | {{SSB4SpecialHitboxTableRow | ||
|id=1 | |id=1 | ||
|damage=9% | |damage=9% | ||
|sd=0 | |sd=0 | ||
|angle=55 | |angle=55 | ||
|af=4 | |||
|bk=30 | |bk=30 | ||
|ks=100 | |ks=100 | ||
| Line 44: | Line 47: | ||
|ypos=-5.0 | |ypos=-5.0 | ||
|zpos=1.5 | |zpos=1.5 | ||
|ystretch=-5.0 | |||
|zstretch=0.5 | |||
|trip=0 | |trip=0 | ||
|clang=f | |clang=f | ||
| Line 57: | Line 62: | ||
==Timing== | ==Timing== | ||
===Attack=== | ===Attack=== | ||
{|class="wikitable" | {|class="wikitable" | ||
| Line 67: | Line 71: | ||
|- | |- | ||
!Ending autocancel | !Ending autocancel | ||
|48 | |48- | ||
|- | |- | ||
!Interruptible | !Interruptible | ||
| Line 73: | Line 77: | ||
|- | |- | ||
!Animation length | !Animation length | ||
| | |65 | ||
|} | |} | ||
{{FrameStripStart}} | {{FrameStripStart}} | ||
{{FrameStrip|t=Lag|c=9}}{{FrameStrip|t=Hitbox|c=1}}{{FrameStrip|t=Lag|c=48}}{{FrameStrip|t=Interruptible|c= | {{FrameStrip|t=Lag|c=9}}{{FrameStrip|t=Hitbox|c=1}}{{FrameStrip|t=Lag|c=48}}{{FrameStrip|t=Interruptible|c=7}} | ||
|- | |- | ||
{{FrameStrip|t=Autocancel|c=2}}{{FrameStrip|t=Blank|c=45}}{{FrameStrip|t=Autocancel|c= | {{FrameStrip|t=Autocancel|c=2}}{{FrameStrip|t=Blank|c=45}}{{FrameStrip|t=Autocancel|c=18}} | ||
{{FrameStripEnd}} | {{FrameStripEnd}} | ||
Latest revision as of 01:37, March 25, 2024
Overview[edit]
An arcing kick below herself. This is the fourth fastest meteor smash in the game, tied with Luigi's and Cloud's down aerials. Its quick startup also makes it a good out of shield option. However, it lasts for only one frame, has disproportionately high landing lag, starts autocancelling incredibly late -though still before the move ends- and it is the laggiest aerial in the entire game, having 48 frames of ending lag, meaning she will not be able to react until she lands or passes the platform she was in before entering the air.
As a result of its unprecedentedly low post-hitbox speed, its sees extremely little usage in competitive play outside of edgeguarding. Despite this, it is still capable of comboing if one times the move well as Palutena lands during the move, occasionally leading into an aerial at mid percentages, though this is difficult to pull off.
Hitboxes[edit]
Timing[edit]
Attack[edit]
| Initial autocancel | 1-2 |
|---|---|
| Hitboxes | 10 |
| Ending autocancel | 48- |
| Interruptible | 59 |
| Animation length | 65 |
Landing lag[edit]
| Animation length | 18 |
|---|
Lag time |
Hitbox |
Autocancel |
Interruptible |
|
