Kirby (SSB)/Back aerial: Difference between revisions
No edit summary |
m (Text replacement - "== ([^=])" to "== $1") |
||
| (6 intermediate revisions by one other user not shown) | |||
| Line 3: | Line 3: | ||
==Overview== | ==Overview== | ||
[[File:Kirby Back Aerial Hitbox Smash 64.gif|thumb|The hitbox of Kirby's bair.]] | [[File:Kirby Back Aerial Hitbox Smash 64.gif|thumb|The hitbox of Kirby's bair.]] | ||
Kirby sticks out both of its feet behind him, doing 16% damage and high knockback during the first few frames and | Kirby sticks out both of its feet behind him, doing 16% damage and high knockback during the first few frames and 12% damage and low knockback if it hits during later frames. One of Kirby's best aerials, being a staple example of an [[edgeguarding]] move with a good [[hitbox]]. It also has [[sex kick]] properties. It has very low start-up lag and with the disjointed hitbox, it has some range as well. It can also perform the [[Fence of Pain]], a variation of {{SSB|Jigglypuff}}'s Wall of Pain; though in this game, Kirby's is better. A useful move for defensive and offensive maneuvers such as [[spacing]], as well as aerial approaching. This move, down aerial, and up tilt allow Kirby to [[air camp]] the majority of the cast, especially characters without projectiles like {{SSB|Captain Falcon}}. The weaker hit can also combo into his up tilt as well. | ||
{{ | ==Hitboxes== | ||
{{SSB64HitboxTableHeader}} | |||
{{HitboxTableTitle|Clean hit|24}} | |||
{{SSB64HitboxTableRow | |||
|id=0 | |||
|damage=16% | |||
|sd=0 | |||
|angle=361 | |||
|bk=10 | |||
|ks=100 | |||
|fkv=0 | |||
|r=190 | |||
|bn=0.0 | |||
|xpos=0.0 | |||
|ypos=150 | |||
|zpos=-240 | |||
|trip=0 | |||
|type=Foot | |||
|effect=Normal | |||
|ff=1.0 | |||
|clang=t | |||
|slvl=L | |||
|sfx=Kick | |||
}} | |||
{{SSB64HitboxTableRow | |||
|id=1 | |||
|damage=16% | |||
|sd=0 | |||
|angle=361 | |||
|bk=10 | |||
|ks=100 | |||
|fkv=0 | |||
|r=180 | |||
|bn=0.0 | |||
|xpos=0.0 | |||
|ypos=150 | |||
|zpos=-100 | |||
|trip=0 | |||
|type=Foot | |||
|effect=Normal | |||
|ff=1.0 | |||
|clang=t | |||
|slvl=L | |||
|sfx=Kick | |||
}} | |||
{{HitboxTableTitle|Late hit|24}} | |||
{{SSB64HitboxTableRow | |||
|id=0 | |||
|damage=12% | |||
|sd=0 | |||
|angle=361 | |||
|bk=0 | |||
|ks=100 | |||
|fkv=0 | |||
|r=190 | |||
|bn=0.0 | |||
|xpos=0.0 | |||
|ypos=150 | |||
|zpos=-240 | |||
|trip=0 | |||
|type=Foot | |||
|effect=Normal | |||
|ff=1.0 | |||
|clang=t | |||
|slvl=M | |||
|sfx=Kick | |||
}} | |||
{{SSB64HitboxTableRow | |||
|id=0 | |||
|damage=12% | |||
|sd=0 | |||
|angle=361 | |||
|bk=0 | |||
|ks=100 | |||
|fkv=0 | |||
|r=180 | |||
|bn=0.0 | |||
|xpos=0.0 | |||
|ypos=150 | |||
|zpos=-100 | |||
|trip=0 | |||
|type=Foot | |||
|effect=Normal | |||
|ff=1.0 | |||
|clang=t | |||
|slvl=M | |||
|sfx=Kick | |||
}} | |||
|} | |||
==Timing== | |||
===Attack=== | |||
{|class="wikitable" | |||
!Initial autocancel | |||
|1-5 | |||
|- | |||
!Clean hit | |||
|6-9 | |||
|- | |||
!Late hit | |||
|10-25 | |||
|- | |||
!Ending autocancel | |||
|26- | |||
|- | |||
!Animation length | |||
|39 | |||
|} | |||
{{FrameStripStart}} | |||
{{FrameStrip|t=Lag|c=5}}{{FrameStrip|t=Hitbox|c=4|e=HitboxChangeS}}{{FrameStrip|t=Hitbox|c=16|s=HitboxChangeE}}{{FrameStrip|t=Lag|c=14}} | |||
|- | |||
{{FrameStrip|t=Autocancel|c=5}}{{FrameStrip|t=Blank|c=20}}{{FrameStrip|t=Autocancel|c=14}} | |||
{{FrameStripEnd}} | |||
===Landing lag=== | |||
{|class="wikitable" | |||
|- | |||
!Animation length | |||
|30 | |||
|- | |||
!L-cancelled animation length | |||
|4 | |||
|} | |||
{{FrameStripStart}} | |||
|Normal {{FrameStrip|t=Lag|c=30}} | |||
|- | |||
|L-cancelled {{FrameStrip|t=Lag|c=4}}{{FrameStrip|t=Blank|c=26}} | |||
{{FrameStripEnd}} | |||
{{FrameIconLegend|lag=y|hitbox=y|hitboxchange=y|autocancel=y}} | |||
{{MvSubNavKirby|g=SSB}} | {{MvSubNavKirby|g=SSB}} | ||
Latest revision as of 22:54, April 12, 2022
Overview[edit]
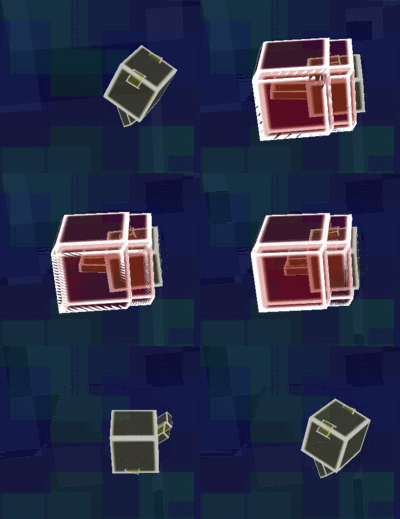
Kirby sticks out both of its feet behind him, doing 16% damage and high knockback during the first few frames and 12% damage and low knockback if it hits during later frames. One of Kirby's best aerials, being a staple example of an edgeguarding move with a good hitbox. It also has sex kick properties. It has very low start-up lag and with the disjointed hitbox, it has some range as well. It can also perform the Fence of Pain, a variation of Jigglypuff's Wall of Pain; though in this game, Kirby's is better. A useful move for defensive and offensive maneuvers such as spacing, as well as aerial approaching. This move, down aerial, and up tilt allow Kirby to air camp the majority of the cast, especially characters without projectiles like Captain Falcon. The weaker hit can also combo into his up tilt as well.
Hitboxes[edit]
Timing[edit]
Attack[edit]
| Initial autocancel | 1-5 |
|---|---|
| Clean hit | 6-9 |
| Late hit | 10-25 |
| Ending autocancel | 26- |
| Animation length | 39 |
Landing lag[edit]
| Animation length | 30 |
|---|---|
| L-cancelled animation length | 4 |
| Normal | ||||||||||||||||||||||||||||||
| L-cancelled |
Lag time |
Hitbox |
Hitbox change |
Autocancel |
|
