Dr. Mario (SSB4)/Neutral attack/Hit 1: Difference between revisions
From SmashWiki, the Super Smash Bros. wiki
Jump to navigationJump to search
No edit summary |
(→Overview: added an overview for the move.) |
||
| Line 2: | Line 2: | ||
==Overview== | ==Overview== | ||
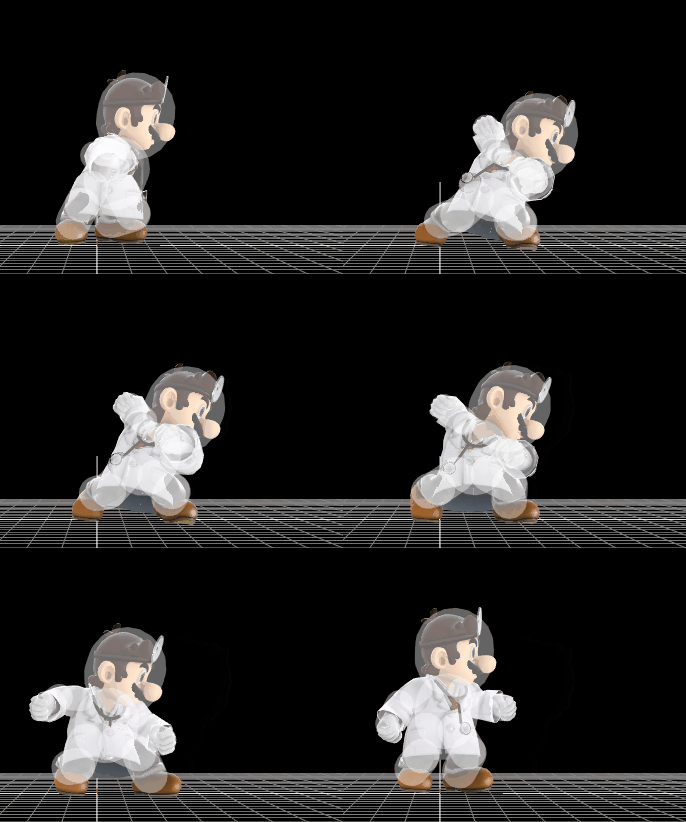
The first hit of | The first hit of Dr. Mario's [[Neutral attack|neutral attack]] is a simple punch from his arm further from the camera. It does 2.8% and very little knockback. Unlike {{SSB4|Mario}}'s jab 1, Dr. Mario's is incapable of locking or pratfalling, due to the lack of a [[Sakurai angle]] on all hitboxes. The speed allows it to interrupt approaches, or combo break if Dr. Mario lands fast enough from an attack. Most notably, the attack is able to be [[jab cancel]]led into Super Jump Punch, one of his best kill moves. Jab cancels are also effective with his down tilt to start combos with it, especially as down tilt has decent range, compared to up tilt, which is riskier to use due to shorter horizontal range. | ||
==Frame Data== | ==Frame Data== | ||
Revision as of 04:49, November 17, 2018
Overview
The first hit of Dr. Mario's neutral attack is a simple punch from his arm further from the camera. It does 2.8% and very little knockback. Unlike Mario's jab 1, Dr. Mario's is incapable of locking or pratfalling, due to the lack of a Sakurai angle on all hitboxes. The speed allows it to interrupt approaches, or combo break if Dr. Mario lands fast enough from an attack. Most notably, the attack is able to be jab cancelled into Super Jump Punch, one of his best kill moves. Jab cancels are also effective with his down tilt to start combos with it, especially as down tilt has decent range, compared to up tilt, which is riskier to use due to shorter horizontal range.
Frame Data
All measurements are in frames.
| Hitbox IDs | Startup | Hitbox lasts for | Endlag |
|---|---|---|---|
| 0-2 | 1 | 2 | 19 |
Hitbox Properties
References
|
