SSBM Icon.png

Falco (SSBM)/Neutral special

From SmashWiki, the Super Smash Bros. wiki
< Falco (SSBM)
Revision as of 15:01, October 27, 2013 by Toomai (talk | contribs) (first attempt at projectile move - go ahead and suggest improvements)
Jump to navigationJump to search

Overview

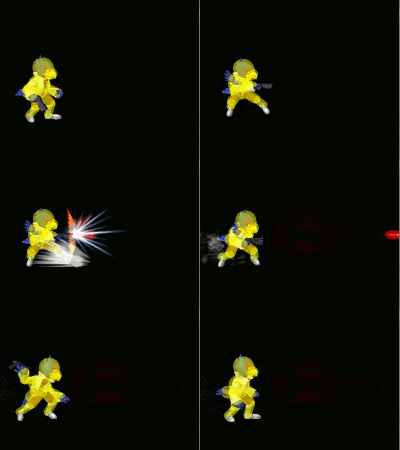
The hitbox of Falco's Blaster, used on the ground.
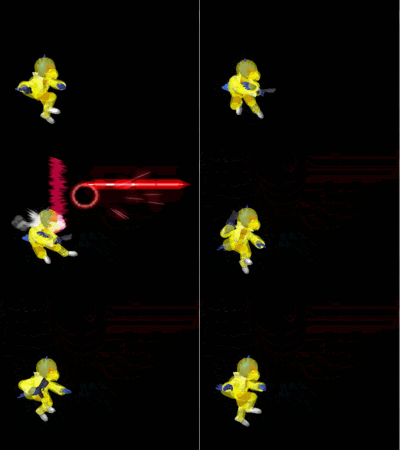
The hitbox of Falco's Blaster, used in the air.

Compared to Fox's Blaster, Falco's version is slower but causes the opponent to flinch like Fox's Blaster in the original Smash Bros. Because the lasers cause the opponent to flinch, they are extremely useful for disrupting their approach and camping. Falco can short hop laser while approaching to avoid lag. If he is close enough, the laser can stun the opponent so that Falco can follow up with a grab or a move like a shine, up tilt, or even an forward smash.

Hitboxes

ID Part Damage SD Angle BK KS FKV Radius Bone Offset Clang Rebound Effect G A Sound Blockable Reflectable Absorbable
0 0 3% 0 Sakurai angle 0 100 101 0.0046872 0 0.0 0.0 -0.0031248 HitboxTableIcon(NoClang).png HitboxTableIcon(NoRebound).png EffectIcon(Normal).png HitboxTableIcon(GroundedTrue).png HitboxTableIcon(AerialTrue).png S Punch HitboxTableIcon(Blockable).png HitboxTableIcon(Reflectable).png HitboxTableIcon(Absorbable).png
1 0 3% 0 Sakurai angle 0 100 101 0.0046872 0 0.0 0.0 -0.014577192 HitboxTableIcon(NoClang).png HitboxTableIcon(NoRebound).png EffectIcon(Normal).png HitboxTableIcon(GroundedTrue).png HitboxTableIcon(AerialTrue).png S Punch HitboxTableIcon(Blockable).png HitboxTableIcon(Reflectable).png HitboxTableIcon(Absorbable).png
2 0 3% 0 Sakurai angle 0 100 101 0.0046872 0 0.0 0.0 -0.026029584 HitboxTableIcon(NoClang).png HitboxTableIcon(NoRebound).png EffectIcon(Normal).png HitboxTableIcon(GroundedTrue).png HitboxTableIcon(AerialTrue).png S Punch HitboxTableIcon(Blockable).png HitboxTableIcon(Reflectable).png HitboxTableIcon(Absorbable).png
0 0 3% 0 Sakurai angle 0 100 101 0.0046872 0 0.0 0.0 -0.0374976 HitboxTableIcon(NoClang).png HitboxTableIcon(NoRebound).png EffectIcon(Normal).png HitboxTableIcon(GroundedTrue).png HitboxTableIcon(AerialTrue).png S Punch HitboxTableIcon(Blockable).png HitboxTableIcon(Reflectable).png HitboxTableIcon(Absorbable).png

Timing

Ground

First loop frame 7
Repeat window 15-28
Shot 23
Last loop frame 30
Animation length 57
FrameIcon(Lag).png FrameIcon(Lag).png FrameIcon(Lag).png FrameIcon(Lag).png FrameIcon(Lag).png FrameIcon(LagLoopS).png FrameIcon(LagLoopE).png FrameIcon(Lag).png FrameIcon(Lag).png FrameIcon(Lag).png FrameIcon(Lag).png FrameIcon(Lag).png FrameIcon(Lag).png FrameIcon(Lag).png FrameIcon(Lag).png FrameIcon(Lag).png FrameIcon(Lag).png FrameIcon(Lag).png FrameIcon(Lag).png FrameIcon(Lag).png FrameIcon(Lag).png FrameIcon(LagPropS).png FrameIcon(LagPropE).png FrameIcon(Lag).png FrameIcon(Lag).png FrameIcon(Lag).png FrameIcon(Lag).png FrameIcon(Lag).png FrameIcon(Lag).png FrameIcon(LagLoopS).png FrameIcon(LagLoopE).png FrameIcon(Lag).png FrameIcon(Lag).png FrameIcon(Lag).png FrameIcon(Lag).png FrameIcon(Lag).png FrameIcon(Lag).png FrameIcon(Lag).png FrameIcon(Lag).png FrameIcon(Lag).png FrameIcon(Lag).png FrameIcon(Lag).png FrameIcon(Lag).png FrameIcon(Lag).png FrameIcon(Lag).png FrameIcon(Lag).png FrameIcon(Lag).png FrameIcon(Lag).png FrameIcon(Lag).png FrameIcon(Lag).png FrameIcon(Lag).png FrameIcon(Lag).png FrameIcon(Lag).png FrameIcon(Lag).png FrameIcon(Lag).png FrameIcon(Lag).png FrameIcon(Lag).png
FrameIcon(Blank).png FrameIcon(Blank).png FrameIcon(Blank).png FrameIcon(Blank).png FrameIcon(Blank).png FrameIcon(BlankLoopS).png FrameIcon(BlankLoopE).png FrameIcon(Blank).png FrameIcon(Blank).png FrameIcon(Blank).png FrameIcon(Blank).png FrameIcon(Blank).png FrameIcon(Blank).png FrameIcon(Blank).png FrameIcon(Continuable).png FrameIcon(Continuable).png FrameIcon(Continuable).png FrameIcon(Continuable).png FrameIcon(Continuable).png FrameIcon(Continuable).png FrameIcon(Continuable).png FrameIcon(Continuable).png FrameIcon(Continuable).png FrameIcon(Continuable).png FrameIcon(Continuable).png FrameIcon(Continuable).png FrameIcon(Continuable).png FrameIcon(Continuable).png FrameIcon(Blank).png FrameIcon(BlankLoopS).png FrameIcon(BlankLoopE).png FrameIcon(Blank).png FrameIcon(Blank).png FrameIcon(Blank).png FrameIcon(Blank).png FrameIcon(Blank).png FrameIcon(Blank).png FrameIcon(Blank).png FrameIcon(Blank).png FrameIcon(Blank).png FrameIcon(Blank).png FrameIcon(Blank).png FrameIcon(Blank).png FrameIcon(Blank).png FrameIcon(Blank).png FrameIcon(Blank).png FrameIcon(Blank).png FrameIcon(Blank).png FrameIcon(Blank).png FrameIcon(Blank).png FrameIcon(Blank).png FrameIcon(Blank).png FrameIcon(Blank).png FrameIcon(Blank).png FrameIcon(Blank).png FrameIcon(Blank).png FrameIcon(Blank).png

Air

First loop frame 4
Repeat window 5-16
Shot 13
Last loop frame 20
Animation length 42