Bowser Jr. (SSB4)/Up tilt: Difference between revisions
From SmashWiki, the Super Smash Bros. wiki
Jump to navigationJump to search
Serpent King (talk | contribs) No edit summary |
No edit summary |
||
| (7 intermediate revisions by 4 users not shown) | |||
| Line 2: | Line 2: | ||
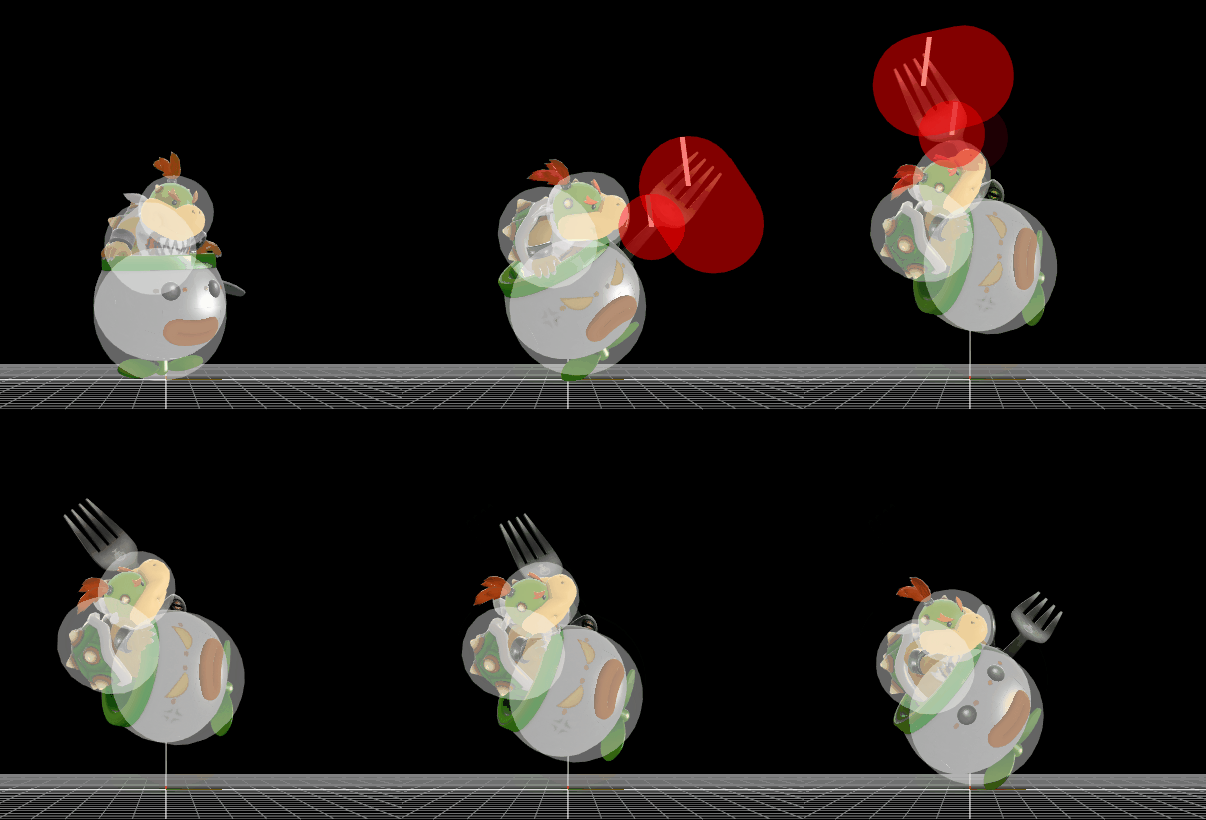
[[File:BowserJrUpTilt.gif|thumb|270px|Hitbox visualization showing Bowser Jr.'s up tilt.]] | [[File:BowserJrUpTilt.gif|thumb|270px|Hitbox visualization showing Bowser Jr.'s up tilt.]] | ||
==Overview== | ==Overview== | ||
{{SSB4|Bowser Jr.}} leans back, swinging a large metal fork upwards. The attack deals 6% and | {{SSB4|Bowser Jr.}} leans back, swinging a large metal fork upwards. The attack deals 6% with low knockback, and combos into itself, up smash or up aerials. The attack, while disjointed, has notable trouble hitting smaller sized opponents, and makes for a bad [[out of shield]] option, as it fails to catch many landing animations. The disjoint makes it a decent anti air, although the weak damage and knockback doesn't allow the move to kill until very high percents. Thus, it is mainly used as a juggling tool or early percent combo tool, and not used quite often especially on grounded opponents due to its poor hitbox against them. | ||
== | ==Hitboxes== | ||
{{SSB4HitboxTableHeader}} | |||
{| | {{SSB4HitboxTableRow | ||
| | |id=0 | ||
|part=0 | |||
| | |damage=6% | ||
| 0-1 || | |angle=97 | ||
|bk=48 | |||
|ks=99 | |||
|fkv=0 | |||
|r=4.5 | |||
|bn=1044 | |||
|xpos=4.0 to 3.0 | |||
|ypos=0.0 | |||
|zpos=0.0 to 4.0 | |||
|type=Weapon | |||
|effect=Slash | |||
|SDI=1.0 | |||
|trip=0 | |||
|sfx=Slash | |||
|slvl=M | |||
}} | |||
{{SSB4HitboxTableRow | |||
|id=1 | |||
|part=0 | |||
|damage=6% | |||
|angle=97 | |||
|bk=48 | |||
|ks=99 | |||
|fkv=0 | |||
|r=3.0 | |||
|bn=1044 | |||
|xpos=-1.0 | |||
|ypos=0.0 | |||
|zpos=0.0 | |||
|type=Weapon | |||
|effect=Slash | |||
|SDI=1.0 | |||
|trip=0 | |||
|sfx=Slash | |||
|slvl=M | |||
}} | |||
|} | |} | ||
== | ==Timing== | ||
{| class="wikitable" | {|class="wikitable" | ||
!Hitboxes | |||
|7-14 | |||
|- | |- | ||
! | !Interruptible | ||
|33 | |||
|- | |- | ||
!Animation length | |||
| | |41 | ||
|} | |} | ||
{{FrameStripStart}} | |||
{{FrameStrip|t=Lag|c=6}}{{FrameStrip|t=Hitbox|c=8}}{{FrameStrip|t=Lag|c=18}}{{FrameStrip|t=Interruptible|c=9}} | |||
{{FrameStripEnd}} | |||
== | {{FrameIconLegend|lag=y|hitbox=y|interruptible=y}} | ||
{{MvSubNavBowserJr|g=SSB4}} | {{MvSubNavBowserJr|g=SSB4}} | ||
Latest revision as of 13:30, April 21, 2021
Overview[edit]
Bowser Jr. leans back, swinging a large metal fork upwards. The attack deals 6% with low knockback, and combos into itself, up smash or up aerials. The attack, while disjointed, has notable trouble hitting smaller sized opponents, and makes for a bad out of shield option, as it fails to catch many landing animations. The disjoint makes it a decent anti air, although the weak damage and knockback doesn't allow the move to kill until very high percents. Thus, it is mainly used as a juggling tool or early percent combo tool, and not used quite often especially on grounded opponents due to its poor hitbox against them.
Hitboxes[edit]
Timing[edit]
| Hitboxes | 7-14 |
|---|---|
| Interruptible | 33 |
| Animation length | 41 |
Lag time |
Hitbox |
Interruptible |
|
