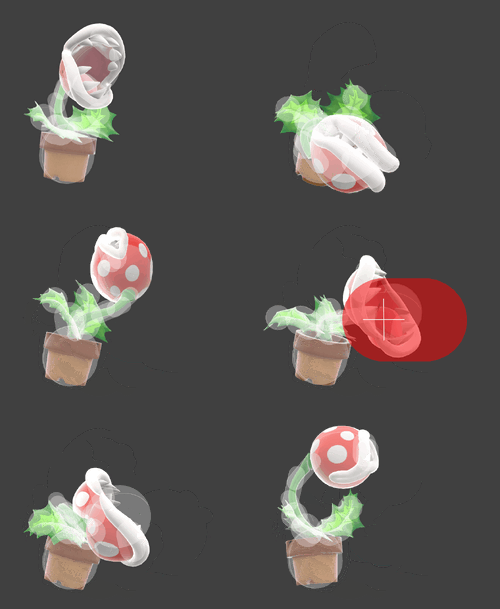
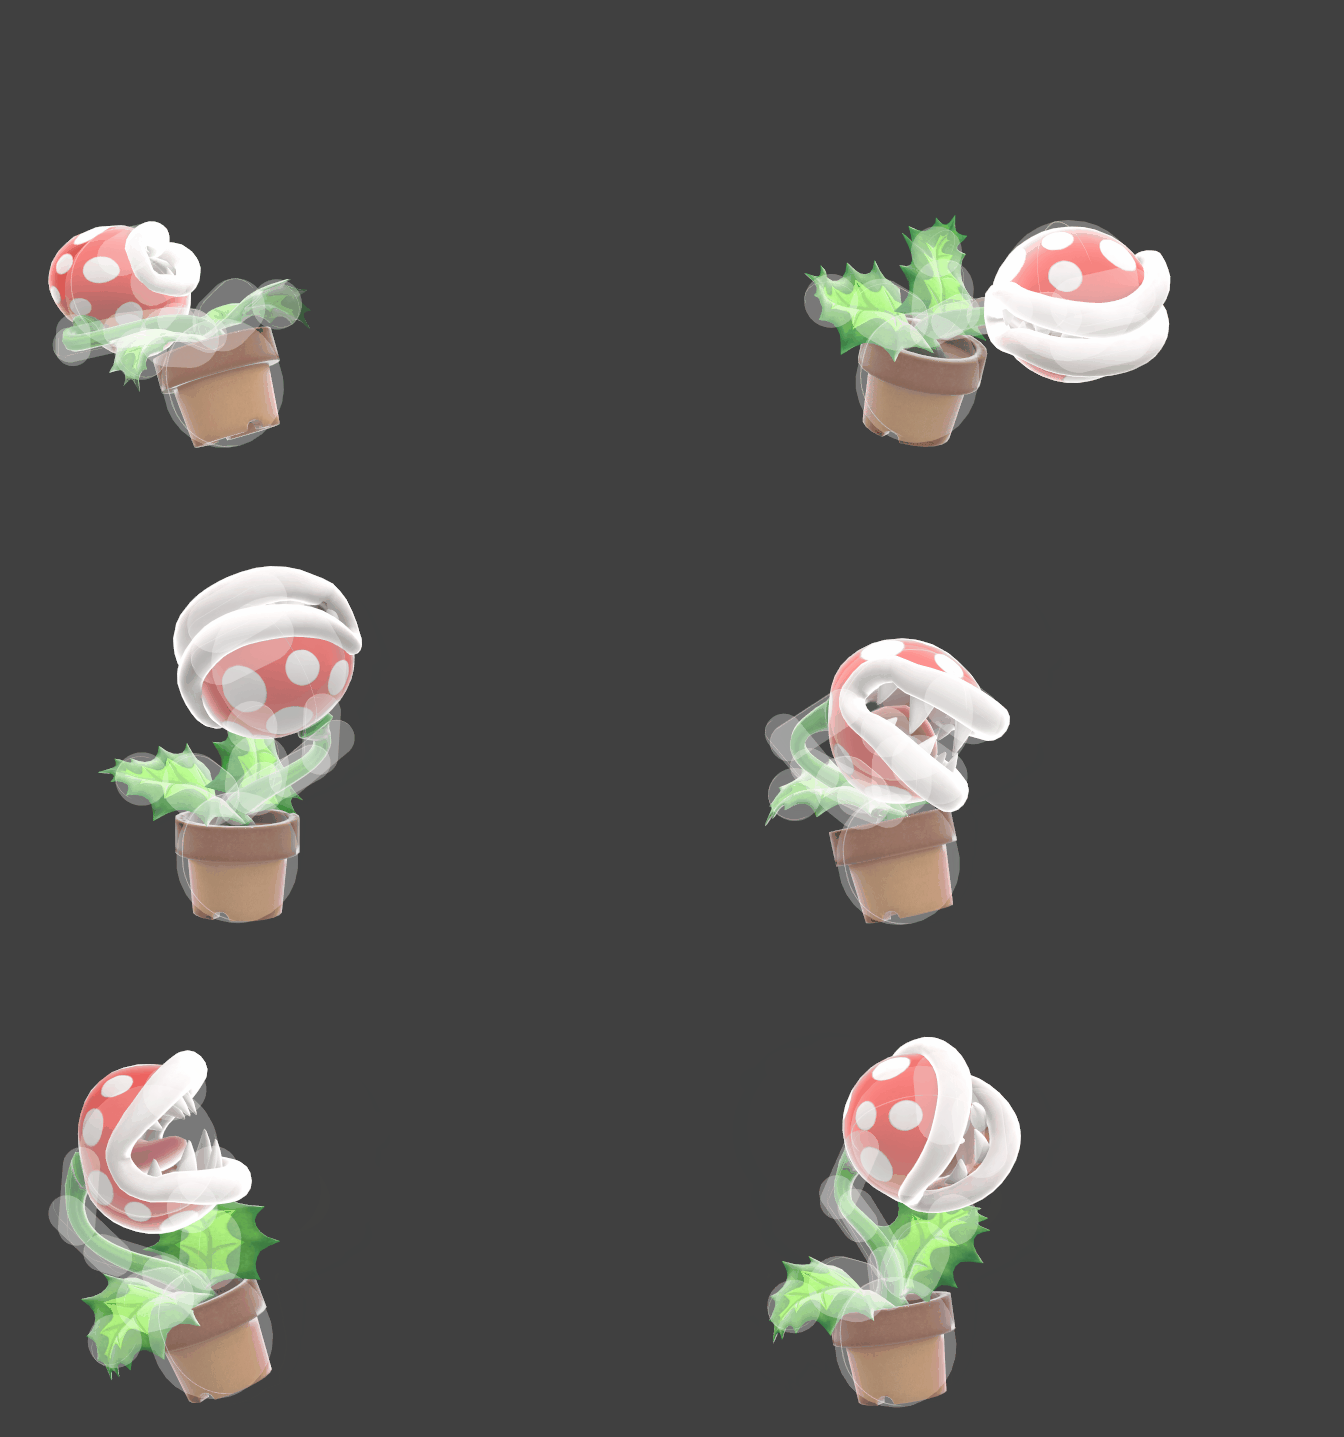
Piranha Plant (SSBU)/Neutral attack/Infinite: Difference between revisions
From SmashWiki, the Super Smash Bros. wiki
Jump to navigationJump to search
Raul Retana (talk | contribs) m (Added hitstun/shieldstun) |
No edit summary |
||
| (6 intermediate revisions by 3 users not shown) | |||
| Line 1: | Line 1: | ||
{{ArticleIcons|ssbu=y}} | {{ArticleIcons|ssbu=y}} | ||
[[File:PiranhaPlantRapidJab.gif|thumb| | [[File:PiranhaPlantRapidJab.gif|thumb|250px|Hitbox visualization showing Piranha Plant's rapid jab.]] | ||
[[File:PiranhaPlantJabFinisher.gif|thumb| | [[File:PiranhaPlantJabFinisher.gif|thumb|250px|Hitbox visualization showing Piranha Plant's rapid jab finisher.]] | ||
==Overview== | ==Overview== | ||
| Line 9: | Line 9: | ||
'''{{GameIcon|ssbu}} {{SSBU|3.1.0}}''' | '''{{GameIcon|ssbu}} {{SSBU|3.1.0}}''' | ||
*{{buff|Neutral infinite deals more hitstun (3 frames → 4).}} | *{{buff|Neutral infinite deals more hitstun (3 frames → 4).}} | ||
'''{{GameIcon|ssbu}} {{SSBU|9.0.0}}''' | |||
*{{buff|[[Rapid jab]] and its finisher have [[transcendent priority]], preventing them from being canceled out by weak attacks.}} | |||
==Hitboxes== | ==Hitboxes== | ||
| Line 19: | Line 21: | ||
|damage=0.6% | |damage=0.6% | ||
|angle=361 | |angle=361 | ||
|af=3 | |||
|bk=8 | |bk=8 | ||
|ks=10 | |ks=10 | ||
| Line 33: | Line 36: | ||
|sfx=Slash | |sfx=Slash | ||
|slvl=S | |slvl=S | ||
|clang=f | |||
|rebound=f | |||
}} | }} | ||
|'''+4''' frames | |'''+4''' frames | ||
| | |9× | ||
{{HitboxTableTitle|Rapid jab finisher|42}} | {{HitboxTableTitle|Rapid jab finisher|42}} | ||
{{UltimateHitboxTableRow | {{UltimateHitboxTableRow | ||
| Line 41: | Line 46: | ||
|damage=3.4% | |damage=3.4% | ||
|angle=50 | |angle=50 | ||
|af=3 | |||
|bk=40 | |bk=40 | ||
|ks=150 | |ks=150 | ||
| Line 54: | Line 60: | ||
|sfx=Slash | |sfx=Slash | ||
|slvl=M | |slvl=M | ||
|clang=f | |||
|rebound=f | |||
}} | }} | ||
|— | |||
|— | |||
|} | |} | ||
==Timing== | ==Timing== | ||
After one full loop, releasing the attack button at any point causes the infinite to transition into the finisher. Interruptibility and animation length are for the finisher only. | |||
{|class="wikitable" | {|class="wikitable" | ||
!Rapid | !Loop points | ||
|6, 10, 14 | |3-4, 20-21 | ||
|- | |||
!Rapid jab | |||
|6, 10, 14, 18 | |||
|- | |- | ||
!Finisher | !Finisher | ||
| Line 66: | Line 80: | ||
|- | |- | ||
!Interruptible | !Interruptible | ||
| | |40 | ||
|- | |- | ||
!Animation length | !Animation length | ||
| Line 73: | Line 87: | ||
{{FrameStripStart}} | {{FrameStripStart}} | ||
{{FrameStrip|t=Lag|c=3|e=LagLoopS}}{{FrameStrip|t=Lag|c=2|s=LagLoopE}}{{FrameStrip|t=Hitbox|c=1}}{{FrameStrip|t=Lag|c=3}}{{FrameStrip|t=Hitbox|c=1}}{{FrameStrip|t=Lag|c=3}}{{FrameStrip|t=Hitbox|c=1}}{{FrameStrip|t=Lag|c=3}}{{FrameStrip|t=Hitbox|c=1}}{{FrameStrip|t=Lag|c=2|e=LagLoopS}}{{FrameStrip|t=Lag|c=5|s=LagLoopE}}{{FrameStrip|t=Hitbox|c=2}}{{FrameStrip|t=Lag|c= | {{FrameStrip|t=Lag|c=3|e=LagLoopS}}{{FrameStrip|t=Lag|c=2|s=LagLoopE}}{{FrameStrip|t=Hitbox|c=1}}{{FrameStrip|t=Lag|c=3}}{{FrameStrip|t=Hitbox|c=1}}{{FrameStrip|t=Lag|c=3}}{{FrameStrip|t=Hitbox|c=1}}{{FrameStrip|t=Lag|c=3}}{{FrameStrip|t=Hitbox|c=1}}{{FrameStrip|t=Lag|c=2|e=LagLoopS}}{{FrameStrip|t=Lag|c=5|s=LagLoopE}}{{FrameStrip|t=Hitbox|c=2}}{{FrameStrip|t=Lag|c=32}}{{FrameStrip|t=Interruptible|c=10}} | ||
{{FrameStripEnd}} | {{FrameStripEnd}} | ||
{{FrameIconLegend|lag=y|hitbox=y|interruptible=y|loop=y}} | |||
{{MvSubNavPiranhaPlant|g=SSBU}} | {{MvSubNavPiranhaPlant|g=SSBU}} | ||
[[Category:Piranha Plant (SSBU)]] | [[Category:Piranha Plant (SSBU)]] | ||
[[Category:Neutral attacks (SSBU)]] | [[Category:Neutral attacks (SSBU)]] | ||
Latest revision as of 17:27, August 5, 2022
Overview[edit]
Piranha Plant performs a fast flurry of bites, finishing with a stronger bite. It is capable of racking impressive amounts of damage, typically dealing up to ~20% if held and then finished just before the opponent gets out. It possesses no notable kill power, making it exclusively for dealing damage or to send offstage for an edgeguard. It also pushes back shields more than most rapid jabs. A very useful tool, coming from the frame 2 jab 1 and doing very high damage for how fast it is.
Update history[edit]
 Neutral infinite deals more hitstun (3 frames → 4).
 Rapid jab and its finisher have transcendent priority, preventing them from being canceled out by weak attacks.
Hitboxes[edit]
Timing[edit]
After one full loop, releasing the attack button at any point causes the infinite to transition into the finisher. Interruptibility and animation length are for the finisher only.
| Loop points | 3-4, 20-21 |
|---|---|
| Rapid jab | 6, 10, 14, 18 |
| Finisher | 6-7 |
| Interruptible | 40 |
| Animation length | 49 |
Lag time |
Hitbox |
Loop point |
Interruptible |
|

