SSBM Icon.png

Marth (SSBM)/Neutral aerial: Difference between revisions

From SmashWiki, the Super Smash Bros. wiki
Jump to navigationJump to search
(→‎Overview: There is no sweetspot.)
Line 3: Line 3:
==Overview==
==Overview==
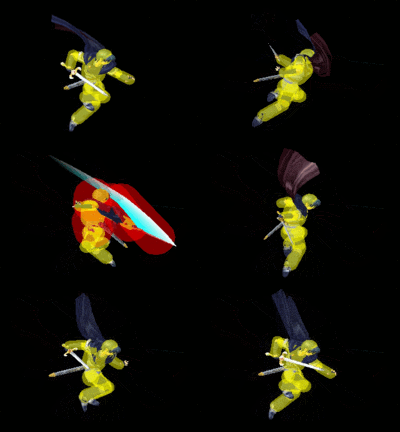
[[File:Marth Neutral Aerial Hitbox Melee.gif|thumb|Hitboxes of Marth's nair.]]
[[File:Marth Neutral Aerial Hitbox Melee.gif|thumb|Hitboxes of Marth's nair.]]
Marth does two aerial slashes around himself. First hit deals 4% damage, while the second deals 10%, for a total of 14% if both hits connect. The two hits can easily connect almost all of the time, and can followup into each other, with the second having decent knockback if sweetspotted. Unlike the majority of Marth's moveset, both hits deal the same damage and knockback whether tipped or not, despite the SFX being different depending on whether it's tipped or not. The move is a decent [[edgeguarder]], and has some use in [[combo]]s, along with the second hit even being able to KO in certain situations when near the [[edge]]. Despite all this, it has a smaller [[hitbox]] than most of Marth's aerials and is less likely to be used due to favor of other aerials.
Marth does two aerial slashes around himself. First hit deals 4% damage, while the second deals 10%, for a total of 14% if both hits connect. The two hits can easily connect almost all of the time, and can followup into each other, with the second having decent knockback. Unlike the majority of Marth's moveset, both hits deal the same damage and knockback whether tipped or not, despite the SFX being different depending on whether it's tipped or not. The move is a decent [[edgeguarder]], and has some use in [[combo]]s, along with the second hit even being able to KO in certain situations when near the [[edge]]. Despite all this, it has a smaller [[hitbox]] than most of Marth's aerials and is less likely to be used due to favor of other aerials.


{{competitive expertise}}

Revision as of 02:03, January 21, 2016

Overview

Hitboxes of Marth's neutral aerial in Melee.
Hitboxes of Marth's nair.

Marth does two aerial slashes around himself. First hit deals 4% damage, while the second deals 10%, for a total of 14% if both hits connect. The two hits can easily connect almost all of the time, and can followup into each other, with the second having decent knockback. Unlike the majority of Marth's moveset, both hits deal the same damage and knockback whether tipped or not, despite the SFX being different depending on whether it's tipped or not. The move is a decent edgeguarder, and has some use in combos, along with the second hit even being able to KO in certain situations when near the edge. Despite all this, it has a smaller hitbox than most of Marth's aerials and is less likely to be used due to favor of other aerials.


Competitive.png This article or section may require competitive expertise.
You can discuss this issue on the talk page or edit this page to improve it.

Hitboxes

ID Part Damage SD Angle BK KS FKV Radius Bone Offset Clang Rebound Effect G A Sound
Hit 1
0 0 4% 0 AngleIcon100.png 30 40 0 3.906 76 3.5154 0.0 0.0 HitboxTableIcon(Clang).png HitboxTableIcon(NoRebound).png EffectIcon(Slash).png HitboxTableIcon(GroundedTrue).png HitboxTableIcon(AerialTrue).png S Slash
1 0 4% 0 AngleIcon100.png 30 40 0 3.906 71 2.3436 0.0 0.0 HitboxTableIcon(Clang).png HitboxTableIcon(NoRebound).png EffectIcon(Slash).png HitboxTableIcon(GroundedTrue).png HitboxTableIcon(AerialTrue).png S Slash
2 0 4% 0 AngleIcon100.png 30 40 0 3.906 25 0.0 0.0 0.0 HitboxTableIcon(Clang).png HitboxTableIcon(NoRebound).png EffectIcon(Slash).png HitboxTableIcon(GroundedTrue).png HitboxTableIcon(AerialTrue).png S Slash
0 0 4% 0 AngleIcon90.png 30 40 0 3.906 4 0.0 0.0 0.0 HitboxTableIcon(Clang).png HitboxTableIcon(NoRebound).png EffectIcon(Normal).png HitboxTableIcon(GroundedTrue).png HitboxTableIcon(AerialTrue).png S Kick
Hit 2
0 0 10% 0 Sakurai angle 50 80 0 3.906 76 3.5154 0.0 0.0 HitboxTableIcon(Clang).png HitboxTableIcon(Rebound).png EffectIcon(Slash).png HitboxTableIcon(GroundedTrue).png HitboxTableIcon(AerialTrue).png L Slash
1 0 10% 0 Sakurai angle 50 80 0 3.906 71 2.3436 0.0 0.0 HitboxTableIcon(Clang).png HitboxTableIcon(Rebound).png EffectIcon(Slash).png HitboxTableIcon(GroundedTrue).png HitboxTableIcon(AerialTrue).png L Slash
2 0 10% 0 Sakurai angle 50 80 0 3.906 25 0.0 0.0 0.0 HitboxTableIcon(Clang).png HitboxTableIcon(Rebound).png EffectIcon(Slash).png HitboxTableIcon(GroundedTrue).png HitboxTableIcon(AerialTrue).png L Slash
3 0 10% 0 Sakurai angle 50 80 0 3.906 4 0.0 0.0 0.0 HitboxTableIcon(Clang).png HitboxTableIcon(Rebound).png EffectIcon(Normal).png HitboxTableIcon(GroundedTrue).png HitboxTableIcon(AerialTrue).png S Kick

Timing

Attack

Initial autocancel 1-5
Hitboxes 6-7, 15-21
Ending autocancel 25-
Animation length 49
Interruptible 50
FrameIcon(Lag).png FrameIcon(Lag).png FrameIcon(Lag).png FrameIcon(Lag).png FrameIcon(Lag).png FrameIcon(Hitbox).png FrameIcon(Hitbox).png FrameIcon(Lag).png FrameIcon(Lag).png FrameIcon(Lag).png FrameIcon(Lag).png FrameIcon(Lag).png FrameIcon(Lag).png FrameIcon(Lag).png FrameIcon(Hitbox).png FrameIcon(Hitbox).png FrameIcon(Hitbox).png FrameIcon(Hitbox).png FrameIcon(Hitbox).png FrameIcon(Hitbox).png FrameIcon(Hitbox).png FrameIcon(Lag).png FrameIcon(Lag).png FrameIcon(Lag).png FrameIcon(Lag).png FrameIcon(Lag).png FrameIcon(Lag).png FrameIcon(Lag).png FrameIcon(Lag).png FrameIcon(Lag).png FrameIcon(Lag).png FrameIcon(Lag).png FrameIcon(Lag).png FrameIcon(Lag).png FrameIcon(Lag).png FrameIcon(Lag).png FrameIcon(Lag).png FrameIcon(Lag).png FrameIcon(Lag).png FrameIcon(Lag).png FrameIcon(Lag).png FrameIcon(Lag).png FrameIcon(Lag).png FrameIcon(Lag).png FrameIcon(Lag).png FrameIcon(Lag).png FrameIcon(Lag).png FrameIcon(Lag).png FrameIcon(Lag).png
FrameIcon(Autocancel).png FrameIcon(Autocancel).png FrameIcon(Autocancel).png FrameIcon(Autocancel).png FrameIcon(Autocancel).png FrameIcon(Blank).png FrameIcon(Blank).png FrameIcon(Blank).png FrameIcon(Blank).png FrameIcon(Blank).png FrameIcon(Blank).png FrameIcon(Blank).png FrameIcon(Blank).png FrameIcon(Blank).png FrameIcon(Blank).png FrameIcon(Blank).png FrameIcon(Blank).png FrameIcon(Blank).png FrameIcon(Blank).png FrameIcon(Blank).png FrameIcon(Blank).png FrameIcon(Blank).png FrameIcon(Blank).png FrameIcon(Blank).png FrameIcon(Autocancel).png FrameIcon(Autocancel).png FrameIcon(Autocancel).png FrameIcon(Autocancel).png FrameIcon(Autocancel).png FrameIcon(Autocancel).png FrameIcon(Autocancel).png FrameIcon(Autocancel).png FrameIcon(Autocancel).png FrameIcon(Autocancel).png FrameIcon(Autocancel).png FrameIcon(Autocancel).png FrameIcon(Autocancel).png FrameIcon(Autocancel).png FrameIcon(Autocancel).png FrameIcon(Autocancel).png FrameIcon(Autocancel).png FrameIcon(Autocancel).png FrameIcon(Autocancel).png FrameIcon(Autocancel).png FrameIcon(Autocancel).png FrameIcon(Autocancel).png FrameIcon(Autocancel).png FrameIcon(Autocancel).png FrameIcon(Autocancel).png

Landing lag

Animation length 15
L-cancelled animation length 7
Normal  FrameIcon(Lag).png FrameIcon(Lag).png FrameIcon(Lag).png FrameIcon(Lag).png FrameIcon(Lag).png FrameIcon(Lag).png FrameIcon(Lag).png FrameIcon(Lag).png FrameIcon(Lag).png FrameIcon(Lag).png FrameIcon(Lag).png FrameIcon(Lag).png FrameIcon(Lag).png FrameIcon(Lag).png FrameIcon(Lag).png
L-cancelled  FrameIcon(Lag).png FrameIcon(Lag).png FrameIcon(Lag).png FrameIcon(Lag).png FrameIcon(Lag).png FrameIcon(Lag).png FrameIcon(Lag).png FrameIcon(Blank).png FrameIcon(Blank).png FrameIcon(Blank).png FrameIcon(Blank).png FrameIcon(Blank).png FrameIcon(Blank).png FrameIcon(Blank).png FrameIcon(Blank).png
Legend (1 square = 1 frame)
FrameIcon(Lag).png
Lag time
FrameIcon(Hitbox).png
Hitbox
FrameIcon(Autocancel).png
Autocancel

Similar moves