Marth (SSBM)/Down smash: Difference between revisions
(how'd I miss this) |
m (→Overview) |
||
| Line 4: | Line 4: | ||
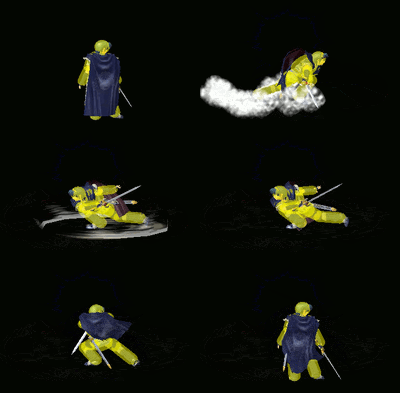
[[File:Marth Down Smash Hitbox Melee.gif|thumb|Hitbox animation of Marth's d-smash.]] | [[File:Marth Down Smash Hitbox Melee.gif|thumb|Hitbox animation of Marth's d-smash.]] | ||
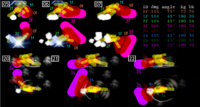
[[File:Dsmash_with_text.png|thumb|Hitbox details of Marth's d-smash.]] | [[File:Dsmash_with_text.png|thumb|Hitbox details of Marth's d-smash.]] | ||
Marth sweeps his sword on the ground in front of himself, then behind. It deals {{ChargedSmashDmgSSBM|11}} on the base and {{ChargedSmashDmgSSBM|16}} when tipped. If tipped, it knocks opponents vertically with very high vertical knockback, being able to KO reliably at high percentages. Overall, it is among the strongest [[down smash]]es in the game, and arguably one of Marth's best KOing options. If not tipped, it is much weaker, and hits opponents horizontally instead, though it can still KO at high percentages near the [[edge]]. Although it has high power, the move has rather high [[ending lag]]; even though it is Marth's second fastest move in terms of [[startup]], it is rather [[punish]]able if it misses. | Marth sweeps his sword on the ground in front of himself, then behind. It deals {{ChargedSmashDmgSSBM|11}} on the base and {{ChargedSmashDmgSSBM|16}} when tipped. If tipped, it knocks opponents vertically with very high vertical knockback, being able to KO reliably at high percentages. Overall, it is among the strongest [[down smash]]es in the game, and arguably one of Marth's best KOing options. If not tipped, it is much weaker, and hits opponents horizontally instead, though it can still KO at high percentages near the [[edge]]. Although it has high power, the move has rather high [[ending lag]]; even though it is Marth's second fastest move in terms of [[startup]], it is rather [[punish]]able if it misses. Also, the move doesn't have much [[combo]] ability outside of sometimes being useful after throws. | ||
{{competitive expertise}} | {{competitive expertise}} | ||
==Hitboxes== | ==Hitboxes== | ||
{{MeleeHitboxTableHeader}} | {{MeleeHitboxTableHeader}} | ||
Revision as of 19:45, November 23, 2013
Overview
Marth sweeps his sword on the ground in front of himself, then behind. It deals 11% on the base and 16% when tipped. If tipped, it knocks opponents vertically with very high vertical knockback, being able to KO reliably at high percentages. Overall, it is among the strongest down smashes in the game, and arguably one of Marth's best KOing options. If not tipped, it is much weaker, and hits opponents horizontally instead, though it can still KO at high percentages near the edge. Although it has high power, the move has rather high ending lag; even though it is Marth's second fastest move in terms of startup, it is rather punishable if it misses. Also, the move doesn't have much combo ability outside of sometimes being useful after throws.
Hitboxes
Timing
| Charges between | 3-4 |
|---|---|
| Hitboxes | 5-7, 20-22 |
| Interruptible | 62 |
| Animation length | 64 |
Lag time |
Charge interval |
Hitbox |
Interruptible |
Similar moves
|


