Mario (SSB4)/Down smash: Difference between revisions
From SmashWiki, the Super Smash Bros. wiki
Jump to navigationJump to search
No edit summary |
m (Text replacement - "|right|thumbnail" to "|thumb") |
||
| (11 intermediate revisions by 6 users not shown) | |||
| Line 1: | Line 1: | ||
{{ArticleIcons|ssb4=y}} | {{ArticleIcons|ssb4=y}} | ||
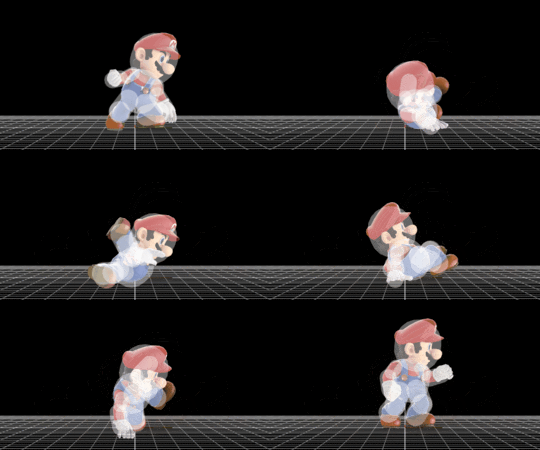
[[File: | [[File:MarioDSmash.gif|270px|thumb|Hitbox visualization of Mario's down smash.]] | ||
{{SSB4|Mario}}'s down smash is a breakdance sweep, hitting opponents from both sides. It hits very fast in front for a [[smash attack]], hitting as fast as | {{competitive expertise}} | ||
==Overview== | |||
{{SSB4|Mario}}'s down smash is a breakdance sweep, hitting opponents from both sides. It hits very fast in front for a [[smash attack]], hitting as fast as all his tilts. | |||
==Hitboxes== | ==Hitboxes== | ||
{{SSB4HitboxTableHeader}} | {{SSB4HitboxTableHeader}} | ||
{{HitboxTableTitle|Hit 1|24}} | |||
{{SSB4HitboxTableRow | {{SSB4HitboxTableRow | ||
|id=0 | |id=0 | ||
|damage=10 | |damage=10% | ||
|angle=32 | |angle=32 | ||
|bk=30 | |bk=30 | ||
| Line 21: | Line 24: | ||
|effect=Normal | |effect=Normal | ||
|clang=t | |clang=t | ||
| | |rebound=t | ||
|slvl=L | |slvl=L | ||
|sfx=Kick | |sfx=Kick | ||
| Line 27: | Line 30: | ||
{{SSB4HitboxTableRow | {{SSB4HitboxTableRow | ||
|id=1 | |id=1 | ||
|damage=10 | |damage=10% | ||
|angle=32 | |angle=32 | ||
|bk=30 | |bk=30 | ||
| Line 40: | Line 43: | ||
|effect=Normal | |effect=Normal | ||
|clang=t | |clang=t | ||
| | |rebound=t | ||
|slvl=L | |slvl=L | ||
|sfx=Kick | |sfx=Kick | ||
}} | }} | ||
| | {{HitboxTableTitle|Hit 2|24}} | ||
{{SSB4HitboxTableRow | {{SSB4HitboxTableRow | ||
|id=0 | |id=0 | ||
|damage=12 | |damage=12% | ||
|angle=30 | |angle=30 | ||
|bk=30 | |bk=30 | ||
| Line 62: | Line 63: | ||
|effect=Normal | |effect=Normal | ||
|clang=t | |clang=t | ||
| | |rebound=t | ||
|slvl=M | |slvl=M | ||
|sfx=Kick | |sfx=Kick | ||
| Line 68: | Line 69: | ||
{{SSB4HitboxTableRow | {{SSB4HitboxTableRow | ||
|id=1 | |id=1 | ||
|damage=12 | |damage=12% | ||
|angle=30 | |angle=30 | ||
|bk=30 | |bk=30 | ||
| Line 81: | Line 82: | ||
|effect=Normal | |effect=Normal | ||
|clang=t | |clang=t | ||
| | |rebound=t | ||
|slvl=M | |slvl=M | ||
|sfx=Kick | |sfx=Kick | ||
| Line 88: | Line 89: | ||
==Timing== | ==Timing== | ||
{|class="wikitable" | |||
{| class="wikitable" | !Charges between | ||
|- | |2-3 | ||
|- | |- | ||
| | !Hit 1 | ||
|5-6 | |||
|- | |- | ||
!Hit 2 | |||
|14 | |||
|- | |- | ||
| | !Interruptible | ||
|44 | |||
|- | |- | ||
| | !Animation length | ||
|45 | |||
|} | |} | ||
{{FrameStripStart}} | {{FrameStripStart}} | ||
{{FrameStrip|t=Lag|c= | {{FrameStrip|t=Lag|c=2|e=LagChargeS}}{{FrameStrip|t=Lag|c=2|s=LagChargeE}}{{FrameStrip|t=Hitbox|c=2}}{{FrameStrip|t=Lag|c=7}}{{FrameStrip|t=Hitbox|c=1}}{{FrameStrip|t=Lag|c=29}}{{FrameStrip|t=Interruptible|c=2}} | ||
{{FrameStripEnd}} | {{FrameStripEnd}} | ||
{{FrameIconLegend|lag=y|charge=y|hitbox=y|interruptible=y}} | |||
{{ | |||
{{MvSubNavMario|g=SSB4}} | {{MvSubNavMario|g=SSB4}} | ||
[[Category:Mario (SSB4)]] | |||
[[Category:Down smashes (SSB4)]] | |||
Latest revision as of 09:16, April 12, 2023
Overview[edit]
Mario's down smash is a breakdance sweep, hitting opponents from both sides. It hits very fast in front for a smash attack, hitting as fast as all his tilts.
Hitboxes[edit]
Timing[edit]
| Charges between | 2-3 |
|---|---|
| Hit 1 | 5-6 |
| Hit 2 | 14 |
| Interruptible | 44 |
| Animation length | 45 |
Lag time |
Charge interval |
Hitbox |
Interruptible |
|

