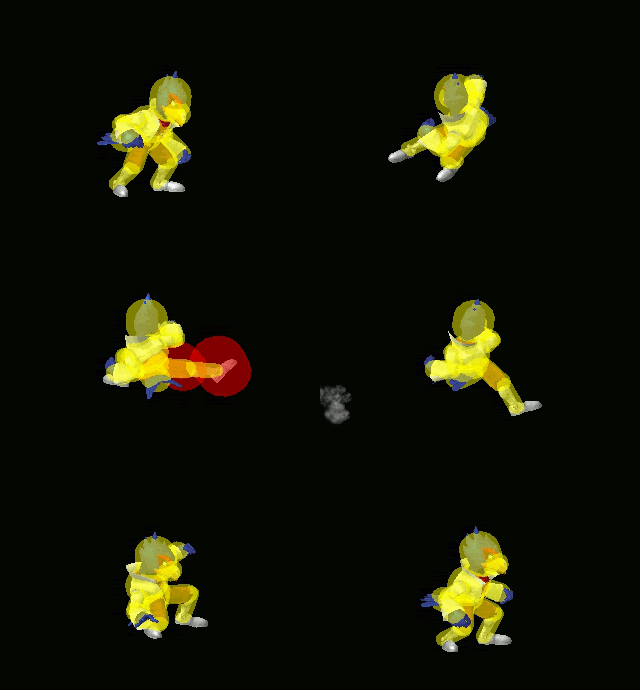
Falco (SSBM)/Forward smash: Difference between revisions
From SmashWiki, the Super Smash Bros. wiki
Jump to navigationJump to search
m (→Overview) |
m (Changing to proper template) |
||
| Line 12: | Line 12: | ||
{{MeleeHitboxTableRow | {{MeleeHitboxTableRow | ||
|id=0 | |id=0 | ||
|damage={{ | |damage={{ChargedSmashDmgSSBM|17}} | ||
|angle=361 | |angle=361 | ||
|bk=40 | |bk=40 | ||
| Line 27: | Line 27: | ||
{{MeleeHitboxTableRow | {{MeleeHitboxTableRow | ||
|id=1 | |id=1 | ||
|damage={{ | |damage={{ChargedSmashDmgSSBM|17}} | ||
|angle=361 | |angle=361 | ||
|bk=40 | |bk=40 | ||
| Line 42: | Line 42: | ||
{{MeleeHitboxTableRow | {{MeleeHitboxTableRow | ||
|id=2 | |id=2 | ||
|damage={{ | |damage={{ChargedSmashDmgSSBM|17}} | ||
|angle=110 | |angle=110 | ||
|bk=40 | |bk=40 | ||
| Line 57: | Line 57: | ||
{{MeleeHitboxTableRow | {{MeleeHitboxTableRow | ||
|id=0 | |id=0 | ||
|damage={{ | |damage={{ChargedSmashDmgSSBM|14}} | ||
|angle=361 | |angle=361 | ||
|bk=10 | |bk=10 | ||
| Line 72: | Line 72: | ||
{{MeleeHitboxTableRow | {{MeleeHitboxTableRow | ||
|id=1 | |id=1 | ||
|damage={{ | |damage={{ChargedSmashDmgSSBM|14}} | ||
|angle=361 | |angle=361 | ||
|bk=10 | |bk=10 | ||
| Line 87: | Line 87: | ||
{{MeleeHitboxTableRow | {{MeleeHitboxTableRow | ||
|id=2 | |id=2 | ||
|damage={{ | |damage={{ChargedSmashDmgSSBM|14}} | ||
|angle=361 | |angle=361 | ||
|bk=10 | |bk=10 | ||
Revision as of 16:21, November 7, 2013
Overview
Falco flips his body and kicks in front of himself while jumping forward. This is similar to Fox's forward smash, but is much stronger, usually KO'ing at around 90-110%. It also has high speed, as well as good range, with the hitbox being out for most of the time while Falco is moving forward. Because of these advantages, it is a great KO option. The move can also be deadly to an opponent on the edge at above 100% damage. It is arguably the best forward smash in Melee.
Hitboxes
Timing
| Charges between | 7-8 |
|---|---|
| Clean hit | 12-16 |
| Late hit | 17-21 |
| Animation length | 39 |
| Interruptible | 46 |
Lag time |
Charge interval |
Hitbox |
Hitbox change |
Similar moves
|

