SSB4 Icon.png

Dr. Mario (SSB4)/Back aerial

From SmashWiki, the Super Smash Bros. wiki
Jump to navigationJump to search
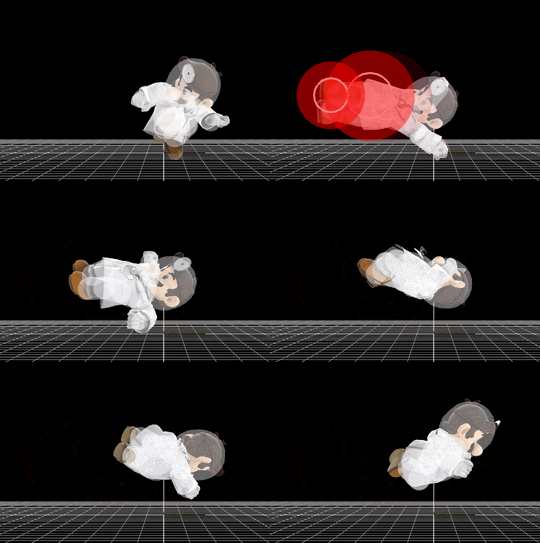
Hitbox visualization showing Dr. Mario's back aerial.
Data.png This article or section may require additional technical data.
You can discuss this issue on the talk page or edit this page to improve it.

Overview

A dropkick. Its minimal start-up lag and its clean hitbox's respectable damage output make it effective for spacing when used as part of a reverse aerial rush or edgeguarding. Its clean hitbox KOs middleweights at 147% while near the edge. It also has good range and is able to perform wall of pains due to the late hit's low knockback. It has more power than Mario's, but at the cost of its utility.

Hitboxes

ID Part Damage SD Angle BK KS FKV Radius Bone Offset SDIx T% Clang Rebound Type Effect G A Sound Direct
Clean hit
0 0 13.44% 0 Sakurai angle 10 95 0 4.2 9 4.8 0.0 0.0 1.0x 1.0x 0% HitboxTableIcon(Clang).png HitboxTableIcon(Rebound).png TypeIcon(Foot).png EffectIcon(Normal).png HitboxTableIcon(GroundedTrue).png HitboxTableIcon(AerialTrue).png L Kick SpecialsDirect.png
1 0 13.44% 0 Sakurai angle 10 95 0 5.4 0 1.6 0.0 0.0 1.0x 1.0x 0% HitboxTableIcon(Clang).png HitboxTableIcon(Rebound).png TypeIcon(Foot).png EffectIcon(Normal).png HitboxTableIcon(GroundedTrue).png HitboxTableIcon(AerialTrue).png L Kick SpecialsDirect.png
Late hit
0 0 7.84% 0 Sakurai angle 7 90 0 4.5 9 4.8 0.0 0.0 1.0x 1.0x 0% HitboxTableIcon(Clang).png HitboxTableIcon(Rebound).png TypeIcon(Foot).png EffectIcon(Normal).png HitboxTableIcon(GroundedTrue).png HitboxTableIcon(AerialTrue).png M Kick SpecialsDirect.png
1 0 7.84% 0 Sakurai angle 7 90 0 5.3 8 1.6 0.0 0.0 1.0x 1.0x 0% HitboxTableIcon(Clang).png HitboxTableIcon(Rebound).png TypeIcon(Foot).png EffectIcon(Normal).png HitboxTableIcon(GroundedTrue).png HitboxTableIcon(AerialTrue).png M Kick SpecialsDirect.png