SSBU Icon.png

Captain Falcon (SSBU)/Neutral attack/Infinite: Difference between revisions

From SmashWiki, the Super Smash Bros. wiki
Jump to navigationJump to search
No edit summary
 
(2 intermediate revisions by one other user not shown)
Line 1: Line 1:
{{ArticleIcons|ssbu=y}}
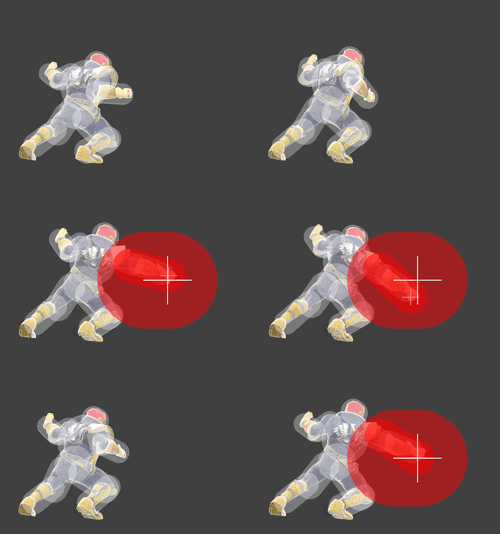
[[File:CaptainFalconRapidJabSSBU.gif|thumb|360px|Hitbox visualization showing Captain Falcon's rapid jab.]]
[[File:CaptainFalconRapidJabSSBU.gif|thumb|250px|Hitbox visualization showing Captain Falcon's rapid jab.]]
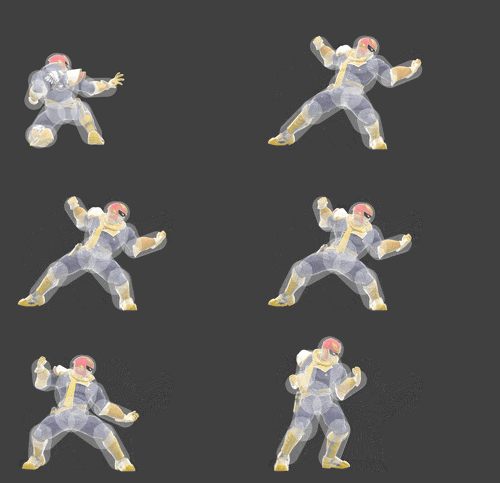
[[File:CaptainFalconRapidJabFinisherSSBU.gif|thumb|360px|Hitbox visualization showing Captain Falcon's rapid jab finisher.]]
[[File:CaptainFalconRapidJabFinisherSSBU.gif|thumb|250px|Hitbox visualization showing Captain Falcon's rapid jab finisher.]]


==Overview==
==Overview==
Captain Falcon performs a series of rapid punches forward. It has a great connecting ability and has low enough of base knockback to keep opponents in place. Additionally, the first hit has increased [[hitstun]] and [[shieldstun]]. This prevents the opponent from doing any other action. The hitboxes also appear to be disjointed away from his arm.


The rapid finisher can [[KO]] slightly easy compared to other finishers, as it has a base knockback of 110.
==Hitboxes==
==Hitboxes==
Hitboxes ID 0 and 1 of rapid jab are given 2 extra frames of hitstun and a shieldstun multiplier of 9x. Due to there being no ID 0 but an ID 2, the latter is not given any extra.  
The scripts only specify hitstun and shieldstun modifiers for the ID 1 hitboxes of the rapid jab portion, as well as an ID 0 hitbox that does not exist. However, [[Hitstun#List of moves with hitstun modifiers|due to a glitch]] with hitstun and shieldstun modifiers, they also apply to the ID 2 hitbox regardless.
{{UltimateHitboxTableHeader}}
! Hitstun
! Hitstun
Line 17: Line 16:
|damage=0.6%
|damage=0.6%
|angle=361
|angle=361
|af=3
|bk=8
|bk=8
|ks=15
|ks=15
Line 33: Line 33:
}}
}}
|'''+2''' frames
|'''+2''' frames
|9x
|
{{UltimateHitboxTableRow
|id=2
|id=2
|damage=0.6%
|damage=0.6%
|angle=361
|angle=361
|af=3
|bk=8
|bk=8
|ks=15
|ks=15
Line 60: Line 61:
|damage=3.0%
|damage=3.0%
|angle=45
|angle=45
|af=3
|bk=110
|bk=110
|ks=55
|ks=55
Line 80: Line 82:
|damage=3.0%
|damage=3.0%
|angle=45
|angle=45
|af=3
|bk=110
|bk=110
|ks=55
|ks=55
Line 99: Line 102:


==Timing==
==Timing==
Interruptibility and animation length are only for the finisher.
After one full loop, releasing the attack button at any point causes the infinite to transition into the finisher. Interruptibility and animation length are for the finisher only.
{|class="wikitable"
{|class="wikitable"
!Rapid Jab
!Loop points
|5, 7, 9, 11...
|2-3, 19-20
|-
!Rapid jab
|5, 7, 9, 11, 13, 15, 17, 19
|-
|-
!Finisher
!Finisher

Latest revision as of 20:34, May 25, 2022

Hitbox visualization for Captain Falcon's rapid jab
Hitbox visualization showing Captain Falcon's rapid jab.
Hitbox visualization for Captain Falcon's rapid jab finisher
Hitbox visualization showing Captain Falcon's rapid jab finisher.

Overview[edit]

Captain Falcon performs a series of rapid punches forward. It has a great connecting ability and has low enough of base knockback to keep opponents in place. Additionally, the first hit has increased hitstun and shieldstun. This prevents the opponent from doing any other action. The hitboxes also appear to be disjointed away from his arm.

Hitboxes[edit]

The scripts only specify hitstun and shieldstun modifiers for the ID 1 hitboxes of the rapid jab portion, as well as an ID 0 hitbox that does not exist. However, due to a glitch with hitstun and shieldstun modifiers, they also apply to the ID 2 hitbox regardless.

ID Part Rehit rate Damage SD Angle Angle type BK KS FKV Set weight Radius Bone Offset SDI× T% Clang Rebound Effect Type G A Sound Direct Hit bits Hit part Blockable Reflectable Absorbable Flinchless No GFX Heedless Hitstun Shieldstun
Rapid jab
1 0 0 0.6% 0 Sakurai angle Forward 8 15 0 HitboxTableIcon(False).png 2.25 shoulderr 7.5 to 2.0 0.8 to -1.0 -0.5 to 0.0 0.5× 0.4× 0% HitboxTableIcon(Clang).png HitboxTableIcon(Rebound).png EffectIcon(Rapid).png TypeIcon(Hand).png HitboxTableIcon(GroundedTrue).png HitboxTableIcon(AerialTrue).png S Punch SpecialsDirect.png All All HitboxTableIcon(Blockable).png HitboxTableIcon(Unreflectable).png HitboxTableIcon(Unabsorbable).png HitboxTableIcon(False).png HitboxTableIcon(False).png HitboxTableIcon(False).png +2 frames
2 0 0 0.6% 0 Sakurai angle Forward 8 15 0 HitboxTableIcon(False).png 6.5 top 0.0 8.0 15.0 to 12.0 0.5× 0.4× 0% HitboxTableIcon(Clang).png HitboxTableIcon(Rebound).png EffectIcon(Rapid).png TypeIcon(Hand).png HitboxTableIcon(GroundedTrue).png HitboxTableIcon(AerialTrue).png S Punch SpecialsDirect.png All All HitboxTableIcon(Blockable).png HitboxTableIcon(Unreflectable).png HitboxTableIcon(Unabsorbable).png HitboxTableIcon(False).png HitboxTableIcon(False).png HitboxTableIcon(False).png
Rapid jab finisher
0 0 0 3.0% 0 AngleIcon45.png Forward 110 55 0 HitboxTableIcon(False).png 4.5 top 0.0 13.0 to 5.5 7.0 2.0× 1.0× 0% HitboxTableIcon(Clang).png HitboxTableIcon(Rebound).png EffectIcon(Normal).png TypeIcon(Hand).png HitboxTableIcon(GroundedTrue).png HitboxTableIcon(AerialTrue).png M Punch SpecialsDirect.png All All HitboxTableIcon(Blockable).png HitboxTableIcon(Unreflectable).png HitboxTableIcon(Unabsorbable).png HitboxTableIcon(False).png HitboxTableIcon(False).png HitboxTableIcon(False).png
1 0 0 3.0% 0 AngleIcon45.png Forward 110 55 0 HitboxTableIcon(False).png 4.5 top 0.0 13.0 to 5.5 13.5 2.0× 1.0× 0% HitboxTableIcon(Clang).png HitboxTableIcon(Rebound).png EffectIcon(Normal).png TypeIcon(Hand).png HitboxTableIcon(GroundedTrue).png HitboxTableIcon(AerialTrue).png M Punch SpecialsDirect.png All All HitboxTableIcon(Blockable).png HitboxTableIcon(Unreflectable).png HitboxTableIcon(Unabsorbable).png HitboxTableIcon(False).png HitboxTableIcon(False).png HitboxTableIcon(False).png

Timing[edit]

After one full loop, releasing the attack button at any point causes the infinite to transition into the finisher. Interruptibility and animation length are for the finisher only.

Loop points 2-3, 19-20
Rapid jab 5, 7, 9, 11, 13, 15, 17, 19
Finisher 6-7
Interruptible 50
Animation length 49
FrameIcon(Lag).png FrameIcon(LagLoopS).png FrameIcon(LagLoopE).png FrameIcon(Lag).png FrameIcon(Hitbox).png FrameIcon(Lag).png FrameIcon(Hitbox).png FrameIcon(Lag).png FrameIcon(Hitbox).png FrameIcon(Lag).png FrameIcon(Hitbox).png FrameIcon(Lag).png FrameIcon(Hitbox).png FrameIcon(Lag).png FrameIcon(Hitbox).png FrameIcon(Lag).png FrameIcon(Hitbox).png FrameIcon(Lag).png FrameIcon(HitboxLoopS).png FrameIcon(LagLoopE).png FrameIcon(Lag).png FrameIcon(Lag).png FrameIcon(Lag).png FrameIcon(Lag).png FrameIcon(Hitbox).png FrameIcon(Hitbox).png FrameIcon(Lag).png FrameIcon(Lag).png FrameIcon(Lag).png FrameIcon(Lag).png FrameIcon(Lag).png FrameIcon(Lag).png FrameIcon(Lag).png FrameIcon(Lag).png FrameIcon(Lag).png FrameIcon(Lag).png FrameIcon(Lag).png FrameIcon(Lag).png FrameIcon(Lag).png FrameIcon(Lag).png FrameIcon(Lag).png FrameIcon(Lag).png FrameIcon(Lag).png FrameIcon(Lag).png FrameIcon(Lag).png FrameIcon(Lag).png FrameIcon(Lag).png FrameIcon(Lag).png FrameIcon(Lag).png FrameIcon(Lag).png FrameIcon(Lag).png FrameIcon(Lag).png FrameIcon(Lag).png FrameIcon(Lag).png FrameIcon(Lag).png FrameIcon(Lag).png FrameIcon(Lag).png FrameIcon(Lag).png FrameIcon(Lag).png FrameIcon(Lag).png FrameIcon(Lag).png FrameIcon(Lag).png FrameIcon(Lag).png FrameIcon(Lag).png FrameIcon(Lag).png FrameIcon(Lag).png FrameIcon(Lag).png FrameIcon(Lag).png
Legend (1 square = 1 frame)
FrameIcon(Lag).png
Lag time
FrameIcon(Hitbox).png
Hitbox
FrameIcon(BlankLoopS).pngFrameIcon(BlankLoopE).png
Loop point
FrameIcon(Interruptible).png
Interruptible