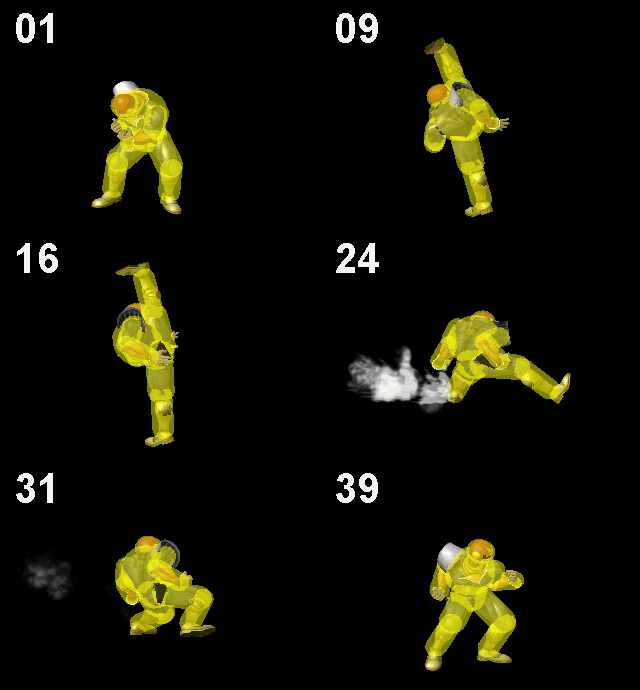
Captain Falcon (SSBM)/Up tilt: Difference between revisions
From SmashWiki, the Super Smash Bros. wiki
Jump to navigationJump to search
(New Page: {{ArticleIcons|ssbm=y}} thumb|400px|Hitbox visualization showing Captain Falcon's up tilt. {{competitive expertise}} ==Overview== ==Hitboxes== {{MeleeHitbox...) |
m (Description added.) Tag: Mobile edit |
||
| (One intermediate revision by one other user not shown) | |||
| Line 1: | Line 1: | ||
{{ArticleIcons|ssbm=y}} | {{ArticleIcons|ssbm=y}} | ||
[[File:CFalcon Up tilt.gif|thumb|400px|Hitbox visualization showing Captain Falcon's up tilt.]] | [[File:CFalcon Up tilt.gif|thumb|400px|Hitbox visualization showing Captain Falcon's up tilt.]] | ||
==Overview== | ==Overview== | ||
Brings his leg up and brings it down in an axe-like fashion. It has incredible [[range]], able to out range many of {{SSBM|Marth}}'s tilts. This move has good horizontal knockback and like his f-tilt, is difficult to [[combo]] from. Due to its low trajectory, one can often follow off the edge of a platform or stage with a falling n-air or non-sweetspotted fair [[edgeguard]], but this is not a true combo. It may be a good idea to [[wavedash]] slightly forward to maintain pressure, and enter a defensive stance. Most players use this move as an edgeguard technique since the heel can extend below the platform. Deals 13% when connected. | |||
==Hitboxes== | ==Hitboxes== | ||
{{MeleeHitboxTableHeader}} | {{MeleeHitboxTableHeader}} | ||
| Line 28: | Line 29: | ||
|ks=80 | |ks=80 | ||
|fkv=0 | |fkv=0 | ||
|r= | |r=800 | ||
|bn=13 | |bn=13 | ||
|xpos=700 | |xpos=700 | ||
| Line 36: | Line 37: | ||
}} | }} | ||
|} | |} | ||
==Timing== | ==Timing== | ||
{|class="wikitable" | {|class="wikitable" | ||
Latest revision as of 21:46, February 25, 2021
Overview[edit]
Brings his leg up and brings it down in an axe-like fashion. It has incredible range, able to out range many of Marth's tilts. This move has good horizontal knockback and like his f-tilt, is difficult to combo from. Due to its low trajectory, one can often follow off the edge of a platform or stage with a falling n-air or non-sweetspotted fair edgeguard, but this is not a true combo. It may be a good idea to wavedash slightly forward to maintain pressure, and enter a defensive stance. Most players use this move as an edgeguard technique since the heel can extend below the platform. Deals 13% when connected.
Hitboxes[edit]
| ID | Part | Damage | SD | Angle | BK | KS | FKV | Radius | Bone | Offset | Clang | Rebound | Effect | G | A | Sound | ||
|---|---|---|---|---|---|---|---|---|---|---|---|---|---|---|---|---|---|---|
| 0 | 0 | 13% | 0 | 50 | 80 | 0 | 4.6872 | 14 | 5.859 | 0.0 | 0.0 | |||||||
| 1 | 0 | 13% | 0 | 50 | 80 | 0 | 3.1248 | 13 | 2.7342 | 0.0 | 0.0 | |||||||
Timing[edit]
| Hitboxes | 17-21 |
|---|---|
| Interruptible | 38 |
| Animation length | 39 |
Lag time |
Hitbox |
Interruptible |
|
