User:Scr7/Pikachu (SSBB) Guide
| Pikachu in Super Smash Bros. Brawl | |
|---|---|
 
| |
| Universe | Pokémon |
| Other playable appearances | in SSB in Melee in SSB4 |
| Availability | Starter |
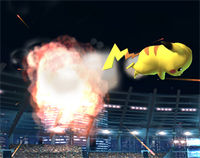
| Final Smash | Volt Tackle |
| Tier | B (8) |
This is a guide to Pikachu in SSBB made by Scr7.
Note: I always refer to Pikachu as a he.
Pros & Cons
Pros
- Quick overall speed
- Very good recovery
- Good at edgeguarding
- Useful throws
- Can combo well
- Two chaingrabs
- Fairly small target
- Projectile can be useful
- Can play mindgames with Quick Attack
- Good momentum canceling - Skull Bash and uair work well
Cons
- Relatively weak air game
- Subpar range in most attacks
- Most ranged attacks are much better right next to characters, especially f-smash
- Fifth lightest character (tied with Meta Knight)
- Smallest shield in the game - vulnerable to shield stabbing
- Has a long trip animation
Summary
Pikachu is, overall, a fast character, with fast walking and dashing speeds, attacks with mostly little lag (although there are some laggy ones), and moderate air and falling speeds. His attacks are powerful, especially his smashes, and he doesn't have much trouble KOing unless his best finishers are stale. He can also combo nicely, has two chaingrabs that work on a variety of characters. A new feature he's gained from Melee is Quick Attack Cancel, allowing him to approach quickly while attacking or set up a KO move such as an nair or Thunder. Another great thing about Pikachu is his unpredictable recovery - he can travel far and has many ways to return to the stage with Quick Attack, along with Skull Bash and an occasional wall jump being other options.
Pikachu's main problems are that his air game isn't particularly effective - while he does have an aerial KO move in his nair, it negates all of his momentum, and his second most powerful aerial move - dair - is laggy unless autocancelled. Uair can be okay for combos but does next to no damage and knockback, and the bair is laggy and not very useful. Pikachu also has below average range, with its finishers needing the opponent to be near Pikachu to be effective. F-smash is an example - a powerful finisher when the opponent is next to Pikachu, but very weak at the tip of the bolt.
Matchups
Moveset and frame data
Normal attacks
Neutral attack
Name: Headbutt
Damage: 2.1% per hit
Description: Does an extremely quick headbutt. The ending lag is basically you letting go of the A button. It does minimal damage and it can't really followup, but it does have a chance of tripping the opponent. Don't use it much, as the opponent can easily DI out after 3-4 hits.
You can use it to counter Stale-Move Negation by attacking things like the statues in Castle Siege.
Frame data
| Hits | 2-3 |
|---|---|
| IASA | 22 (single jab) |
| Trip rate | 10% |
| Advantage on block | -12 (normal shield drop) / -19 (jump/grab OoS) |
Forward tilt
Name: Side Kick
Damage: 9.45% (normal) / 10.5% (angled up) / 8.4% (angled down)
KO percentage: 200%
Description: Quick kick forward. Short range, but it doesn't have bad KO power for a tilt. It's rather awkward to use in combos and for spacing, but it can do both. Also, if you use it right next to the opponent, it knocks them back. I don't really like this move.
Frame data
| Hits | 5-10 |
|---|---|
| IASA | 30 |
| Advantage on block | -14 (normal shield drop) / -21 (jump/grab OoS) |
Note: This will always be the same, regardless of how the move is angled.
Up tilt
Name: Tail Whip
Damage: 7.35%/6.3%/5.25% (more damage closer to Pikachu)
KO percentage: 155%
Description: Whips his tail in an arc above himself, launching opponents up. This is a great move - it's fast, at lower percentages it can juggle and combo into other moves well, and at high percentages it can lead straight into a Thunder for a Thunderspike.
Frame data
| Hits | 7-13 |
|---|---|
| IASA | 24 |
| Advantage on block | -7/-7/-8 (normal shield drop) / -14/-14/-15 (jump/grab OoS) |
Down tilt
Name: Tail Sweep
Damage: 7.35%
KO percentage: 250%
Description: Sweeps his tail along the ground in front of himself. I don't particularly like this move. It has little knockback but also launches the opponent very low to the ground, so it's hard to followup. It also has little KO power. It does have decent range however, and the first hit can trip the opponent. Still, I rarely use it.
Frame data
| Hits | 7-9 |
|---|---|
| IASA | 19 |
| Trip rate | 30% |
| Advantage on block | -2 (normal shield drop) / -9 (jump/grab OoS) |
Dash attack
Name: Running Headbutt
Damage: 7.35%
Description: Does a running headbutt while falling forward. I don't like this move at all. It's too laggy to followup, and it leaves Pikachu very vulnerable, along with being easy for the opponent to shield grab Pikachu. Its knockback isn't too bad, so it can get opponents offstage, but there are almost always better options.
Frame data
| Hits | 5-16 |
|---|---|
| IASA | 50 |
| Advantage on block | -35 (normal shield drop) / -42 (jump/grab OoS) |
Smash attacks
Forward smash
Name: ThunderShock
Damage: 21% (frames 15-17), 17.85% (frames 18-20), 14.7% (frames 21-22) (hitbubbles extend on frames 18 and 21)
KO percentage: 110%
Description: Releases a bolt of electricity in front of himself. Doesn't have too much lag (with 15 frames of startup lag and minimal ending lag), and has some good KO power. Unfortunately, you need to be really close to the opponent for the move to actually work - if you hit with the tip of the bolt, it does very weak knockback instead. So against someone who can easily stay at a distance like Marth, this move is unreliable. But against someone with lower range and spacing capabilities, this isn't a bad KO option at all.
Frame data
| Hits | 15-22 |
|---|---|
| From charge, hits on | 2 |
| IASA | 50 |
| Advantage on block | -26, -24, -21 (normal shield drop) / -33, -31, -28 (jump/grab OoS) |
Up smash
Name: Tail Flip
Damage: 14.7%/13.65% (frames 9-10) (more damage closer to Pikachu), 11.55% (frames 11-12), 7.35% (frames 13-16)
KO percentage: 125%
Description: Flips while attacking with his tail upwards. This is definitely one of Pikachu's best moves. It is very fast (9 frames startup), has high vertical KO power (despite being nerfed quite a bit from Melee), and can easily lead into a Thunderspike. Just like all up smashes, you can do this out of a dash, which is what I usually do. You can also easily followup with a down throw with this, whether it's just a single throw or a chaingrab finisher. As I said, the move isn't nearly as powerful as in Melee, but since Thunderspiking is much more effective, this doesn't matter too much if you're going for a Thunderspike. At low percentages, it can also be used for juggling and as a combo starter. A problem is that, again, you need to be quite close to the opponent for the move to be effective, but not as much as the forward smash.
Frame data
| Hits | 9-16 |
|---|---|
| From charge, hits on | 5 |
| IASA | 44 |
| Advantage on block | -22/-23, -21, -21 (normal shield drop) / -29/-30, -28, -28 (jump/grab OoS) |
Down smash
Name: Electric Spin
Damage: 2.1%, 2.1%, 2.1%, 2.1%, 2.1%, 2.1%, 3.15% (7 hits) (maximum: 15.75%)
KO percentage: 125%
Description: Spins around on the ground while surrounded with electricity, a multi-hit attack. It has only 6 frames of startup lag, being Pikachu's fastest smash. I like this move because it can rack up damage nicely and the final hit has good vertical KO power (and can lead into a Thunderspike like the up smash), but I understand that it isn't too hard to SDI out of it before the final hit (which is where all of the knockback comes from). If you use the move too much, you'll be predictable. That said, it can be very useful as a sort of "panic" option for spacing. It can also counter Stale-Move Negation due to having multiple hits.
Frame data
| Hits | 6-7, 9-10, 12-13, 15-16, 18-19, 21-22, 24 |
|---|---|
| From charge, hits on | 2 |
| IASA | 55 |
| Advantage on block | -44, -41, -38, -35, -32, -29, -25 (normal shield drop) / -51, -48, -45, -42, -39, -36, -32 (jump/grab OoS) |
Aerial attacks
Neutral aerial
Name: Roll Spin
Damage: 12.6% (frames 3-5), 6.3% (frames 6-25)
KO percentage: 135%
Description: Spins around in a circle. This is Pikachu's strongest aerial and his only reliable aerial KO option. It can be used in SHFF and it can be used in combos pretty nicely. It also has very little startup lag (only 3 frames), meaning that it can also break opponent combos. To add to that, it has decent priority and the hitboxes will be still be active if Pikachu hits the ground. However, the ending lag can work against you if your opponent gets the chance to punish. It also negates all of your momentum.
Frame data
| Hits | 3-25 |
|---|---|
| IASA | 40 |
| Landing lag | 25 |
| RCO landing lag | 34 frames |
| Autocancel | 35-39 |
| Advantage on block | -25, -24 (normal shield drop) / -32, -31 (jump/grab OoS) (does not include landing lag) |
Forward aerial
Name: Electric Drill
Damage: 2.1%, 2.1%, 2.1%, 2.1%, 3.15% (5 hits) (maximum: 11.55%)
Description: Does a drill-like attack forward while surrounded with damaging electricity. This isn't a very useful attack, as it is hard to land the multiple hits, and even if you do land all of them, it doesn't do too much damage (you could deal more damage with a nair or dair). It also does very little knockback. If Pikachu lands, the move will slightly lag, but one good thing is that it can set up a grab or d-smash. Also, you can control Pikachu very smoothly during the attack.
Frame data
| Hits | 10-12, 14-16, 18-20, 22-24, 26 |
|---|---|
| IASA | 40 |
| Landing lag | 15 |
| RCO landing lag | 21 |
| Autocancel | 1-9, 35-39 |
| Advantage on block | -23, -19, -15, -11, -5 (normal shield drop) / -30, -26, -22, -18, -12 (jump/grab OoS) (does not include landing lag) |
Back aerial
Name: Pikacopter
Damage: 1.05%, 1.05%, 1.05%, 1.05%, 1.05%, 1.05%, 1.05%, 4.2% (8 aerial hits) (maximum: 11.55%) / 4.2% (landing hit)
KO percentage: 250%
Description: Spins around like a disc, hitting multiple times. I don't like this move, it has very high aerial and landing lag, and like the fair, it can't deal as much damage as a simple nair/dair (although it is much easier to land all the hits compared to fair). One thing is that it can be used to chase opponents' DI, but this is quite situational and hard to do.
Frame data
| Hits | 4-5, 8-9, 12-13, 16-17, 20-21, 24-25, 28-29, 32-37 |
|---|---|
| Landing hitbox | 2 |
| IASA | 60 |
| Landing lag | 30 |
| RCO landing lag | 41 |
| Autocancel | 1-3, 50-59 |
| Advantage on block | -48, -44, -40, -36, -32, -28, -24, -19 (normal shield drop) / -55, -51, -47, -43, -39, -35, -31, -26 (jump/grab OoS) (does not include landing lag) |
Up aerial
Name: Tail Flick
Damage: 6.3%/5.25% (frames 3-4), 5.25%/4.2% (frames 5-8) (more damage closer to Pikachu)
Description: Flicks his tail above himself while flipping forward. Does little damage, and has almost no KO'ing potential. It's useful for juggling though, and can combo into a nair nicely. It's best used to push opponents away in the air. There are also certain tail frames that send the opponent away, at an angle good for gimping at high percentages. Unfortunately, it's lost the tail tip semi-spike from Melee.
Frame data
| Hits | 3-8 |
|---|---|
| IASA | 28 |
| Landing lag | 24 |
| RCO landing lag | 33 |
| Autocancel | 1-2, 18-27 |
| Advantage on block | -15/-16, -14 (normal shield drop) / -22/-23, -21 (jump/grab OoS) (does not include landing lag) |
Down aerial
Name: Electric Screw
Damage: 12.6% (aerial hit) / 4.2% (landing hit) (maximum: 16.8%)
KO percentage: 165%
Description: Does a drill-like attack while diving down, surrounded by damaging electricity. This attack consists of two hits. The aerial hit is Pikachu's second strongest aerial (although it's still weak), and the landing hit also deals knockback. If you land both, the move can deal 16% damage. While it has high aerial lag and very high landing lag, if you do it in a short hop there won't be any lag. The attack knocks opponents horizontally, like the nair, but weaker.
Frame data
| Hits | 14-26 |
|---|---|
| Landing hitbox | 2 |
| IASA | 48 |
| Landing lag | 40 |
| RCO landing lag | 55 |
| Autocancel | 39-47 |
| Advantage on block (aerial hit) | -27 (normal shield drop) / -34 (jump/grab OoS) (does not include landing lag) |
| Advantage on block (landing hit) | -34 (normal shield drop) / -41 (jump/grab OoS) |
Grabs and throws
Grab
Frame data
| Grabs | 6-7 |
|---|---|
| IASA | 30 |
Dash grab
Frame data
| Grabs | 9-10 |
|---|---|
| IASA | 39 |
Pivot grab
Frame data
| Grabs | 10-11 |
|---|---|
| IASA | 36 |
Pummel
Damage: 2% per pummel
Description: Shocks the opponent. Fairly quick.
Frame data
| Hits | 3 |
|---|
Forward throw
Name: Electrocuting Throw
Damage: 10%
Description: Places the opponent on his back, electrocutes them, then throws them forward. It has pretty low knockback, and it works as a chaingrab, which you can do with dash grabs. This works on almost every character, and it can be done from 0% to 50-70% depending on the character. It can also counter Stale-Move Negation thanks to having multiple hits. You can followup the throw using a running up smash, which can set up a Thunderspike.
Back throw
Name: Submission
Damage: 9%
KO percentage: 260%
Description: Rolls back a considerable distance with the opponent and then throws them back. It can get opponents offstage to set up an edgeguard, but other than that, it doesn't have many uses. I don't use this throw much.
Up throw
Name: Headbutt Throw
Damage: 10%
Description: Headbutts the opponent while knocking them upward. It can lead into some aerials, but at low percentages I would prefer to use a d-throw -> u-tilt. It can also combo into a Thunderspike, but a u-tilt or u-smash would be much better for that. Again, this isn't a throw that I particularly like.
Down throw
Name: Slam
Damage: 10%
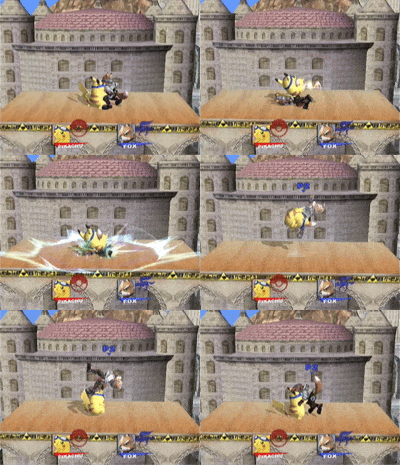
Description: Slams on top of the opponent, knocking them up with low knockback. Another chaingrab, and while it doesn't work on as many characters as the f-throw chaingrab does (since most can jump out of it), it works very effectively against some. It can combo into a u-tilt or u-smash, which can set up some aerials at low percentages, or lead into a Thunderspike at high percentages. The throw can 0-death Fox by ending with a u-smash -> Thunder, as well as Falco, Wolf, and Captain Falcon. (Notably, for Falco and Wolf, you must use a fresh d-throw at 20% - you can reach this with two f-throws and a pummel.) It can also rack up huge damage against Sheik.
An extremely advanced 0-death is to use the d-throw, then u-tilt, footstool, QAC lock repeatedly, then jab lock, ending with a f-smash at KO percentage. I'll put a link to this in the Quick Attack section.
Special moves
Neutral special
Name: Thunder Jolt
Damage: 6.3% (ground jolt) / 9.45% (aerial jolt)
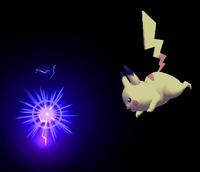
Description: Pikachu releases a jolt of electricity that bounces along the ground in front of himself. It can travel up walls, along ceilings, and below the edge. This projectile is useful for keeping opponents at bay, as it forces them into the air and it can't be crouched under. If the move is used in midair, the jolt of electricity will instead travel diagonally down towards the ground, dealing more damage than a grounded jolt. Since it can travel along walls and edges, you can use this for anti-planking against characters like Meta Knight. Overall a pretty useful projectile.
Frame data
| Jolt released on | 19 |
|---|---|
| IASA | 59 |
| Ground jolt duration | 100 |
| Aerial jolt duration | 99 |
Note: If an aerial jolt hits the ground, it will become a ground jolt and last 100 frames from that point.
Side special
Name: Skull Bash
Damage: 7.35% (uncharged) - 26.25% (fully charged)
Description: Charges up, then fires forward like a missile. Of course, the longer you charge, the faster and more powerful the move will be. This is quite a useful special. It has strong knockback and can easily be used for punishing. You can also use this for recovery - it travels a great distance, and if you happen to be recovering from high up, this is a great move to use. It can sweetspot the edge easily, but remember that some projectiles can stop it, such as Dedede's Waddle Dees. You can't cancel the charge, and there's no way to stop yourself from flying forward, so be careful. If you miss, you're indeed vulnerable, as the move isn't that hard to shield grab. If your opponent underestimates how powerful this attack is, it can be pretty useful.
Frame data
| Hits | 18-? (uncharged) |
|---|---|
| IASA | 91 (uncharged) |
| Advantage on block | ? |
Up special
Name: Quick Attack
Damage: 3.15% (QA1), 2.1% (QA2)
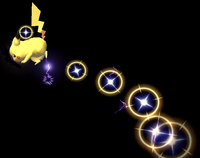
Description: Pikachu moves at warp speed in one or two directions (second is optional). You can control both via the Control Stick, though the second most be 45° different from the first. Quick Attack is an extremely versatile move. The most basic use is obviously to use it for recovery. Since you can aim in any two directions it's very unpredictable. What's great about the move is the Quick Attack Cancel technique - most of it will be explained later, but I'll mention it here. If you aim the move into the ground and then jump, you'll avoid all the lag and be in the air already. This can be used for approaching quickly and attacking simultaneously, and it can be used to lead into a nair as a combo or finisher. You can maneuver around the stage by doing this, and you can also drop through soft platforms by simply holding down on the Control Stick when you warp into them (and you won't become helpless). The move can also lock - this is advanced to the point where top professionals can't do it consistently, but apparently it isn't out of the human realm. Check this [1], and maybe this too [2].
Frame data
| Hits | 15-19 (QA1), 30-34 (QA2) |
|---|---|
| Advantage on block | ? |
Overview
Quick Attack (part 1 only):
- 1-13: Startup
- 14: Startup / QA1 direction input (Control stick position is read on frame 14 only; therefore, you may switch directions during startup)
- 15: Hitbox
- 16-18: Hitbox / edge grab allowed
- 19: Hitbox / edge grab allowed / first frame able to input QAC actions
- 20: edge grab allowed / RCO activated
- 21: -
- 22-24: Hurtbox stretched (vertical long)
- 25: -
- 26: Hurtbox stretched (horizontal small)
- 27: Hurtbox stretched (horizontal long)
- 28: Hurtbox stretched (horizontal small)
- 29: Last frame able to input QAC actions
- 30: Cooldown / QAC frame
- 31-70: Cooldown
- 71: Freefall begins
Quick Attack (parts 1 and 2):
- 1-13: Startup
- 14: Startup / QA1 direction input (Control stick position is read on frame 14 only; therefore, you may switch directions during startup)
- 15: Hitbox
- 16-18: Hitbox / edge grab allowed
- 19: Hitbox / edge grab allowed / first frame able to input QAC actions
- 20: edge grab allowed / RCO activated
- 21: -
- 22-24: Hurtbox stretched (vertical long)
- 25: -
- 26: Hurtbox stretched (horizontal small)
- 27: Hurtbox stretched (horizontal long)
- 28: Hurtbox stretched (horizontal small)
- 29: QA2 direction input (Control stick position is read on frame 29 only; therefore, you may switch directions until then)
- 30: Hitbox
- 31-33: Hitbox / edge grab allowed
- 34: Hitbox / edge grab allowed / first frame able to input QAC actions
- 35: edge grab allowed
- 36: -
- 37-39: Hurtbox stretched (vertical long)
- 40: -
- 41: Hurtbox stretched (horizontal small)
- 42: Hurtbox stretched (vertical long)
- 43: Hurtbox stretched (horizontal small)
- 44: Last frame able to input QAC actions
- 45: Cooldown / QAC frame
- 46-85: Cooldown
- 86: Freefall begins
Down special
Name: Thunder
Damage: 10.5% (bolt) / 17.85% (shockwave)
KO percentage: From as low as 75% to as high as 190%. Varies a lot on the character's position and how you use this attack.
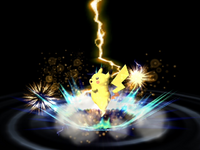
Description: You probably already know what Thunder is. Basically Pikachu shouts "PIKA!", calling a bolt of thunder above himself. This attack can hit in two different places - the bolt itself, or the shockwave surrounding Pikachu when the bolt hits him. If you do it while moving in the air, the bolt may miss Pikachu. The shockwave produces very strong horizontal knockback, while the bolt produces vertical knockback. A technique is to use the bolt for a Star KO, called Thunderspiking - a move like a u-tilt or u-smash can lead into this. You can also use Thunder offstage near the edge to give characters with short and/or linear recoveries a hard time - but only do this if you know what you're doing, as it can be dangerous. It's overall a great move that can KO very early, and sometimes Pikachu relies on it for KOs.
Frame data
| Hits | 15-74 (bolt) / 43-74 (shockwave) |
|---|---|
| IASA | 79 (thunder hits Pikachu) / 88 (thunder misses Pikachu) |
| Invincibility | 43-50 (shockwave only) |
| Advantage on block | ? (shockwave) |
Edge options
Edge grab
Frame data
| Invincibility | 1-34 (invincibility can carry over into ledge drop actions) |
|---|---|
| IASA | 12 (edge attack, roll, or jump) / 14 (edge drop or climb) |
Note: You must wait at least 30 frames after releasing the ledge before you can re-grab it.
Edge attack <100%
Name: Somersault
Damage: 8.4%
Description: Does a somersault while climbing onto the stage.
Frame data
| Hits on | 22-24 |
|---|---|
| IASA | 54 |
| Invincibility | 1-20 |
| Advantage on block | -21 (normal shield drop) / -28 (jump/grab OoS) |
Edge attack >100%
Name: Tail Kick
Damage: 10.5%
Description: Slowly kicks up onto the stage, then does a tail attack.
Frame data
| Hits on | 55-59 |
|---|---|
| IASA | 70 |
| Invincibility | 1-59 |
| Advantage on block | -4 (normal shield drop) / -11 (jump/grab OoS) |
Edge climb <100%
Frame data
| Invincibility | 1-30 |
|---|---|
| IASA | 33 |
Edge climb >100%
Frame data
| Invincibility | 1-56 |
|---|---|
| IASA | 60 |
Edge roll <100%
Frame data
| Invincibility | 1-24 |
|---|---|
| IASA | 50 |
Edge roll >100%
Frame data
| Invincibility | 1-60 |
|---|---|
| IASA | 80 |
Edge jump <100%
Frame data
| Invincibility | 1-15 |
|---|---|
| IASA | 16 |
Edge jump >100%
Frame data
| Invincibility | 1-26 |
|---|---|
| IASA | 27 |
Floor and tech moves
Tech
Frame data
| Invincibility | 1-21 |
|---|---|
| IASA | 27 |
Tech roll forward
Frame data
| Invincibility | ? |
|---|---|
| IASA | 42 |
| Roll length | 35.99 (units unknown) |
Tech roll back
Frame data
| Invincibility | ? |
|---|---|
| IASA | 42 |
| Roll length | 32.41 (units unknown) |
Flop
Frame data
| IASA | 27 |
|---|
Stand (back/front)
Frame data
| Invincibility | 1-22 |
|---|---|
| IASA | 30 |
Floor attack (back)
Name: Sweeper Kick
Damage: 6.3%, 6.3% (2 hits)
Description: Does a sweeper kick.
Frame data
| Hits on | 13-14, 18-19 |
|---|---|
| IASA | 50 |
| Invincibility | 1-19 |
| Advantage on block | -27, -22 (normal shield drop) / -34, -29 (jump/grab OoS) |
Floor attack (front)
Name: Sweeper Kick
Damage: 6.3%, 6.3% (2 hits)
Description: Does a sweeper kick.
Frame data
| Hits on | 17-18, 23-24 |
|---|---|
| IASA | 51 |
| Invincibility | 1-24 |
| Advantage on block | -24, -18 (normal shield drop) / -31, -25 (jump/grab OoS) |
Floor roll forward (back)
Frame data
| Invincibility | 1-14 |
|---|---|
| IASA | 36 |
Floor roll forward (front)
Frame data
| Invincibility | 1-19 |
|---|---|
| IASA | 37 |
Floor roll back (back/front)
Frame data
| Invincibility | 1-19 |
|---|---|
| IASA | 36 |
Dash trip
Frame data
| Duration | ? |
|---|
Pivot trip
Frame data
| Duration | ? |
|---|
Forced trip
Frame data
| Duration | ? |
|---|
Trip stand
Frame data
| Invincibility | 1-17 |
|---|---|
| IASA | 22 |
Trip attack
Name: Tail Sweeper Kick
Damage: 5.25%, 5.25% (2 hits)
Description: Does a sweeper kick with his tail.
Frame data
| Hits on | 19-20, 31-32 |
|---|---|
| IASA | 50 |
| Invincibility | 1-8 |
| Advantage on block | -22, -10 (normal shield drop) / -29, -17 (jump/grab OoS) |
Trip roll forward/back
Frame data
| Invincibility | 1-10 |
|---|---|
| IASA | 29 |
Shield, jump, rolls, and dodges
Shield
Frame data
| Active on | 1 |
|---|---|
| Shield drop | 7 |
Jump
Frame data
| Jump squat duration | 4 (to short hop, hold jump for 4 or less frames; to full hop, hold jump for 5 or more frames) |
|---|---|
| Short hop air time | 40 |
| Full jump air time | 60 |
| Soft landing | 2 |
| Hard landing | 4 |
| Soft RCO landing | 15 |
| Hard RCO landing | 24 |
Forward/back roll
Frame data
| Invincibility | 4-19 |
|---|---|
| Total duration | 31 |
Spot dodge
Frame data
| Invincibility | 2-20 |
|---|---|
| Total duration | 22 |
Air dodge
Frame data
| Invincibility | 4-29 |
|---|---|
| Total duration | 49 |
Taunts
Up taunt
Frame data
| IASA | 90 |
|---|
Down taunt
Frame data
| IASA | 90 |
|---|
Side taunt
Frame data
| IASA | 81 |
|---|
Item moves
Item pickup/drop
| Item pickup on | 7 |
|---|---|
| Drop on | 1 |
Forward toss (ground)
| Item thrown on | 12 |
|---|---|
| IASA | 29 |
Back toss (ground)
| Item thrown on | 14 |
|---|---|
| IASA | 29 |
Up toss (ground)
| Item thrown on | 15 |
|---|---|
| IASA | 29 |
Down toss (ground)
| Item thrown on | 8 |
|---|---|
| IASA | 22 |
Dash toss
| Item thrown on | 5 |
|---|---|
| IASA | 39 |
Forward toss (aerial)
| Item thrown on | 10 |
|---|---|
| IASA | 30 |
Back toss (aerial)
| Item thrown on | 14 |
|---|---|
| IASA | 30 |
Up toss (aerial)
| Item thrown on | 14 |
|---|---|
| IASA | 30 |
Down toss (aerial)
| Item thrown on | 8 |
|---|---|
| IASA | 22 |
