Super Smash Bros. 4

Captain Falcon (SSB4)/Up throw: Difference between revisions

From SmashWiki, the Super Smash Bros. wiki
Jump to navigationJump to search
m (Text replacement - "== ([^=])" to "== $1")
 
Line 8: Line 8:


===Hitbox===
===Hitbox===
{{SSB4HitboxTableHeader|special=y}}
{{SSB4SpecialHitboxTableRow
Line 35: Line 34:


===Throw===
===Throw===
{{SSB4ThrowTableHeader}}
{{SSB4ThrowTableRow
{{SSB4ThrowTableRow

Latest revision as of 20:44, April 12, 2022

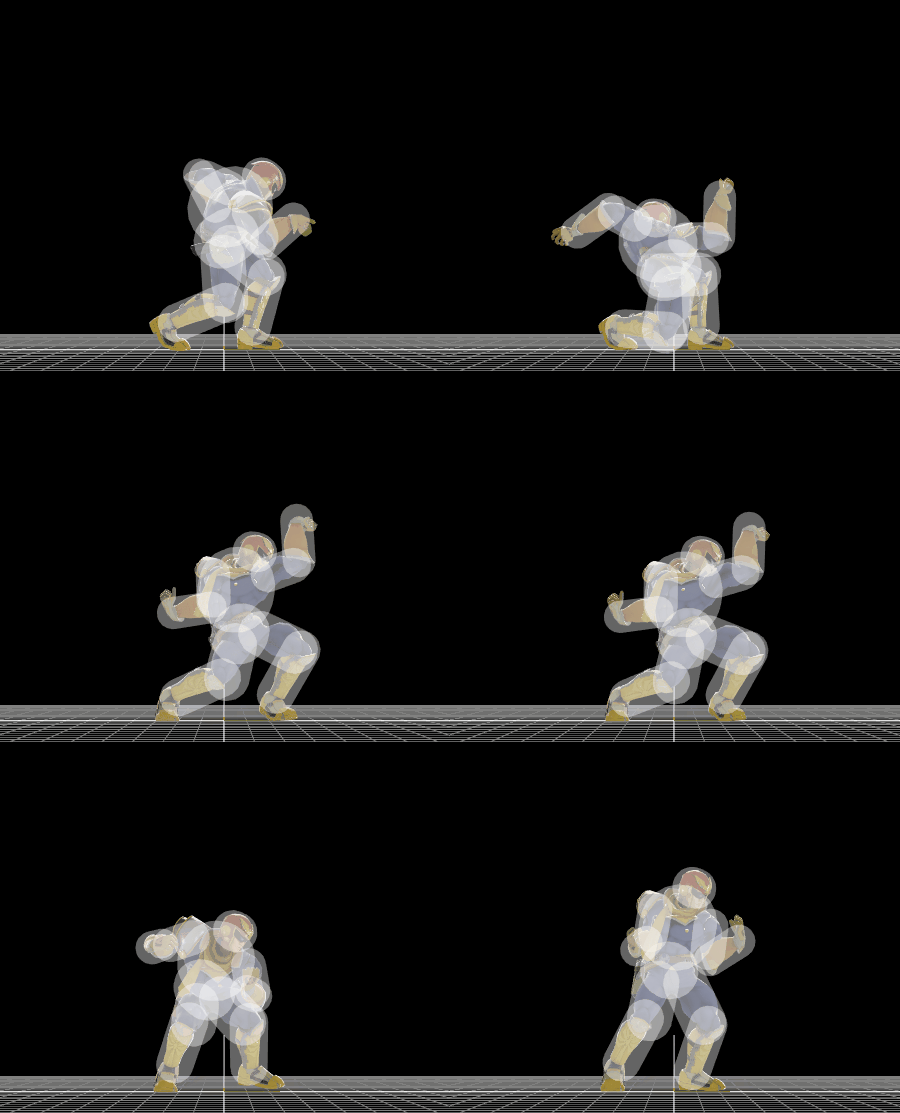
Hitbox visualization showing Captain Falcon's up throw.

Overview[edit]

Captain Falcon hits the opponent upwards with his wrist. While lacking combo potential, it deals decent damage, and can be used as a last resort kill throw, as it has enough knockback to kill mid-weights at around 160% with rage, should back or forward throws not be able to kill. Otherwise, it is Falcon's least used throw, as it only serves specific utility.

Throw and Hitbox Data[edit]

Hitbox[edit]

ID Part Rehit rate Damage SD Angle BK KS FKV Radius Bone Offset SDIx T% Clang Rebound Type Effect G A Sound Direct Hit bits Blockable Reflectable Absorbable Piercing Heedless No GFX Flinchless Stretch
0 0 0 4% 0 AngleIcon80.png Forwards 60 100 0 4.5 16 4.8 0.0 0.0 1.0x 1.5x 0% HitboxTableIcon(NoClang).png HitboxTableIcon(Rebound).png Hand (type) Normal (effect) HitboxTableIcon(GroundedTrue).png HitboxTableIcon(AerialTrue).png L Punch SpecialsDirect.png 63 HitboxTableIcon(Blockable).png HitboxTableIcon(Unreflectable).png HitboxTableIcon(Unabsorbable).png HitboxTableIcon(False).png HitboxTableIcon(False).png HitboxTableIcon(False).png HitboxTableIcon(False).png

Throw[edit]

ID Damage Angle BK KS FKV Bone FFx Type Effect Sound
0 3% AngleIcon85.png Forwards 80 110 0 0 None Throwing (type) Normal (effect) S None
1 3% Sakurai angle Forwards 60 100 0 0 None Throwing (type) Normal (effect) S None

Timing[edit]

Invincibility 1-18
Hitbox 12-13
Throw Release 14
Animation length 39
Interruptible 40
FrameIcon(Lag).png FrameIcon(Lag).png FrameIcon(Lag).png FrameIcon(Lag).png FrameIcon(Lag).png FrameIcon(Lag).png FrameIcon(Lag).png FrameIcon(Lag).png FrameIcon(Lag).png FrameIcon(Lag).png FrameIcon(Lag).png FrameIcon(Hitbox).png FrameIcon(HitboxThrowS).png FrameIcon(LagThrowE).png FrameIcon(Lag).png FrameIcon(Lag).png FrameIcon(Lag).png FrameIcon(Lag).png FrameIcon(Lag).png FrameIcon(Lag).png FrameIcon(Lag).png FrameIcon(Lag).png FrameIcon(Lag).png FrameIcon(Lag).png FrameIcon(Lag).png FrameIcon(Lag).png FrameIcon(Lag).png FrameIcon(Lag).png FrameIcon(Lag).png FrameIcon(Lag).png FrameIcon(Lag).png FrameIcon(Lag).png FrameIcon(Lag).png FrameIcon(Lag).png FrameIcon(Lag).png FrameIcon(Lag).png FrameIcon(Lag).png FrameIcon(Lag).png FrameIcon(Lag).png
FrameIcon(Invincible).png FrameIcon(Invincible).png FrameIcon(Invincible).png FrameIcon(Invincible).png FrameIcon(Invincible).png FrameIcon(Invincible).png FrameIcon(Invincible).png FrameIcon(Invincible).png FrameIcon(Invincible).png FrameIcon(Invincible).png FrameIcon(Invincible).png FrameIcon(Invincible).png FrameIcon(Invincible).png FrameIcon(Invincible).png FrameIcon(Invincible).png FrameIcon(Invincible).png FrameIcon(Invincible).png FrameIcon(Invincible).png FrameIcon(Vulnerable).png FrameIcon(Vulnerable).png FrameIcon(Vulnerable).png FrameIcon(Vulnerable).png FrameIcon(Vulnerable).png FrameIcon(Vulnerable).png FrameIcon(Vulnerable).png FrameIcon(Vulnerable).png FrameIcon(Vulnerable).png FrameIcon(Vulnerable).png FrameIcon(Vulnerable).png FrameIcon(Vulnerable).png FrameIcon(Vulnerable).png FrameIcon(Vulnerable).png FrameIcon(Vulnerable).png FrameIcon(Vulnerable).png FrameIcon(Vulnerable).png FrameIcon(Vulnerable).png FrameIcon(Vulnerable).png FrameIcon(Vulnerable).png FrameIcon(Vulnerable).png
Legend (1 square = 1 frame)
Lag
Lag time
Hitbox
Hitbox
FrameIcon(Vulnerable).png
Vulnerable
Invincibility
Invincible
ThrowThrow
Throw point