Ice Climbers (SSBU)/Up tilt: Difference between revisions
(→Overview: Continuing to elaborate...) |
m (→Overview: links.) |
||
| Line 8: | Line 8: | ||
While the damage from landing an up tilt is already quite a bit, its low knockback scaling allows for combos at a wide variety of percentages. Often starting an immensely damaging string of [[Ice Climbers (SSBU)/Up aerial|up aerials]], and thanks to the duo's above-average jump height and powerful finishers, it can even lead to relatively easy kill confirms; such as [[Ice Climbers (SSBU)/Up aerial|up aerial]], [[Ice Climbers (SSBU)/Back aerial|back aerial]], or [[Ice Climbers (SSBU)/Up special|up special]]. While an [[Ice Climbers (SSBU)/Up special|up special]] finisher is the easiest to perform, small or medium-sized opponents can escape with DI and it leaves the Ice Climbers [[helpless]] for several seconds afterward, making it fairly situational and very risky. Up tilt can also be comboed into. After landing a [[Ice Climbers (SSBU)/Side special|side special]], up tilt is a viable combo extender if the opponent's percent is too low for an [[Ice Climbers (SSBU)/Up aerial|up air]], and the [[Ice Climbers (SSBU)/Up aerial|up air]] can be saved for after the tilt. [[Ice Climbers (SSBU)/Down throw|Down throw]] can also lead to an up tilt against especially large and heavy opponents at low percentages. | While the damage from landing an up tilt is already quite a bit, its low knockback scaling allows for combos at a wide variety of percentages. Often starting an immensely damaging string of [[Ice Climbers (SSBU)/Up aerial|up aerials]], and thanks to the duo's above-average jump height and powerful finishers, it can even lead to relatively easy kill confirms; such as [[Ice Climbers (SSBU)/Up aerial|up aerial]], [[Ice Climbers (SSBU)/Back aerial|back aerial]], or [[Ice Climbers (SSBU)/Up special|up special]]. While an [[Ice Climbers (SSBU)/Up special|up special]] finisher is the easiest to perform, small or medium-sized opponents can escape with DI and it leaves the Ice Climbers [[helpless]] for several seconds afterward, making it fairly situational and very risky. Up tilt can also be comboed into. After landing a [[Ice Climbers (SSBU)/Side special|side special]], up tilt is a viable combo extender if the opponent's percent is too low for an [[Ice Climbers (SSBU)/Up aerial|up air]], and the [[Ice Climbers (SSBU)/Up aerial|up air]] can be saved for after the tilt. [[Ice Climbers (SSBU)/Down throw|Down throw]] can also lead to an up tilt against especially large and heavy opponents at low percentages. | ||
While keeping both Climbers [[Desynching|desynced]] can improve their combo game in many ways, keeping them together is preferable in order to maximize up tilt's consistency for bread-and-butter strings. The ambiguity of the move's ending lag can be compounded further yet depending on how much the 2nd Climber's attack is delayed, (via [[Desynching|desyncing]]) but doing so can throw off a player's timing if one of them connects, missing an opportunity for a combo. That's not to say a [[Desynching|desynced]] up tilt doesn't have its uses. As its long-lasting multihit nature buys the other climber plenty of time for an unconventional setup. The partner can be made to use an up tilt on their own if done out of a [[Desynching|desyncing]] method known as the "Soymilk" desync, which involves manipulating the 2nd Climber to buffer a move independently during their turnaround animation. While an opponent is stuck in an up tilt, the lead climber can [[Footstool Jump|footstool]] them, starting an infinite where the Ice Climbers continuously up tilt and footstool their opponent. (although this really only works against especially floaty fighters, since those who fall to the ground fast enough can tech the footstool and escape) If their victim is already at a high enough percent, the 1st Climber can simply hit them with an up smash to finish them off. | While keeping both Climbers [[Desynching|desynced]] can improve their combo game in many ways, keeping them together is preferable in order to maximize up tilt's consistency for bread-and-butter strings. The ambiguity of the move's ending lag can be compounded further yet depending on how much the 2nd Climber's attack is delayed, (via [[Desynching|desyncing]]) but doing so can throw off a player's timing if one of them connects, missing an opportunity for a combo. That's not to say a [[Desynching|desynced]] up tilt doesn't have its uses. As its long-lasting multihit nature buys the other climber plenty of time for an unconventional setup. The partner can be made to use an up tilt on their own if done out of a [[Desynching|desyncing]] method known as the "Soymilk" desync, which involves manipulating the 2nd Climber to buffer a move independently during their turnaround animation. While an opponent is stuck in an up tilt, the lead climber can [[Footstool Jump|footstool]] them, starting an infinite where the Ice Climbers continuously up tilt and [[Footstool Jump|footstool]] their opponent. (although this really only works against especially floaty fighters, since those who fall to the ground fast enough can [[tech]] the footstool and escape) If their victim is already at a high enough percent, the 1st Climber can simply hit them with an [[Ice Climbers (SSBU)/Up smash|up smash]] to finish them off. | ||
Even without the remarkable additions of the partner, the Ice Climbers' up tilt retains enough of its combo potential and frame-trapping capabilities to be a passable attack even in its worst state, while being a truly immaculate move at its best. | Even without the remarkable additions of the partner, the Ice Climbers' up tilt retains enough of its combo potential and frame-trapping capabilities to be a passable attack even in its worst state, while being a truly immaculate move at its best. | ||
Revision as of 18:13, May 8, 2024
Overview
Each of the duo thrusts their mallet upward with a flourish. Compared to most combo starters, it deals great damage and is shockingly safe for a tilt. Its lengthy activity and deceptively large hitboxes give it great use as an anti-air or frame trap, and makes it surprisingly decent at hitting opponents beside them in spite of the strictly vertical appearance. The sheer number of rapid multihits can make it even more difficult to punish since it's hard to make out the ending animation amongst two Climbers in the heat of the moment, and attempting an out-of-shield option is risky, since lowering one's guard too early can pull them into a devastating combo, and the duo can get away with leaving an opening if their opponent hesitates to punish.
While the damage from landing an up tilt is already quite a bit, its low knockback scaling allows for combos at a wide variety of percentages. Often starting an immensely damaging string of up aerials, and thanks to the duo's above-average jump height and powerful finishers, it can even lead to relatively easy kill confirms; such as up aerial, back aerial, or up special. While an up special finisher is the easiest to perform, small or medium-sized opponents can escape with DI and it leaves the Ice Climbers helpless for several seconds afterward, making it fairly situational and very risky. Up tilt can also be comboed into. After landing a side special, up tilt is a viable combo extender if the opponent's percent is too low for an up air, and the up air can be saved for after the tilt. Down throw can also lead to an up tilt against especially large and heavy opponents at low percentages.
While keeping both Climbers desynced can improve their combo game in many ways, keeping them together is preferable in order to maximize up tilt's consistency for bread-and-butter strings. The ambiguity of the move's ending lag can be compounded further yet depending on how much the 2nd Climber's attack is delayed, (via desyncing) but doing so can throw off a player's timing if one of them connects, missing an opportunity for a combo. That's not to say a desynced up tilt doesn't have its uses. As its long-lasting multihit nature buys the other climber plenty of time for an unconventional setup. The partner can be made to use an up tilt on their own if done out of a desyncing method known as the "Soymilk" desync, which involves manipulating the 2nd Climber to buffer a move independently during their turnaround animation. While an opponent is stuck in an up tilt, the lead climber can footstool them, starting an infinite where the Ice Climbers continuously up tilt and footstool their opponent. (although this really only works against especially floaty fighters, since those who fall to the ground fast enough can tech the footstool and escape) If their victim is already at a high enough percent, the 1st Climber can simply hit them with an up smash to finish them off.
Even without the remarkable additions of the partner, the Ice Climbers' up tilt retains enough of its combo potential and frame-trapping capabilities to be a passable attack even in its worst state, while being a truly immaculate move at its best.
Update History
 The hitlag multiplier of the final hit of the partner climber's up tilt has been increased.
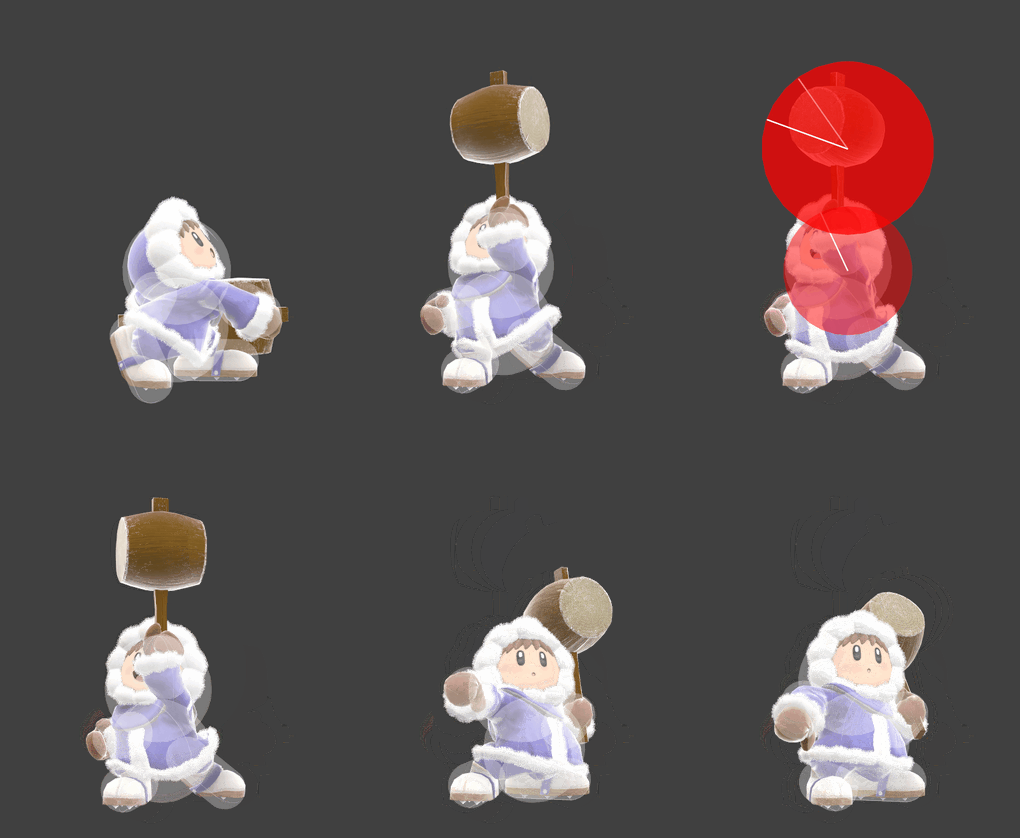
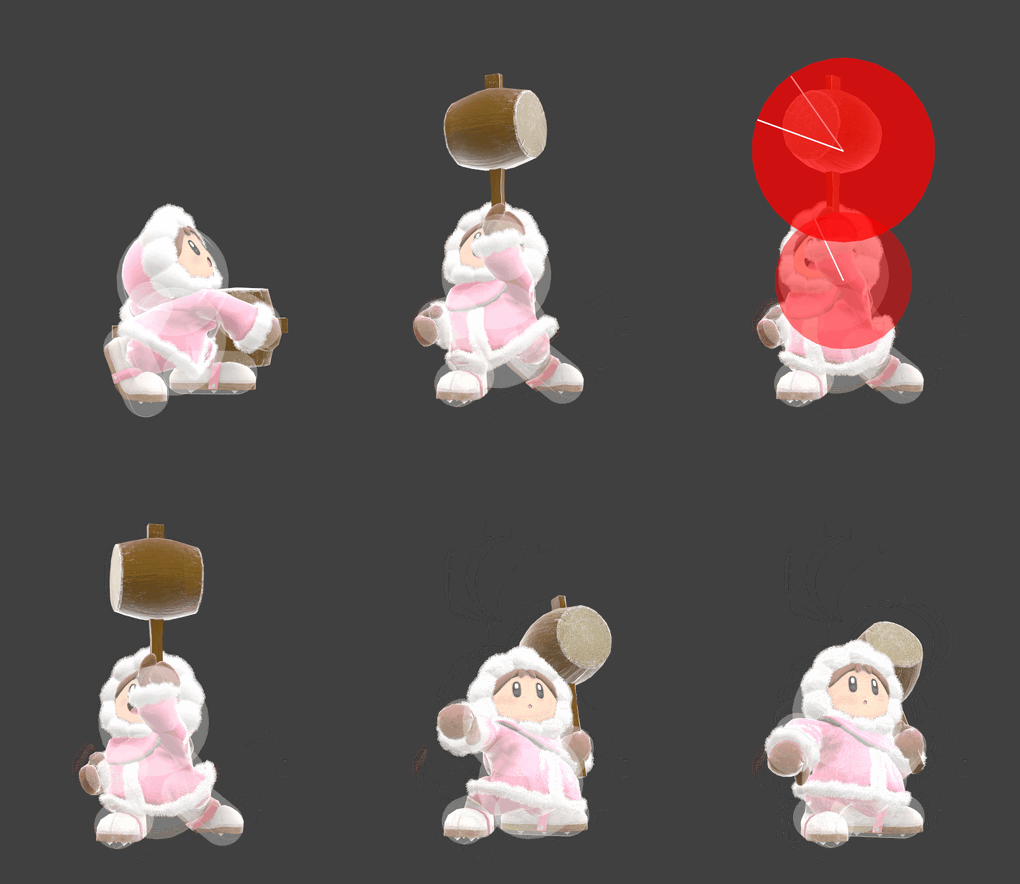
Hitboxes
Leader
Partner
The hitboxes have two possible X offsets depending on whether the partner is facing right or left (respectively), preventing issues with the Z-axis.
Timing
| Hits 1-6 | 8-9, 11-12, 14-15, 17-18, 20-21, 23-24 |
|---|---|
| Hit 7 | 27 |
| Interruptible | 49 |
| Animation length | 59 |
Lag time |
Hitbox |
Interruptible |
Trivia
- For the partner, every hitbox is coded as an extended hitbox despite not being actually extended. This prevents them from interpolating.
|


