SSBB Icon.png

Ganondorf (SSBB)/Forward tilt

From SmashWiki, the Super Smash Bros. wiki
Jump to navigationJump to search
Competitive.png This article or section may require competitive expertise.
You can discuss this issue on the talk page or edit this page to improve it.

Overview[edit]

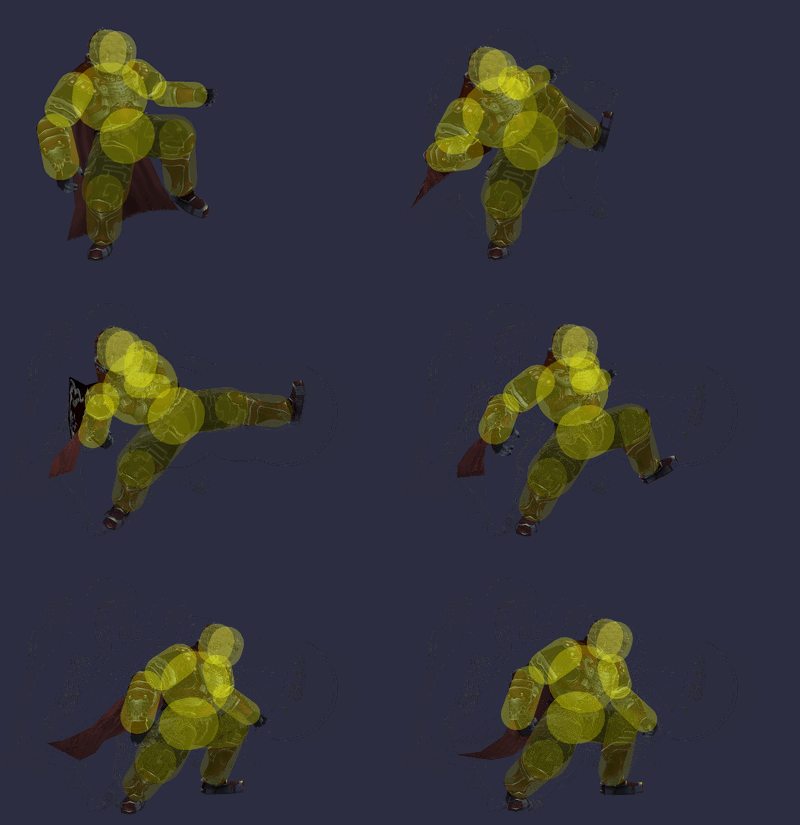
Ganondorf leans back and delivers a forceful forward kick with his left leg. The move is based on a kick Ganondorf and other large enemies use in The Legend of Zelda: Twilight Princess.

The move deals 13% at Ganondorf's foot and 12% on his leg and it is a semi-spike with powerful knockback. The foot KOes Mario at 130% in the middle of Final Destination while the leg KOes him at just over 140%. The move's high knockback and semi-spike angle make it an effective tool to send opponents off stage or to edgeguard them. The move also has fairly large hitboxes that have a slight disjoint although its overall range is shorter than Ganondorf's jab and down tilt. The move comes out on frame 10 and while that is fairly slow for a forward tilt, the move is still one of Ganondorf's faster ground moves. It is even a guaranteed followup after Flame Choke against certain characters which makes it quite useful in certain matchups.

The main downside with the move however is its high ending lag. The move has a total duration of 39 frames which makes it quite punishable both on whiff on and on shield. The move's high startup lag also makes the move fairly easy for approaching opponents to power shield which makes the move even more punishable.

Overall, forward tilt is a solid move in Ganondorf's kit as while it is fairly slow, it has decent range, good power and a very low launch angle which makes the move rewarding when it lands.

Hitboxes[edit]

ID Part Damage SD Angle BK KS FKV Radius Bone Offset SDIx T% Clang Rebound Type Effect G A Sound Direct
0 0 13% 0 AngleIcon22.png 30 88 0 5.5 9 0.0 -5.3 0.0 1.0x 1.0x 0% HitboxTableIcon(Clang).png HitboxTableIcon(Rebound).png TypeIcon(Foot).png EffectIcon(Normal).png HitboxTableIcon(GroundedTrue).png HitboxTableIcon(AerialTrue).png L Kick SpecialsDirect.png
1 0 12% 0 AngleIcon22.png 30 88 0 5.3 9 0.0 -0.5 0.0 1.0x 1.0x 0% HitboxTableIcon(Clang).png HitboxTableIcon(Rebound).png TypeIcon(Foot).png EffectIcon(Normal).png HitboxTableIcon(GroundedTrue).png HitboxTableIcon(AerialTrue).png L Kick SpecialsDirect.png
2 0 12% 0 AngleIcon22.png 30 88 0 5.1 6 0.0 0.0 0.0 1.0x 1.0x 0% HitboxTableIcon(Clang).png HitboxTableIcon(Rebound).png TypeIcon(Foot).png EffectIcon(Normal).png HitboxTableIcon(GroundedTrue).png HitboxTableIcon(AerialTrue).png L Kick SpecialsDirect.png

Timing[edit]

Attack[edit]

Hitboxes 10-12
Interruptible 40
Animation length 54
FrameIcon(Lag).png FrameIcon(Lag).png FrameIcon(Lag).png FrameIcon(Lag).png FrameIcon(Lag).png FrameIcon(Lag).png FrameIcon(Lag).png FrameIcon(Lag).png FrameIcon(Lag).png FrameIcon(Hitbox).png FrameIcon(Hitbox).png FrameIcon(Hitbox).png FrameIcon(Lag).png FrameIcon(Lag).png FrameIcon(Lag).png FrameIcon(Lag).png FrameIcon(Lag).png FrameIcon(Lag).png FrameIcon(Lag).png FrameIcon(Lag).png FrameIcon(Lag).png FrameIcon(Lag).png FrameIcon(Lag).png FrameIcon(Lag).png FrameIcon(Lag).png FrameIcon(Lag).png FrameIcon(Lag).png FrameIcon(Lag).png FrameIcon(Lag).png FrameIcon(Lag).png FrameIcon(Lag).png FrameIcon(Lag).png FrameIcon(Lag).png FrameIcon(Lag).png FrameIcon(Lag).png FrameIcon(Lag).png FrameIcon(Lag).png FrameIcon(Lag).png FrameIcon(Lag).png FrameIcon(Interruptible).png FrameIcon(Interruptible).png FrameIcon(Interruptible).png FrameIcon(Interruptible).png FrameIcon(Interruptible).png FrameIcon(Interruptible).png FrameIcon(Interruptible).png FrameIcon(Interruptible).png FrameIcon(Interruptible).png FrameIcon(Interruptible).png FrameIcon(Interruptible).png FrameIcon(Interruptible).png FrameIcon(Interruptible).png FrameIcon(Interruptible).png FrameIcon(Interruptible).png
Legend (1 square = 1 frame)
FrameIcon(Lag).png
Lag time
FrameIcon(Hitbox).png
Hitbox
FrameIcon(Interruptible).png
Interruptible