Galleom: Difference between revisions
(→Trivia) |
(Adding name origin like with other SSE baddies) |
||
| (184 intermediate revisions by more than 100 users not shown) | |||
| Line 1: | Line 1: | ||
{{ArticleIcons| | :''Not to be confused with [[Galeem]].'' | ||
{{ArticleIcons|brawl=y|ultimate=y}} | |||
{{Boss | {{Boss | ||
|name=Galleom | |name=Galleom | ||
|image=[[File:Galleom. | |image={{tabber|title1=Ultimate|content1=[[File:Galleom SSBU.png|250px]]|title2=Brawl|content2=[[File:Galleom.jpg|250px]]}} | ||
| | |caption={{symbol|subspace}} | ||
|game1= | |game1=Brawl | ||
|game2=Ultimate | |||
|location = [[The Wilds (Part I)]] <br> [[The Ruined Hall]] <br> [[Base]] | |||
|universe={{uv|Super Smash Bros.}} | |universe={{uv|Super Smash Bros.}} | ||
|points=30000 | |points=30000 | ||
}} | }} | ||
'''Galleom''' ({{ja|ガレオム|Gareomu}}) is a | '''Galleom''' ({{ja|ガレオム|Gareomu}}, ''Galleom'') is a [[boss]] native to the {{uv|Super Smash Bros.}} series who appears in ''[[Super Smash Bros. Brawl]]'' and ''[[Super Smash Bros. Ultimate]]''. | ||
== | ==Boss description== | ||
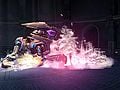
[[File:GalleomSubspaceBomb.png| | [[File:GalleomSubspaceBomb.png|thumb|left|250px|Galleom's Subspace Bomb when he is preparing to self-destruct.]] | ||
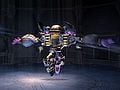
Galleom appears to be a giant, purple robot/cyborg which has simian features, and is also capable of transforming into a jet propelled tank labelled as his "Tank Form". He is covered head to toe in a heavy mechanized arsenal, possessing two rocket launchers as shoulder weapons, and powerful jets on his feet. He wears an iron mask that covers his face, as well as metallic arm braces over his bulky forearms. He is also quite agile in his simian form, capable of performing extremely large jumps, leading to the possibility that his jumps are jet propelled. In his tank form, he is much more compact, only being able to attack by either firing the missiles on his back, or simply by ramming into his foe at a high speed. As a last resort, he can set off a [[Subspace Bomb]] hidden within his head. | Galleom appears to be a giant, purple robot/cyborg which has simian features, and is also capable of transforming into a jet propelled tank labelled as his "Tank Form". He is covered head to toe in a heavy mechanized arsenal, possessing two rocket launchers as shoulder weapons, and powerful jets on his feet. He wears an iron mask that covers his face, as well as metallic arm braces over his bulky forearms. He is also quite agile in his simian form, capable of performing extremely large jumps, leading to the possibility that his jumps are jet propelled. In his tank form, he is much more compact, only being able to attack by either firing the missiles on his back, or simply by ramming into his foe at a high speed. As a last resort, he can set off a [[Subspace Bomb]] hidden within his head. | ||
{{clr}} | |||
==Role in | ==In ''Super Smash Bros. Brawl''== | ||
[[File:Galleom tank.jpg|thumb | ===Role in [[The Subspace Emissary]]=== | ||
{{SSBB|Marth}}, {{SSBB|Ike}}, and {{SSBB|Meta Knight}} were the first to spot Galleom as he was traveling through [[The Wilds (Part I)|the desert]] in his tank form. The trio quickly caught up to him and defeated | [[File:Galleom tank.jpg|thumb|Galleom in his tank form fighting against {{SSBB|Pokémon Trainer}}]] | ||
[[file:Galleomdesert.jpg|thumb|left||200px|Galleom about to battle Marth, Ike, and Meta Knight.]] | |||
Galleom is the fourth boss introduced in [[The Subspace Emissary]]. {{SSBB|Marth}}, {{SSBB|Ike}}, and {{SSBB|Meta Knight}} were the first to spot Galleom as he was traveling through [[The Wilds (Part I)|the desert]] in his tank form. The trio quickly caught up to him, causing Galleom to transform and fight the heroes. He was defeated and then jumps off the cliff to make a tactical retreat, only for him to land onto unstable ground which gave way, and Galleom landed in the [[The Ruined Hall|Ruined Hall]], where {{SSBB|Lucas}} and the {{SSBB|Pokémon Trainer}} challenge him. They manage to defeat him, and, in a last desperate attempt, Galleom grabs both Lucas and the Pokémon Trainer, starts the countdown on his emergency Subspace Bomb, then jets into the sky. Lucas manages to free both himself and the Pokémon Trainer by using [[PK Thunder]], but in the process causes them both to fall a great distance as Galleom explodes. Meta Knight manages to catch the duo just before they land, then fly them away from the Subspace Bomb's blast. Galleom is then sucked into [[The Great Maze]], along with the trophy of {{SSBB|Wario}}, and revived; he must eventually be fought again in the Maze. | |||
{{clrl}} | |||
== | ===As a playable character=== | ||
===Galleom' | {{main|Galleom (SSBB)}} | ||
Like all ''Brawl'' bosses, Galleom can be controlled in [[Boss Battles]] through [[hacking]]. The start button will self-destruct it. | |||
==== | ===Moveset=== | ||
Like all bosses Galleom is controllable with hacks in [[Boss Battles Mode]]. The start button will, like all bosses, self-destruct him. Its attacks are very powerful, and several of them gain [[One-hit KO|OHKO]] power on Intense. Move names with a Japanese name listed afterwards are sourced from the official Japanese strategy guide to ''Super Smash Bros. Ultimate''. | |||
{| class="wikitable" | |||
|- | |||
! Move !! Input !! Description !! Move Number | |||
|- | |||
| Trample<br>({{ja|踏みつぶし|Fumitsubushi}}) || {{Button|GCN|A|s=32px}} || Galleom stomps forward with one foot. This is Galleom's fastest and least telegraphed attack, but it is also one of his least powerful (though still strong enough to KO at 60% on Intense and around 100% on Easy). || 1 | |||
|- | |||
| Hammer Knuckle<br>({{ja|ハンマーナックル|Hanmā Nakkuru}}) || {{Button|GCN|A|s=32px}}+{{Button|GCN|D-Pad|U|s=32px}} || Galleom spins, then punches the ground with both fists to create a shockwave. The fists hit has extreme power, inflicting up to 55%. The shockwave deals decent damage (up to 25%) and hit with completely horizontal knockback. On higher difficulties, the shockwave can send the player very far, potentially past the [[blast line]]s. The shockwave covers the length of the entire stage. || 2 | |||
|- | |||
| Double Arm Press<br>({{ja|ダブルアームプレス|Daburu Āmu Puresu}})|| {{Button|GCN|A|s=32px}}+{{Button|GCN|D-Pad|D|s=32px}} || Galleom slams his fists on both sides of him, similar to [[Donkey Kong]]'s down smash. This is one of Galleom's fastest attacks, though it can be avoided by just being right near Galleom. If the player hits the lower part of Galleom's arms, they could potentially be [[meteor smash]]ed. || 2 | |||
|- | |||
| Uppercut<br>({{ja|アッパーカット|Uppākatto}}) || {{Button|GCN|A|s=32px}}+{{Button|GCN|D-Pad|L|s=32px}}/{{Button|GCN|D-Pad|R|s=32px}} || Galleom does a huge, jet-propelled uppercut. Noticeable windup, but the uppercut travels fast when unleashed. The fist is a sweetspot with extreme knockback, OHKOing on Intense when Galleom is at low health, but not when it's at full health. In Boss Battles this attack is curiously made much faster, unlike all the others. If Galleom is fought as one of the last three [[boss]]es before [[Tabuu]], it is even swifter and more unpredictable. However, it is also his most [[nerfed]] move, with the sweetspot KOing at 35% on Intense. || 1 | |||
|- | |||
| Double Lariat<br>({{ja|ダブルラリアット|Daburu Rariatto}})|| {{Button|GCN|B|s=32px}} || Galleom charges up, then spins around. It creates a very powerful [[vacuum]] to suck players in, though its [[range]] is very short and it lasts briefly; furthermore, any character can just walk away to not get sucked in even on Intense difficulty. If players get sucked in near the beginning of the attack and multiple hits chain, they will sustain an extreme amount of damage (quite over 150%) with guaranteed OHKO power on Intense. The last KOing hit deals perfectly vertical knockback. This move is somewhat similar to [[Spinning Kong]]. || 2 | |||
|- | |||
| Giant Jump<br>({{ja|大ジャンプ|Dai Janpu}}) || {{Button|GCN|B|s=32px}}+{{Button|GCN|D-Pad|U|s=32px}} || Galleom jumps high, and then lands with a big stomp. Regardless of where he lands, he will slide to the side opposite of where he jumped. It deals up to 61%, OHKOing on Intense when Galleom is at low health, but not when at full health.|| 2 | |||
|- | |||
| Shooting<br>({{ja|射撃|Shageki}}) || {{Button|GCN|B|s=32px}}+{{Button|GCN|D-Pad|D|s=32px}} || Galleom transforms into a tank, then shoots four missiles. On the higher difficulties, every missile can inflict up to 30% damage, KOing slightly under 60%. Despite being projectiles, the missiles are unable to be [[reflected]] in ''Brawl'' as they pass through reflector hitboxes, but they can be reflected in his ''Ultimate'' incarnation. || 2 | |||
|- | |||
| Missile<br>({{ja|ミサイル|Misairu}}) || {{Button|GCN|B|s=32px}}+{{Button|GCN|D-Pad|L|s=32px}}/{{Button|GCN|D-Pad|R|s=32px}}|| Galleom shoots two missiles two times. During this time, his "mask" has a hitbox and can still damage on contact. The missiles have roughly the same power of their Tank version, but are easier to avoid. || 1 | |||
|- | |||
| Collapse<br>({{ja|倒れこみ|Taorekomi}}) || {{Button|GCN|X|s=32px}} || Galleom stiffens, and tries to fall on the player. Huge knockback, being an invariable one-hit KO on Intense difficulty. It's similar to [[Luigi]]'s side taunt but as an actual attack. Damage can reach 62%, while knockback is very horizontal. If the player touches Galleom's back, they will only take minor knockback and less than 20%, being the only possibility to survive on the higher difficulties. || 2 | |||
|- | |||
| Rush<br>({{ja|突進|Tosshin}}) || {{Button|GCN|R|s=32px}} || Galleom transforms into a tank, then rushes forward, dealing vertical knockback. || 2 | |||
|- | |||
| Rush and Slam || {{Button|GCN|L|s=32px}} || Used at low health, Galleom uses Rush then also tries to fall on the player from above - which deals enormous spiked or horizontal knockback, and will OHKO on Intense, much like Collapse. Damage can reach a huge 70%. Afterwards, he will stay vulnerable on the ground for a long time (up to three seconds). It is easy for him to be KO'd during this down time, as he must be at low HP already to initiate the fall (usually 25% or lower). || 2 | |||
|- | |||
| Stomping Jump || Unusable || Galleom stomps across the stage, which will [[bury]] grounded players, and [[meteor smash]] airborne players. Galleom will stomp four times, and will stomp in place if he reaches the edge of the screen before finishing the move. On the higher difficulties, each stomp deals 38% damage, for a combined maximum damage of 144% if all hits land.|| 1 | |||
|} | |} | ||
<gallery> | <gallery> | ||
Galleomjump.jpg|Galleom stomping across the stage. | Galleomjump.jpg|Galleom stomping across the stage. | ||
| Line 81: | Line 70: | ||
GalleomSpin.jpg|Galleom spinning around. | GalleomSpin.jpg|Galleom spinning around. | ||
GalleomSpinPose.jpg|Galleom's pose after the spin is complete. | GalleomSpinPose.jpg|Galleom's pose after the spin is complete. | ||
GalleomShockwave.jpg|Galleom punching the ground with both fists, creating a shockwave as a result. | GalleomShockwave.jpg|Galleom punching the ground with both fists, creating a shockwave as a result. | ||
GalleomLJump.jpg|Galleom during the high jump. | GalleomLJump.jpg|Galleom during the high jump. | ||
GalleomLJump2.jpg|Galleom's stomp after performing the high jump. | GalleomLJump2.jpg|Galleom's stomp after performing the high jump. | ||
| Line 88: | Line 77: | ||
GalleomTankMissile.jpg|Galleom firing missiles in tank form. | GalleomTankMissile.jpg|Galleom firing missiles in tank form. | ||
</gallery> | </gallery> | ||
====HP and damage taken==== | |||
{|class="wikitable" style="margin:1em auto 1em auto; text-align:center" | |||
|- | |||
!HP Values!!colspan=3|[[File:EasyDifficulty.png|32px|link=Difficulty|Lowest difficulty]]!!colspan=3|[[File:NormalDifficulty.png|32px|link=Difficulty|Below-middle difficulty]]!!colspan=3|[[File:HardDifficulty.png|32px|link=Difficulty|Middle difficulty]]!!colspan=3|[[File:VeryHardDifficulty.png|32px|link=Difficulty|Above-middle difficulty]]!!colspan=3|[[File:IntenseDifficulty.png|32px|link=Difficulty|Highest difficulty]] | |||
|- | |||
|The Wilds (Part I)||colspan=3|315||colspan=3|375||colspan=3|420||colspan=3|495||colspan=3|570 | |||
|- | |||
|The Ruined Hall||colspan=3|205||colspan=3|225||colspan=3|240||colspan=3|265||colspan=3|290 | |||
|- | |||
|The Great Maze||colspan=3|333||colspan=3|399||colspan=3|444||colspan=3|513||colspan=3|570 | |||
|-style="font-weight:bold" | |||
|Round||1-3||4-6||7-9||1-3||4-6||7-9||1-3||4-6||7-9||1-3||4-6||7-9||1-3||4-6||7-9 | |||
|- | |||
|Boss Battles||114.8||120.4||132||126||134||146||138||146.5||160||150||160||177||182||196||215 | |||
|} | |||
{{EnemyResistances | |||
|freezing=1.3 | |||
|flame=0.75 | |||
|water=1.3 | |||
|si=0.95 | |||
}} | |||
Like all bosses in ''Brawl'', Galleom gains an additional ×0.6 damage resistance modifier when fought in co-op mode, effectively gaining 67% more health. This modifier is applied whenever the second player is in-game, and is no longer applied if the second player loses all their [[stock]]s. | |||
===Trophies=== | |||
{{see also|List of SSBB trophies (The Subspace Emissary)}} | |||
Galleom has two [[trophies]], one featuring his Robot Form (which is obtained by using a [[Trophy Stand]] on Galleom), and the Galleom (Tank Form) trophy, which is obtained by completing [[Boss Battles]] mode on Intense difficulty. Completing Boss Battles on Intense difficulty is the only way to get this trophy in the [[NTSC]] version of ''Brawl'', as using a [[Golden Hammer]] on the challenge square holding the trophy will not work—this is not the case in the [[PAL]] version, where every box can be broken. | |||
{{Trophy | |||
|name=Galleom | |||
|image=Galleom - Brawl Trophy.png | |||
|desc=An enormous, transforming robot and [[Subspace Army]] warmonger. Galleom is characterized by various attack threats, including jump stomps, beefy arm bludgeonings, and even missiles fired from its back. It also has a Subspace Bomb set in its head, which it can use in times of desperation to blow itself up and drag the player into the darkness of Subspace. It's one tough robot! | |||
|gamelist={{Trophy games|console1=Wii|game1=Super Smash Bros. Brawl}} | |||
|game=Brawl | |||
}} | |||
{{clrl}} | |||
{{Trophy | |||
|name=Galleom (Tank Form) | |||
|image=Galleom (Tank Form) - Brawl Trophy.png | |||
|desc=Galleom with its arms and legs neatly compacted into tank form. In this form, it can get around the combat field at high speed. It can quickly change into humanoid form to take advantage of awesome combat capabilities. Its last defense and most threatening trait is a built-in Subspace Bomb. In tank form, Galleom can still attack with body slams and missiles. It never runs. | |||
|gamelist={{Trophy games|console1=Wii|game1=Super Smash Bros. Brawl}} | |||
|game=Brawl | |||
}} | |||
{{clrl}} | |||
==In ''Super Smash Bros. Ultimate''== | |||
'''Galleom''' returns in ''[[Super Smash Bros. Ultimate]]'', playing a role as a boss in {{SSBU|Classic Mode}} and in the [[World of Light]] adventure mode. | |||
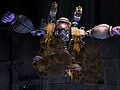
Galleom appears in a battlefield that resembles the large hangar in [[Shadow Moses Island]] from ''[[Metal Gear (universe)|Metal Gear Solid]]'', where [[Solid Snake]] fights [[Metal Gear REX]], crashing onto the ground before transforming out of his tank form and letting out a roar, jets of steam bursting from his body. Galleom appears to have most of his attack patterns from its past incarnation in ''[[Super Smash Bros. Brawl]]'', with some new additions: | |||
*His attacks deal less damage and knockback, even on the highest [[difficulty]] with no [[spirit]]s. | |||
*Galleom can now launch six missiles after transforming into his tank form, firing in three bursts of two missiles each. | |||
*Galleom has a new move called "Grab" ({{ja|つかみ|Tsukami}}) in which he stretches his arms out, then tries to grab the fighter. If the grab is successful, Galleom will crush the player, dealing constant damage and slamming them into the ground which launches them unless the fighter breaks free. Like other [[grab]]s, this can bypass shields as well as counters. | |||
*When charging in his tank form, Galleom will turn around and charge back as he returns to the battlefield in an attempt to hit the fighter again. | |||
*Galleom now uses the hover jets on his feet to aim his jump attack, aiming for the fighter as he lands. | |||
*When reduced to a quarter of his health, Galleom turns red and stomps around wildly, dealing flame damage if he hits the player with one of his stomps. Afterwards, all of his attack patterns are sped up and the lag between his attacks is significantly decreased. | |||
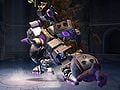
When defeated, explosions erupt across Galleom's body as pieces of it (including one of its arms) fly off before the metal monster falls over with his remaining hand on his chest, like he did in the [[Subspace Emissary]]. | |||
The Fighters that are assigned to fight Galleom in Classic Mode at the end of their runs are {{SSBU|R.O.B.}}, {{SSBU|Snake}}, {{SSBU|Wolf}}, {{SSBU|Dark Pit}}, {{SSBU|King K. Rool}} and {{SSBU|Min Min}}. {{SSBU|Mega Man}} and {{SSBU|Sephiroth}} are also assigned to fight Galleom, but not for the final round, as Mega Man fights {{SSBU|Dr. Mario}} (representing Dr. Wily), then {{SSBU|Mewtwo}} (upon Dr. Mario’s defeat, who represents Wily Alien) afterwards, and Sephiroth fights Galleom in the second round of his route. Usually, {{SSBUMusicLink|Super Smash Bros.|Boss Battle - Super Smash Bros. Brawl}} plays during the battle, but {{SSBUMusicLink|Mega Man|Guts Man Stage}} plays in Mega Man's Classic Mode, {{SSBUMusicLink|ARMS|ARMS Grand Prix Final Battle}} plays in Min Min's Classic Mode, and {{SSBUMusicLink|Super Smash Bros.|Galeem / Dharkon}} plays during the boss rush. | |||
===Spirit=== | |||
{|class="wikitable" | |||
! No. !! Image !! Name !! Type !! Class !! Slots | |||
! Base [[File:Equipment Icon Power Badge.png|20px|Power]] | |||
! Max [[File:Equipment Icon Power Badge.png|20px|Power]] | |||
! Base [[File:Equipment Icon Brawn Badge.png|20px|Attack]] | |||
! Max [[File:Equipment Icon Brawn Badge.png|20px|Attack]] | |||
! Base [[File:Equipment Icon Protection Badge.png|20px|Defense]] | |||
! Max [[File:Equipment Icon Protection Badge.png|20px|Defense]] | |||
! Ability !! Series | |||
|- | |||
| 1,098 || {{SpiritTableName|Galleom}} || {{SpiritType|Neutral}} || ★★ || 3 || 1565 || 6334 || 715 || 2893 || 790 || 3198 || Fist Attack ↑ || ''Super Smash Bros.'' Series | |||
|} | |||
=== Role in World of Light === | |||
[[File:Galleom WoL.jpg|thumb|Galleom's location in World of Light|left]] | |||
Galleom is assigned by Galeem to guard the [[Base]] sub area of the Light Realm, which can be accessed in a jungle like area. Defeating Galleom is necessary to weaken the shield protecting Galeem. | |||
He is later fought again during the {{b|final stage|World of Light}}, along with all the others bosses except for Master and Crazy Hand. In said battle, Galleom is the first of the Light Realm bosses to appear on screen in the second phase, which could indicate that he is considered the first boss in World of Light. | |||
{{clr}} | |||
==Names in other languages== | |||
{{langtable | |||
|ja={{ja|ガレオム|Gareomu}}, ''Galleom'' | |||
|en=Galleom | |||
|fr=Galéon | |||
|es=Galleom | |||
|de=Galleom | |||
|it=Galleom | |||
|nl=Galleom | |||
|ru={{rollover|Галлеом|Galleom|?}} | |||
|ko={{rollover|가레옴|Gale-om|?}}, ''Galleom'' | |||
|zh_cn={{rollover|加雷欧姆|Jiāléi'ōumǔ|?}}, ''Galleom'' | |||
|zh_tw={{rollover|加雷歐姆|Jiāléi'ōumǔ|?}}, ''Galleom'' | |||
}} | |||
==Trivia== | |||
*Galleom's name is likely a reference to [[Wikipedia:Gallium|gallium]], a metallic element which is used in electronics. | |||
*Galleom has two different death animations. The first involves him falling over and kneeling, weakened but still operational, while the second involves him falling onto his back and subsequently exploding; however, it can still be seen moving slightly. The latter appears in the last few rounds of [[Boss Battles]], and sometimes appears after defeating Galleom with a powerful attack at low health, such as with [[Falcon Punch]] and [[Kafrizz]]. | |||
*In Boss Battles, the arena that Galleom appears in (in the desert or in the large ruin chamber) is random. | |||
*The music in Galleom's Subspace Emissary battles, {{SSBBMusicLink|Super Smash Bros. Brawl|Boss Battle Song 1}}, is the same as the [[Duon]] battle. Galleom and Duon are the only bosses who originate from ''Brawl'', aside from [[Tabuu]]. | |||
**Oddly, in ''Ultimate'', Duon's spirit battle plays {{SSBUMusicLink|Super Smash Bros.|Boss Battle Song 1}} as in the Subspace Emissary, but Galleom's boss battle plays {{SSBUMusicLink|Super Smash Bros.|Boss Battle - Super Smash Bros. Brawl}} instead. | |||
*Galleom is the only boss in The Subspace Emissary who is battled twice before The Great Maze | |||
*After the Great Maze is completed, the player cannot fight Galleom in The Wilds (Part I). | |||
*Galleom is one of two bosses (the other being Tabuu) to appear in two forms of trophies. For Galleom, it's the normal one via the [[Trophy Stand]] and the one for completing Boss Battles Mode on Intense. | |||
*As of version 12.0.0, Galleom is the most common boss for ''Ultimate'''s Classic Mode who isn't Master Hand, being fought by 8 characters. | |||
*If Galleom is defeated in Tank Form, it will continue the attack (Rush or Rush & Slam) until the end, even falling on the player. However, these attacks cannot KO the player in this state, as the blastzones cease to exist once Galleom's health is fully depleted. | |||
{{Bosses}} | {{Bosses}} | ||
{{SubspaceArmy}} | {{SubspaceArmy}} | ||
| Line 96: | Line 194: | ||
[[Category:Trophies (SSBB)]] | [[Category:Trophies (SSBB)]] | ||
[[Category:Super Smash Bros. universe]] | [[Category:Super Smash Bros. universe]] | ||
[[Category:Spirits]] | |||
[[Category:Galleom]] | |||
[[es:Galleom]] | |||
Latest revision as of 03:12, February 3, 2024
- Not to be confused with Galeem.
| Galleom | |
|---|---|
  
| |
| A boss in | Brawl Ultimate |
| Universe | Super Smash Bros. |
| Point worth | 30000 |
| Location | The Wilds (Part I) The Ruined Hall Base |
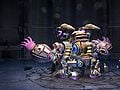
Galleom (ガレオム, Galleom) is a boss native to the Super Smash Bros. series who appears in Super Smash Bros. Brawl and Super Smash Bros. Ultimate.
Boss description[edit]

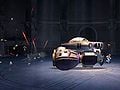
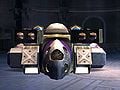
Galleom appears to be a giant, purple robot/cyborg which has simian features, and is also capable of transforming into a jet propelled tank labelled as his "Tank Form". He is covered head to toe in a heavy mechanized arsenal, possessing two rocket launchers as shoulder weapons, and powerful jets on his feet. He wears an iron mask that covers his face, as well as metallic arm braces over his bulky forearms. He is also quite agile in his simian form, capable of performing extremely large jumps, leading to the possibility that his jumps are jet propelled. In his tank form, he is much more compact, only being able to attack by either firing the missiles on his back, or simply by ramming into his foe at a high speed. As a last resort, he can set off a Subspace Bomb hidden within his head.
In Super Smash Bros. Brawl[edit]
Role in The Subspace Emissary[edit]


Galleom is the fourth boss introduced in The Subspace Emissary. Marth, Ike, and Meta Knight were the first to spot Galleom as he was traveling through the desert in his tank form. The trio quickly caught up to him, causing Galleom to transform and fight the heroes. He was defeated and then jumps off the cliff to make a tactical retreat, only for him to land onto unstable ground which gave way, and Galleom landed in the Ruined Hall, where Lucas and the Pokémon Trainer challenge him. They manage to defeat him, and, in a last desperate attempt, Galleom grabs both Lucas and the Pokémon Trainer, starts the countdown on his emergency Subspace Bomb, then jets into the sky. Lucas manages to free both himself and the Pokémon Trainer by using PK Thunder, but in the process causes them both to fall a great distance as Galleom explodes. Meta Knight manages to catch the duo just before they land, then fly them away from the Subspace Bomb's blast. Galleom is then sucked into The Great Maze, along with the trophy of Wario, and revived; he must eventually be fought again in the Maze.
As a playable character[edit]
Like all Brawl bosses, Galleom can be controlled in Boss Battles through hacking. The start button will self-destruct it.
Moveset[edit]
Like all bosses Galleom is controllable with hacks in Boss Battles Mode. The start button will, like all bosses, self-destruct him. Its attacks are very powerful, and several of them gain OHKO power on Intense. Move names with a Japanese name listed afterwards are sourced from the official Japanese strategy guide to Super Smash Bros. Ultimate.
| Move | Input | Description | Move Number |
|---|---|---|---|
| Trample (踏みつぶし) |
Galleom stomps forward with one foot. This is Galleom's fastest and least telegraphed attack, but it is also one of his least powerful (though still strong enough to KO at 60% on Intense and around 100% on Easy). | 1 | |
| Hammer Knuckle (ハンマーナックル) |
Galleom spins, then punches the ground with both fists to create a shockwave. The fists hit has extreme power, inflicting up to 55%. The shockwave deals decent damage (up to 25%) and hit with completely horizontal knockback. On higher difficulties, the shockwave can send the player very far, potentially past the blast lines. The shockwave covers the length of the entire stage. | 2 | |
| Double Arm Press (ダブルアームプレス) |
Galleom slams his fists on both sides of him, similar to Donkey Kong's down smash. This is one of Galleom's fastest attacks, though it can be avoided by just being right near Galleom. If the player hits the lower part of Galleom's arms, they could potentially be meteor smashed. | 2 | |
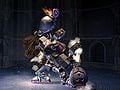
| Uppercut (アッパーカット) |
Galleom does a huge, jet-propelled uppercut. Noticeable windup, but the uppercut travels fast when unleashed. The fist is a sweetspot with extreme knockback, OHKOing on Intense when Galleom is at low health, but not when it's at full health. In Boss Battles this attack is curiously made much faster, unlike all the others. If Galleom is fought as one of the last three bosses before Tabuu, it is even swifter and more unpredictable. However, it is also his most nerfed move, with the sweetspot KOing at 35% on Intense. | 1 | |
| Double Lariat (ダブルラリアット) |
Galleom charges up, then spins around. It creates a very powerful vacuum to suck players in, though its range is very short and it lasts briefly; furthermore, any character can just walk away to not get sucked in even on Intense difficulty. If players get sucked in near the beginning of the attack and multiple hits chain, they will sustain an extreme amount of damage (quite over 150%) with guaranteed OHKO power on Intense. The last KOing hit deals perfectly vertical knockback. This move is somewhat similar to Spinning Kong. | 2 | |
| Giant Jump (大ジャンプ) |
Galleom jumps high, and then lands with a big stomp. Regardless of where he lands, he will slide to the side opposite of where he jumped. It deals up to 61%, OHKOing on Intense when Galleom is at low health, but not when at full health. | 2 | |
| Shooting (射撃) |
Galleom transforms into a tank, then shoots four missiles. On the higher difficulties, every missile can inflict up to 30% damage, KOing slightly under 60%. Despite being projectiles, the missiles are unable to be reflected in Brawl as they pass through reflector hitboxes, but they can be reflected in his Ultimate incarnation. | 2 | |
| Missile (ミサイル) |
Galleom shoots two missiles two times. During this time, his "mask" has a hitbox and can still damage on contact. The missiles have roughly the same power of their Tank version, but are easier to avoid. | 1 | |
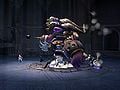
| Collapse (倒れこみ) |
Galleom stiffens, and tries to fall on the player. Huge knockback, being an invariable one-hit KO on Intense difficulty. It's similar to Luigi's side taunt but as an actual attack. Damage can reach 62%, while knockback is very horizontal. If the player touches Galleom's back, they will only take minor knockback and less than 20%, being the only possibility to survive on the higher difficulties. | 2 | |
| Rush (突進) |
Galleom transforms into a tank, then rushes forward, dealing vertical knockback. | 2 | |
| Rush and Slam | Used at low health, Galleom uses Rush then also tries to fall on the player from above - which deals enormous spiked or horizontal knockback, and will OHKO on Intense, much like Collapse. Damage can reach a huge 70%. Afterwards, he will stay vulnerable on the ground for a long time (up to three seconds). It is easy for him to be KO'd during this down time, as he must be at low HP already to initiate the fall (usually 25% or lower). | 2 | |
| Stomping Jump | Unusable | Galleom stomps across the stage, which will bury grounded players, and meteor smash airborne players. Galleom will stomp four times, and will stomp in place if he reaches the edge of the screen before finishing the move. On the higher difficulties, each stomp deals 38% damage, for a combined maximum damage of 144% if all hits land. | 1 |
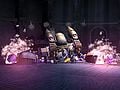
Galleom stomping across the stage.
Galleom firing two missiles.
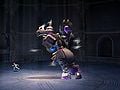
Galleom performing an uppercut.
Galleom stomping with one foot.
Galleom stiffening and falling on the player.
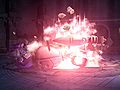
Galleom after hitting the ground after stiffening and falling.
Galleom punching both sides of him.
Galleom spinning around.
Galleom's pose after the spin is complete.
Galleom punching the ground with both fists, creating a shockwave as a result.
Galleom during the high jump.
Galleom's stomp after performing the high jump.
Galleom dashing while in tank form.
Galleom after falling from the air in tank form.
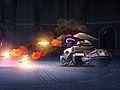
Galleom firing missiles in tank form.


HP and damage taken[edit]
| HP Values | |||||||||||||||
|---|---|---|---|---|---|---|---|---|---|---|---|---|---|---|---|
| The Wilds (Part I) | 315 | 375 | 420 | 495 | 570 | ||||||||||
| The Ruined Hall | 205 | 225 | 240 | 265 | 290 | ||||||||||
| The Great Maze | 333 | 399 | 444 | 513 | 570 | ||||||||||
| Round | 1-3 | 4-6 | 7-9 | 1-3 | 4-6 | 7-9 | 1-3 | 4-6 | 7-9 | 1-3 | 4-6 | 7-9 | 1-3 | 4-6 | 7-9 |
| Boss Battles | 114.8 | 120.4 | 132 | 126 | 134 | 146 | 138 | 146.5 | 160 | 150 | 160 | 177 | 182 | 196 | 215 |
| Damage taken | ×1.0 | ×1.0 | ×1.0 | ×1.3 | ×0.75 | ×1.0 | ×1.3 | ×1.0 | ×1.0 | ×1.0 | ×0.95 |
Like all bosses in Brawl, Galleom gains an additional ×0.6 damage resistance modifier when fought in co-op mode, effectively gaining 67% more health. This modifier is applied whenever the second player is in-game, and is no longer applied if the second player loses all their stocks.
Trophies[edit]
Galleom has two trophies, one featuring his Robot Form (which is obtained by using a Trophy Stand on Galleom), and the Galleom (Tank Form) trophy, which is obtained by completing Boss Battles mode on Intense difficulty. Completing Boss Battles on Intense difficulty is the only way to get this trophy in the NTSC version of Brawl, as using a Golden Hammer on the challenge square holding the trophy will not work—this is not the case in the PAL version, where every box can be broken.

- Galleom
- An enormous, transforming robot and Subspace Army warmonger. Galleom is characterized by various attack threats, including jump stomps, beefy arm bludgeonings, and even missiles fired from its back. It also has a Subspace Bomb set in its head, which it can use in times of desperation to blow itself up and drag the player into the darkness of Subspace. It's one tough robot!
 : Super Smash Bros. Brawl
_-_Brawl_Trophy.png)
- Galleom (Tank Form)
- Galleom with its arms and legs neatly compacted into tank form. In this form, it can get around the combat field at high speed. It can quickly change into humanoid form to take advantage of awesome combat capabilities. Its last defense and most threatening trait is a built-in Subspace Bomb. In tank form, Galleom can still attack with body slams and missiles. It never runs.
- : Super Smash Bros. Brawl
In Super Smash Bros. Ultimate[edit]
Galleom returns in Super Smash Bros. Ultimate, playing a role as a boss in Classic Mode and in the World of Light adventure mode.
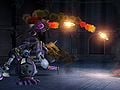
Galleom appears in a battlefield that resembles the large hangar in Shadow Moses Island from Metal Gear Solid, where Solid Snake fights Metal Gear REX, crashing onto the ground before transforming out of his tank form and letting out a roar, jets of steam bursting from his body. Galleom appears to have most of his attack patterns from its past incarnation in Super Smash Bros. Brawl, with some new additions:
- His attacks deal less damage and knockback, even on the highest difficulty with no spirits.
- Galleom can now launch six missiles after transforming into his tank form, firing in three bursts of two missiles each.
- Galleom has a new move called "Grab" (つかみ) in which he stretches his arms out, then tries to grab the fighter. If the grab is successful, Galleom will crush the player, dealing constant damage and slamming them into the ground which launches them unless the fighter breaks free. Like other grabs, this can bypass shields as well as counters.
- When charging in his tank form, Galleom will turn around and charge back as he returns to the battlefield in an attempt to hit the fighter again.
- Galleom now uses the hover jets on his feet to aim his jump attack, aiming for the fighter as he lands.
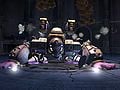
- When reduced to a quarter of his health, Galleom turns red and stomps around wildly, dealing flame damage if he hits the player with one of his stomps. Afterwards, all of his attack patterns are sped up and the lag between his attacks is significantly decreased.
When defeated, explosions erupt across Galleom's body as pieces of it (including one of its arms) fly off before the metal monster falls over with his remaining hand on his chest, like he did in the Subspace Emissary.
The Fighters that are assigned to fight Galleom in Classic Mode at the end of their runs are R.O.B., Snake, Wolf, Dark Pit, King K. Rool and Min Min. Mega Man and Sephiroth are also assigned to fight Galleom, but not for the final round, as Mega Man fights Dr. Mario (representing Dr. Wily), then Mewtwo (upon Dr. Mario’s defeat, who represents Wily Alien) afterwards, and Sephiroth fights Galleom in the second round of his route. Usually, Boss Battle - Super Smash Bros. Brawl plays during the battle, but Guts Man Stage plays in Mega Man's Classic Mode, ARMS Grand Prix Final Battle plays in Min Min's Classic Mode, and Galeem / Dharkon plays during the boss rush.
Spirit[edit]
| No. | Image | Name | Type | Class | Slots | Base |
Max |
Base |
Max |
Base |
Max |
Ability | Series |
|---|---|---|---|---|---|---|---|---|---|---|---|---|---|
| 1,098 |  |
Galleom | ★★ | 3 | 1565 | 6334 | 715 | 2893 | 790 | 3198 | Fist Attack ↑ | Super Smash Bros. Series |
Role in World of Light[edit]

Galleom is assigned by Galeem to guard the Base sub area of the Light Realm, which can be accessed in a jungle like area. Defeating Galleom is necessary to weaken the shield protecting Galeem.
He is later fought again during the final stage, along with all the others bosses except for Master and Crazy Hand. In said battle, Galleom is the first of the Light Realm bosses to appear on screen in the second phase, which could indicate that he is considered the first boss in World of Light.
Names in other languages[edit]
| Language | Name |
|---|---|
| ガレオム, Galleom | |
| Galleom | |
| Galéon | |
| Galleom | |
| Galleom | |
| Galleom | |
| 加雷欧姆, Galleom | |
| 加雷歐姆, Galleom | |
| 가레옴, Galleom | |
| Galleom | |
| Галлеом |
Trivia[edit]
- Galleom's name is likely a reference to gallium, a metallic element which is used in electronics.
- Galleom has two different death animations. The first involves him falling over and kneeling, weakened but still operational, while the second involves him falling onto his back and subsequently exploding; however, it can still be seen moving slightly. The latter appears in the last few rounds of Boss Battles, and sometimes appears after defeating Galleom with a powerful attack at low health, such as with Falcon Punch and Kafrizz.
- In Boss Battles, the arena that Galleom appears in (in the desert or in the large ruin chamber) is random.
- The music in Galleom's Subspace Emissary battles, Boss Battle Song 1, is the same as the Duon battle. Galleom and Duon are the only bosses who originate from Brawl, aside from Tabuu.
- Oddly, in Ultimate, Duon's spirit battle plays Boss Battle Song 1 as in the Subspace Emissary, but Galleom's boss battle plays Boss Battle - Super Smash Bros. Brawl instead.
- Galleom is the only boss in The Subspace Emissary who is battled twice before The Great Maze
- After the Great Maze is completed, the player cannot fight Galleom in The Wilds (Part I).
- Galleom is one of two bosses (the other being Tabuu) to appear in two forms of trophies. For Galleom, it's the normal one via the Trophy Stand and the one for completing Boss Battles Mode on Intense.
- As of version 12.0.0, Galleom is the most common boss for Ultimate's Classic Mode who isn't Master Hand, being fought by 8 characters.
- If Galleom is defeated in Tank Form, it will continue the attack (Rush or Rush & Slam) until the end, even falling on the player. However, these attacks cannot KO the player in this state, as the blastzones cease to exist once Galleom's health is fully depleted.
| Bosses | |
|---|---|
| Super Smash Bros. | Master Hand · Metal Mario · Giant Donkey Kong · Fighting Polygon Team |
| Melee | Master Hand · Crazy Hand · Giga Bowser · Fighting Wire Frames (Male · Female) |
| Brawl | Master Hand · Crazy Hand · Petey Piranha · Rayquaza · Porky · Galleom · Ridley · Duon · Meta Ridley · Tabuu · Fighting Alloy Team (Red · Blue · Yellow · Green) · False characters |
| Smash 4 | Master Hand · Crazy Hand · Master Core · Fighting Mii Team |
| Ultimate | Master Hand · Crazy Hand · Rathalos · Galleom · Giga Bowser · Galeem · Dharkon · Dracula · Ganon · Marx · Fighting Mii Team · False characters |