Meta Knight (SSBB)/Up aerial: Difference between revisions
m (→Overview) |
No edit summary |
||
| Line 20: | Line 20: | ||
*Optimal shield advantage: -10 | *Optimal shield advantage: -10 | ||
*Optimal shield drop advantage: -3 | *Optimal shield drop advantage: -3 | ||
{{MvSubNavMetaKnight|g=SSBB}} | |||
[[Category:Meta Knight (SSBB)]] | [[Category:Meta Knight (SSBB)]] | ||
[[Category:Up aerials]] | [[Category:Up aerials]] | ||
Revision as of 17:21, October 22, 2013
Overview
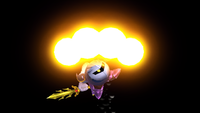
Meta Knight slashes above himself extremely quickly. If the jump button is held or pressed repeatedly while performing it multiple times, Meta Knight can rise in the air a certain distance while attack. It has the shortest ending lag of any aerial in the game, and is one of the fastest attacks in the game (2 frames). The attack's low ending lag is part of what gives Meta Knight one of the strongest planking capabilities in the game (using two up aerials and regrabbing the ledge in the shortest time possible provides only 2 frames of vulnerability). It is fast enough to be performed three times in one short hop. Like most of Meta Knight's other moves, it has transcendent priority. Does 6% damage. Very useful for juggling, and is good for combos; at lower percentages, it can chain into itself. A well-known Meta Knight combo is several rising up airs followed by a Mach Tornado at the top of the screen, which will usually Star KO the opponent should they fail to escape; this is especially effective against floaty characters.
Attack data
- Startup: frame 1
- Hits on: frame 2
- Hitbox out: frames 2-3
- Aerial cooldown: frames 4-13
- Landing lag: 12 frames
- Autocancel: frame 21
- IASA frames: 14
- Shield hitlag differential: 0
- Shield stun: 2
- Optimal shield advantage: -10
- Optimal shield drop advantage: -3
|


