Marth (SSBU)/Forward tilt: Difference between revisions
| (3 intermediate revisions by 3 users not shown) | |||
| Line 1: | Line 1: | ||
{{ArticleIcons|ssbu=y}} | {{ArticleIcons|ssbu=y}} | ||
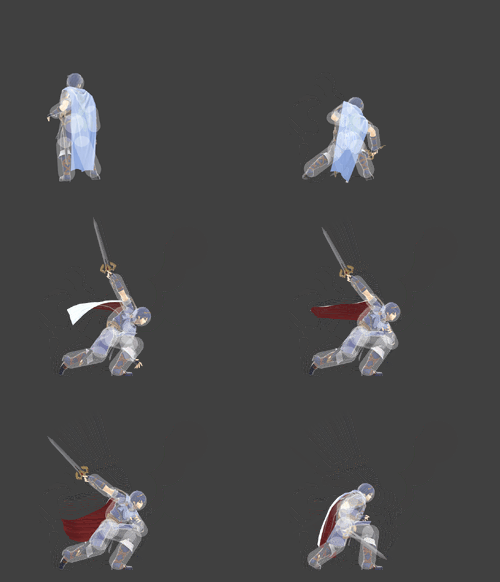
[[File:MarthFTiltSSBU.gif|thumb|250px|Hitbox visualization showing Marth's forward tilt.]] | [[File:MarthFTiltSSBU.gif|thumb|250px|Hitbox visualization showing Marth's forward tilt.]] | ||
==Overview== | ==Overview== | ||
Compared to [[../Forward smash|forward smash]], forward tilt has more range, faster startup, and less end lag. This makes it safer as not only will it keep Marth at a safe distance, he will also have less time to be punished if it misses or have more time to followup if it hits. It has a lot of vertical range, letting it hit opponents on the lower platforms of stages (like {{SSBU|Battlefield}} and [[Pokémon Stadium 2]]) to close out stocks. Stages like [[Yoshi's Story]] and [[Dream Land]] have higher platforms that make it harder for forward tilt to reach, in which case [[../Up tilt|up tilt]] or aerials can be mixed in to keep the opponent above Marth and in disadvantage. | |||
At lower percents, forward tilt is not good to use in the [[neutral game]], especially against faster characters capable of disrupting Marth's space control. In particular, untippered forward tilt has almost no follow ups against most low percent targets as the lower knockback and closer range makes it easier for the opponent to recover and prevent a followup. Furthermore, the nature of [[dash]]ing and variety of high range characters in ''Ultimate'' makes dashing back out of this situation often troublesome. A better use is to use it as a followup to a [[fast fall]]ed aerial, the most useful of which being [[../Neutral aerial|neutral air]] (which is his safest move on shield when tippered, fast falled, spaced, and timed correctly) or [[../Forward aerial|forward air]] (for dealing with opponents that may be approaching above too quickly for forward tilt to challenge). Alternatively, forward tilt can be a followup to Marth's [[tech chase]]s that are often started with down tilt. As mentioned above, it is again a safer alternative to forward smash to punish missed [[tech]]s, though [[../Down smash|down smash]] is more preferred in this situation over both options. | |||
==Hitboxes== | ==Hitboxes== | ||
| Line 11: | Line 12: | ||
|damage=9.0% | |damage=9.0% | ||
|angle=361 | |angle=361 | ||
|af=3 | |||
|bk=30 | |bk=30 | ||
|ks=70 | |ks=70 | ||
| Line 29: | Line 31: | ||
|damage=9.0% | |damage=9.0% | ||
|angle=361 | |angle=361 | ||
|af=3 | |||
|bk=30 | |bk=30 | ||
|ks=70 | |ks=70 | ||
| Line 47: | Line 50: | ||
|damage=12.0% | |damage=12.0% | ||
|angle=361 | |angle=361 | ||
|af=3 | |||
|bk=55 | |bk=55 | ||
|ks=85 | |ks=85 | ||
| Line 62: | Line 66: | ||
}} | }} | ||
|} | |} | ||
==Timing== | ==Timing== | ||
{|class="wikitable" | {|class="wikitable" | ||
Latest revision as of 20:13, June 19, 2022
Overview[edit]
Compared to forward smash, forward tilt has more range, faster startup, and less end lag. This makes it safer as not only will it keep Marth at a safe distance, he will also have less time to be punished if it misses or have more time to followup if it hits. It has a lot of vertical range, letting it hit opponents on the lower platforms of stages (like Battlefield and Pokémon Stadium 2) to close out stocks. Stages like Yoshi's Story and Dream Land have higher platforms that make it harder for forward tilt to reach, in which case up tilt or aerials can be mixed in to keep the opponent above Marth and in disadvantage.
At lower percents, forward tilt is not good to use in the neutral game, especially against faster characters capable of disrupting Marth's space control. In particular, untippered forward tilt has almost no follow ups against most low percent targets as the lower knockback and closer range makes it easier for the opponent to recover and prevent a followup. Furthermore, the nature of dashing and variety of high range characters in Ultimate makes dashing back out of this situation often troublesome. A better use is to use it as a followup to a fast falled aerial, the most useful of which being neutral air (which is his safest move on shield when tippered, fast falled, spaced, and timed correctly) or forward air (for dealing with opponents that may be approaching above too quickly for forward tilt to challenge). Alternatively, forward tilt can be a followup to Marth's tech chases that are often started with down tilt. As mentioned above, it is again a safer alternative to forward smash to punish missed techs, though down smash is more preferred in this situation over both options.
Hitboxes[edit]
Timing[edit]
| Hitboxes | 8-11 |
|---|---|
| Interruptible | 34 |
| Animation length | 43 |
Lag time |
Hitbox |
Interruptible |
|
