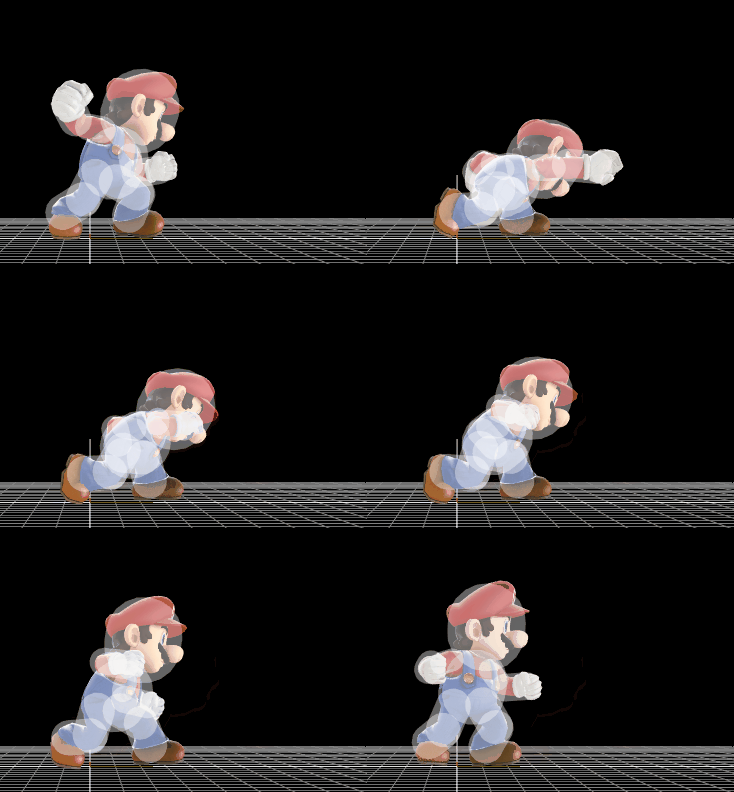
Mario (SSB4)/Neutral attack/Hit 2: Difference between revisions
From SmashWiki, the Super Smash Bros. wiki
Jump to navigationJump to search
Serpent King (talk | contribs) (→Timing) |
(added missing categories) |
||
| (3 intermediate revisions by 3 users not shown) | |||
| Line 1: | Line 1: | ||
{{ArticleIcons|ssb4=y}} | {{ArticleIcons|ssb4=y}} | ||
{{competitive expertise}} | {{competitive expertise}} | ||
[[File:MarioJab2.gif|270px|thumb|Hitbox visualization of Mario's second jab.]] | [[File:MarioJab2.gif|270px|thumb|Hitbox visualization of Mario's second jab.]] | ||
| Line 15: | Line 14: | ||
|bk=0 | |bk=0 | ||
|ks=100 | |ks=100 | ||
|fkv= | |fkv=18 | ||
|r=3.0 | |r=3.0 | ||
|bn=21 | |bn=21 | ||
| Line 32: | Line 31: | ||
|bk=0 | |bk=0 | ||
|ks=100 | |ks=100 | ||
|fkv= | |fkv=15 | ||
|r=1.5 | |r=1.5 | ||
|bn=13 | |bn=13 | ||
| Line 48: | Line 47: | ||
|bk=0 | |bk=0 | ||
|ks=80 | |ks=80 | ||
|fkv= | |fkv=25 | ||
|r=4 | |r=4 | ||
|bn=22 | |bn=22 | ||
| Line 73: | Line 72: | ||
|- | |- | ||
!Animation length | !Animation length | ||
| | |25 | ||
|} | |} | ||
{{FrameStripStart}} | {{FrameStripStart}} | ||
{{FrameStrip|t=Lag|c=1}}{{FrameStrip|t=Hitbox|c=2}}{{FrameStrip|t=Lag|c=3|e=LagContinuableS}}{{FrameStrip|t=Lag|c=15|s=LagContinuableE}}{{FrameStrip|t=Interruptible|c= | {{FrameStrip|t=Lag|c=1}}{{FrameStrip|t=Hitbox|c=2}}{{FrameStrip|t=Lag|c=3|e=LagContinuableS}}{{FrameStrip|t=Lag|c=15|s=LagContinuableE}}{{FrameStrip|t=Interruptible|c=4}} | ||
{{FrameStripEnd}} | {{FrameStripEnd}} | ||
{{FrameIconLegend|lag=y|hitbox=y|continuable=y|interruptible=y}} | {{FrameIconLegend|lag=y|hitbox=y|continuable=y|interruptible=y}} | ||
| Line 85: | Line 84: | ||
{{MvSubNavMario|g=SSB4}} | {{MvSubNavMario|g=SSB4}} | ||
[[Category:Mario (SSB4)]] | |||
[[Category:Neutral attacks (SSB4)]] | |||
Latest revision as of 07:09, October 26, 2018
Overview[edit]
The second hit of Mario's neutral attack is a simple punch using the arm closer to the camera. In terms of its properties, it is quite similar to the first hit, but it has slightly more weight-based knockback, and only does 1.5% damage.
Hitbox Properties[edit]
Timing[edit]
| Hitbox | 2-3 |
|---|---|
| Earliest continuable frame | 6 |
| Interruptible | 22 |
| Animation length | 25 |
Lag time |
Hitbox |
Continuable |
Interruptible |
References[edit]
|

