Donkey Kong (SSB4)/Pummel: Difference between revisions
From SmashWiki, the Super Smash Bros. wiki
Jump to navigationJump to search
Serpent King (talk | contribs) No edit summary |
SuperSqank (talk | contribs) No edit summary |
||
| (5 intermediate revisions by 2 users not shown) | |||
| Line 1: | Line 1: | ||
{{ArticleIcons|ssb4=y}} | |||
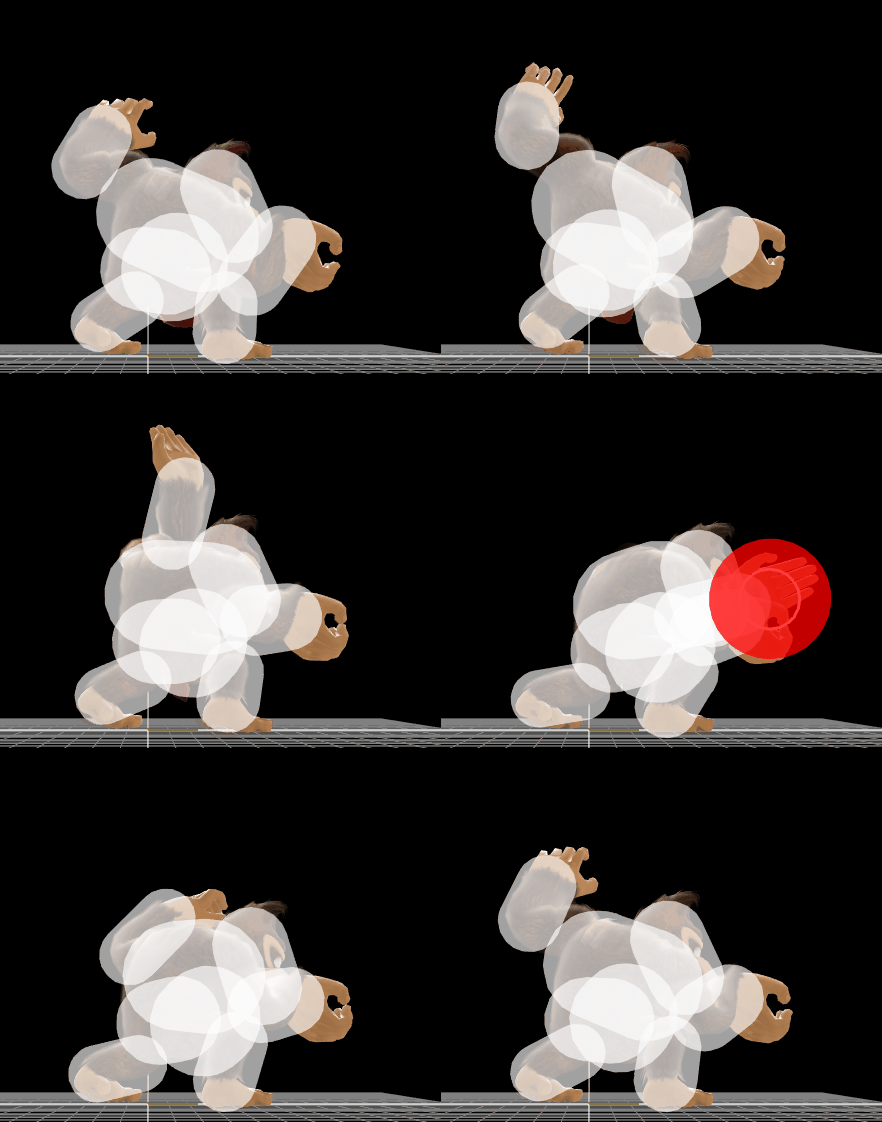
[[File:DonkeyKongPummel.gif|thumb|270px|Hitbox visualization showing Donkey Kong's pummel.]] | [[File:DonkeyKongPummel.gif|thumb|270px|Hitbox visualization showing Donkey Kong's pummel.]] | ||
==Overview== | ==Overview== | ||
Donkey Kong | Donkey Kong slaps the opponent, being somewhat fast and dealing 2.1%, making it great for racking damage on the opponent and unstaling moves. It is also useful to get opponents in the percent range for the Ding-Dong kill confirm, or into the percent range for back throw to kill. | ||
== | ==Hitboxes== | ||
{| class="wikitable" | {{SSB4HitboxTableHeader|special=y}} | ||
{{SSB4SpecialHitboxTableRow | |||
|id=0 | |||
|damage=2.1% | |||
|angle=361 | |||
|af=3 | |||
|bk=0 | |||
|ks=100 | |||
|fkv=30 | |||
|r=6.0 | |||
|bn=0 | |||
|xpos=0.0 | |||
|ypos=13.0 | |||
|zpos=18.0 | |||
|ff=1.0 | |||
|type=Hand | |||
|effect=Normal | |||
|sfx=Punch | |||
|slvl=S | |||
|clang=f | |||
|rebound=t | |||
}} | |||
|} | |||
==Timing== | |||
{|class="wikitable" | |||
!Hitbox | |||
|9-10 | |||
|- | |- | ||
! | !Interruptible | ||
|16 | |||
|- | |- | ||
| | !Animation length | ||
|23 | |||
|} | |} | ||
{{FrameStripStart}} | |||
{{FrameStrip|t=Lag|c=8}}{{FrameStrip|t=Hitbox|c=2}}{{FrameStrip|t=Lag|c=5}}{{FrameStrip|t=Interruptible|c=8}} | |||
{{FrameStripEnd}} | |||
{{FrameIconLegend|lag=y|hitbox=y|interruptible=y}} | |||
{{MvSubNavDonkeyKong|g=SSB4}} | {{MvSubNavDonkeyKong|g=SSB4}} | ||
[[Category:Donkey Kong (SSB4)]] | [[Category:Donkey Kong (SSB4)]] | ||
[[Category:Pummels (SSB4)]] | [[Category:Pummels (SSB4)]] | ||
Latest revision as of 17:11, September 24, 2021
Overview[edit]
Donkey Kong slaps the opponent, being somewhat fast and dealing 2.1%, making it great for racking damage on the opponent and unstaling moves. It is also useful to get opponents in the percent range for the Ding-Dong kill confirm, or into the percent range for back throw to kill.
Hitboxes[edit]
Timing[edit]
| Hitbox | 9-10 |
|---|---|
| Interruptible | 16 |
| Animation length | 23 |
Lag time |
Hitbox |
Interruptible |
|
