Damage: Difference between revisions
m (→Gallery) |
No edit summary |
||
| Line 23: | Line 23: | ||
Should a [[tournament]] match [[time out]] and the players have equal stock remaining, whoever has less damage is the winner, and a tiebreak procedure is followed should damage also be even. This refers to the usual rules in ''Smash'' tournaments, unrelated to the [[Tournament mode]]. | Should a [[tournament]] match [[time out]] and the players have equal stock remaining, whoever has less damage is the winner, and a tiebreak procedure is followed should damage also be even. This refers to the usual rules in ''Smash'' tournaments, unrelated to the [[Tournament mode]]. | ||
For more information about the damage meter itself, see [[Damage meter|here]]. | |||
Damage | |||
==See also== | ==See also== | ||
Revision as of 13:34, October 31, 2014
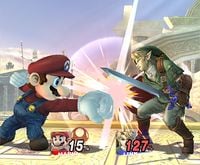
Damage is the basic measure of how vulnerable a character is to the knockback of attacks. At low damages, the character cannot be knocked back very far, and can only be thrown off-stage by the game's most powerful attacks. However, at high damages, attacks deliver considerably more knockback, increasing the risks of severely damaged characters to be KO'd.
Damage starts at 0% and can rise all the way up to 999%. Though damage is displayed as a percent, getting to 100% does not mean a character is doomed - the number itself is somewhat arbitrary. Damage is measured as an integer in the first SSB and a decimal number in subsequent games; a damage with a decimal part is rounded down when displayed.
Each attack deals a set amount of damage, which is then modified by things such as Stale-Move Negation before the target is launched. An attack that does no damage will not cause targets to flinch and not produce a regular hit sound, although it will still cause knockback. The damage an attack deals is a significant factor in how much knockback it causes.
The following aspects are affected by damage:
- Knockback - As a character gets more damage, they fly further when hit. Certain attacks have set knockback, and don't apply.
- Grab time - Characters at high damage can be grabbed for longer periods of time.
- Status time - Generally, characters with higher damage are vulnerable for longer from a status effect (such as sleeping). The exception is being stunned though a shield breaking - the more damage a stunned character has, the faster they can recover.
- Ledge recovery - Before Smash 4, a character's ledge animations change at 100% or more, becoming more sluggish and providing more invincibility frames. The slower attack also deals more damage (in all games this applies to, Captain Falcon's is the sole exception).
- Hoop damage - Characters will not accumulate hoop damage at 150% damage or more.
- Jet Hammer - Like hoop damage, King Dedede will not be damaged by charging this attack when he has 150% or more damage.
- Lucario's attack power - The more damage Lucario has, the more damage his aura-based attacks do. In Brawl, the power is at "normal" when Lucario is at 75%, while it stops decreasing at 20% and caps at 170%.
- Pikmin latch time - Pikmin release a character faster at higher damages.
- A Team Healer's healing power - The more damage the target has, the more damage the item heals.
- Swim time - Higher-damaged characters have less time to swim before panicking, the shortest swim time being at 96% and up.
- Donkey Kong's forward throw - The more damage the grabbed character has, the longer they can be carried, similar to the grab time function.
Should a tournament match time out and the players have equal stock remaining, whoever has less damage is the winner, and a tiebreak procedure is followed should damage also be even. This refers to the usual rules in Smash tournaments, unrelated to the Tournament mode.
For more information about the damage meter itself, see here.
