SSB4 Icon.png

Charizard (SSB4)/Side special/Default: Difference between revisions

From SmashWiki, the Super Smash Bros. wiki
Jump to navigationJump to search
mNo edit summary
m (Text replacement - "== ([^=])" to "== $1")
 
(One intermediate revision by the same user not shown)
Line 6: Line 6:


==Hitboxes==
==Hitboxes==
{{SSB4HitboxTableHeader}}
{{HitboxTableTitle|Hit 1|42}}
Line 56: Line 55:
}}
}}
|}
|}


{{MvSubNavCharizard|g=SSB4}}

Latest revision as of 20:53, April 12, 2022

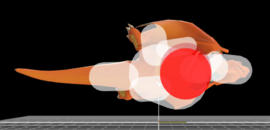
This article is about the hitbox visualization in Super Smash Bros. 4. For the move itself, see Flare Blitz.
Hitbox visualization showing Charizard's Flare Blitz.
Competitive.png This article or section may require competitive expertise.
You can discuss this issue on the talk page or edit this page to improve it.
Data.png This article or section may require additional technical data.
You can discuss this issue on the talk page or edit this page to improve it.

Hitboxes[edit]

ID Part Damage SD Angle BK KS FKV Radius Bone Offset SDIx T% Clang Rebound Type Effect G A Sound Direct
Hit 1
0 0 4% 0 AngleIcon60.png 60 80 0 4.5 18 0.0 0.0 0.0 1.0x 1.0x 0% HitboxTableIcon(Clang).png HitboxTableIcon(NoRebound).png TypeIcon(Body).png EffectIcon(Flame).png HitboxTableIcon(GroundedTrue).png HitboxTableIcon(AerialTrue).png L Burn SpecialsDirect.png
Hit 2
0 0 15% 0 Sakurai angle 70 84 0 11.0 0 0.0 0.0 0.0 1.0x 1.5x 0% HitboxTableIcon(NoClang).png HitboxTableIcon(NoRebound).png TypeIcon(Explosive).png EffectIcon(Flame).png HitboxTableIcon(GroundedTrue).png HitboxTableIcon(AerialTrue).png L Explosion SpecialsIndirect.png