FireThePyro (talk | contribs) (Added competitive expertise.) |
(→Timing) |
||
| (2 intermediate revisions by 2 users not shown) | |||
| Line 1: | Line 1: | ||
{{ArticleIcons|ssbu=y}} | {{ArticleIcons|ssbu=y}} | ||
[[File:MiiBrawlerUSmashSSBU.gif|thumb| | [[File:MiiBrawlerUSmashSSBU.gif|thumb|350px|Hitbox visualization showing Mii Brawler's up smash.]] | ||
==Overview== | ==Overview== | ||
Mii Brawler performs a bicycle kick in the same vein as Fox's up smash. While looking very similar to the same move performed by Fox, Mii Brawler's up smash takes a frame longer to come out and kills later. In addition, it is much harder to confirm into, as it usually is only capable of connecting after neutral air if the opponent holds in for the first attack. Despite this, up smash is a reliable tool for kills, especially when used as an anti-air or out of an empty hop to bait the opponent into dropping their shield. | Mii Brawler performs a bicycle kick in the same vein as Fox's up smash. While looking very similar to the same move performed by Fox, Mii Brawler's up smash takes a frame longer to come out and kills later. In addition, it is much harder to confirm into, as it usually is only capable of connecting after neutral air if the opponent holds in for the first attack. Despite this, up smash is a reliable tool for kills, especially when used as an anti-air or out of an empty hop to bait the opponent into dropping their shield. | ||
| Line 8: | Line 8: | ||
==Hitboxes== | ==Hitboxes== | ||
{{UltimateHitboxTableHeader}} | {{UltimateHitboxTableHeader}} | ||
{{HitboxTableTitle|Clean hit| | {{HitboxTableTitle|Clean hit|50}} | ||
{{UltimateHitboxTableRow | {{UltimateHitboxTableRow | ||
|id=0 | |id=0 | ||
| Line 19: | Line 19: | ||
|bn=kneer | |bn=kneer | ||
|xpos=4.0 | |xpos=4.0 | ||
|ff=1.1 | |ff=1.1 | ||
|type=Foot | |type=Foot | ||
|sfx=Kick | |sfx=Kick | ||
|slvl=L | |slvl=L | ||
| Line 37: | Line 34: | ||
|bn=kneer | |bn=kneer | ||
|xpos=-1.0 | |xpos=-1.0 | ||
|ff=1.1 | |ff=1.1 | ||
|type=Foot | |type=Foot | ||
|sfx=Kick | |sfx=Kick | ||
|slvl=L | |slvl=L | ||
}} | }} | ||
{{HitboxTableTitle|Late hit| | {{HitboxTableTitle|Late hit|50}} | ||
{{UltimateHitboxTableRow | {{UltimateHitboxTableRow | ||
|id=0 | |id=0 | ||
| Line 56: | Line 50: | ||
|bn=kneer | |bn=kneer | ||
|xpos=4.0 | |xpos=4.0 | ||
|ff=1.1 | |ff=1.1 | ||
|type=Foot | |type=Foot | ||
|sfx=Kick | |sfx=Kick | ||
|slvl=M | |slvl=M | ||
| Line 74: | Line 65: | ||
|bn=kneer | |bn=kneer | ||
|xpos=-1.0 | |xpos=-1.0 | ||
|ff=1.1 | |ff=1.1 | ||
|type=Foot | |type=Foot | ||
|sfx=Kick | |sfx=Kick | ||
|slvl=M | |slvl=M | ||
| Line 88: | Line 76: | ||
!Charges between | !Charges between | ||
|3-4 | |3-4 | ||
|- | |||
!Leg intangible | |||
|8-12 | |||
|- | |- | ||
!Clean hit | !Clean hit | ||
| Line 94: | Line 85: | ||
!Late hit | !Late hit | ||
|13-14 | |13-14 | ||
|- | |- | ||
!Interruptible | !Interruptible | ||
| Line 106: | Line 94: | ||
{{FrameStripStart}} | {{FrameStripStart}} | ||
{{FrameStrip|t=Lag|c=3|e=LagChargeS}}{{FrameStrip|t=Lag|c=4|s=LagChargeE}}{{FrameStrip|t=Hitbox|c=5|e=HitboxChangeS}}{{FrameStrip|t=Hitbox|c=2|s=HitboxChangeE}}{{FrameStrip|t=Lag|c=33}}{{FrameStrip|t=Interruptible|c=14}} | !Hitboxes {{FrameStrip|t=Lag|c=3|e=LagChargeS}}{{FrameStrip|t=Lag|c=4|s=LagChargeE}}{{FrameStrip|t=Hitbox|c=5|e=HitboxChangeS}}{{FrameStrip|t=Hitbox|c=2|s=HitboxChangeE}}{{FrameStrip|t=Lag|c=33}}{{FrameStrip|t=Interruptible|c=14}} | ||
|- | |- | ||
{{FrameStrip|t=Vulnerable|c=7}}{{FrameStrip|t=Intangible|c=5}}{{FrameStrip|t=Vulnerable|c=49}} | !Leg {{FrameStrip|t=Vulnerable|c=7}}{{FrameStrip|t=Intangible|c=5}}{{FrameStrip|t=Vulnerable|c=49}} | ||
{{FrameStripEnd}} | {{FrameStripEnd}} | ||
{{FrameIconLegend|lag=y|charge=y|hitbox=y|hitboxchange=y|vulnerable=y|intangible=y|interruptible=y}} | {{FrameIconLegend|lag=y|charge=y|hitbox=y|hitboxchange=y|vulnerable=y|intangible=y|interruptible=y}} | ||
Latest revision as of 19:50, July 28, 2022
OverviewEdit
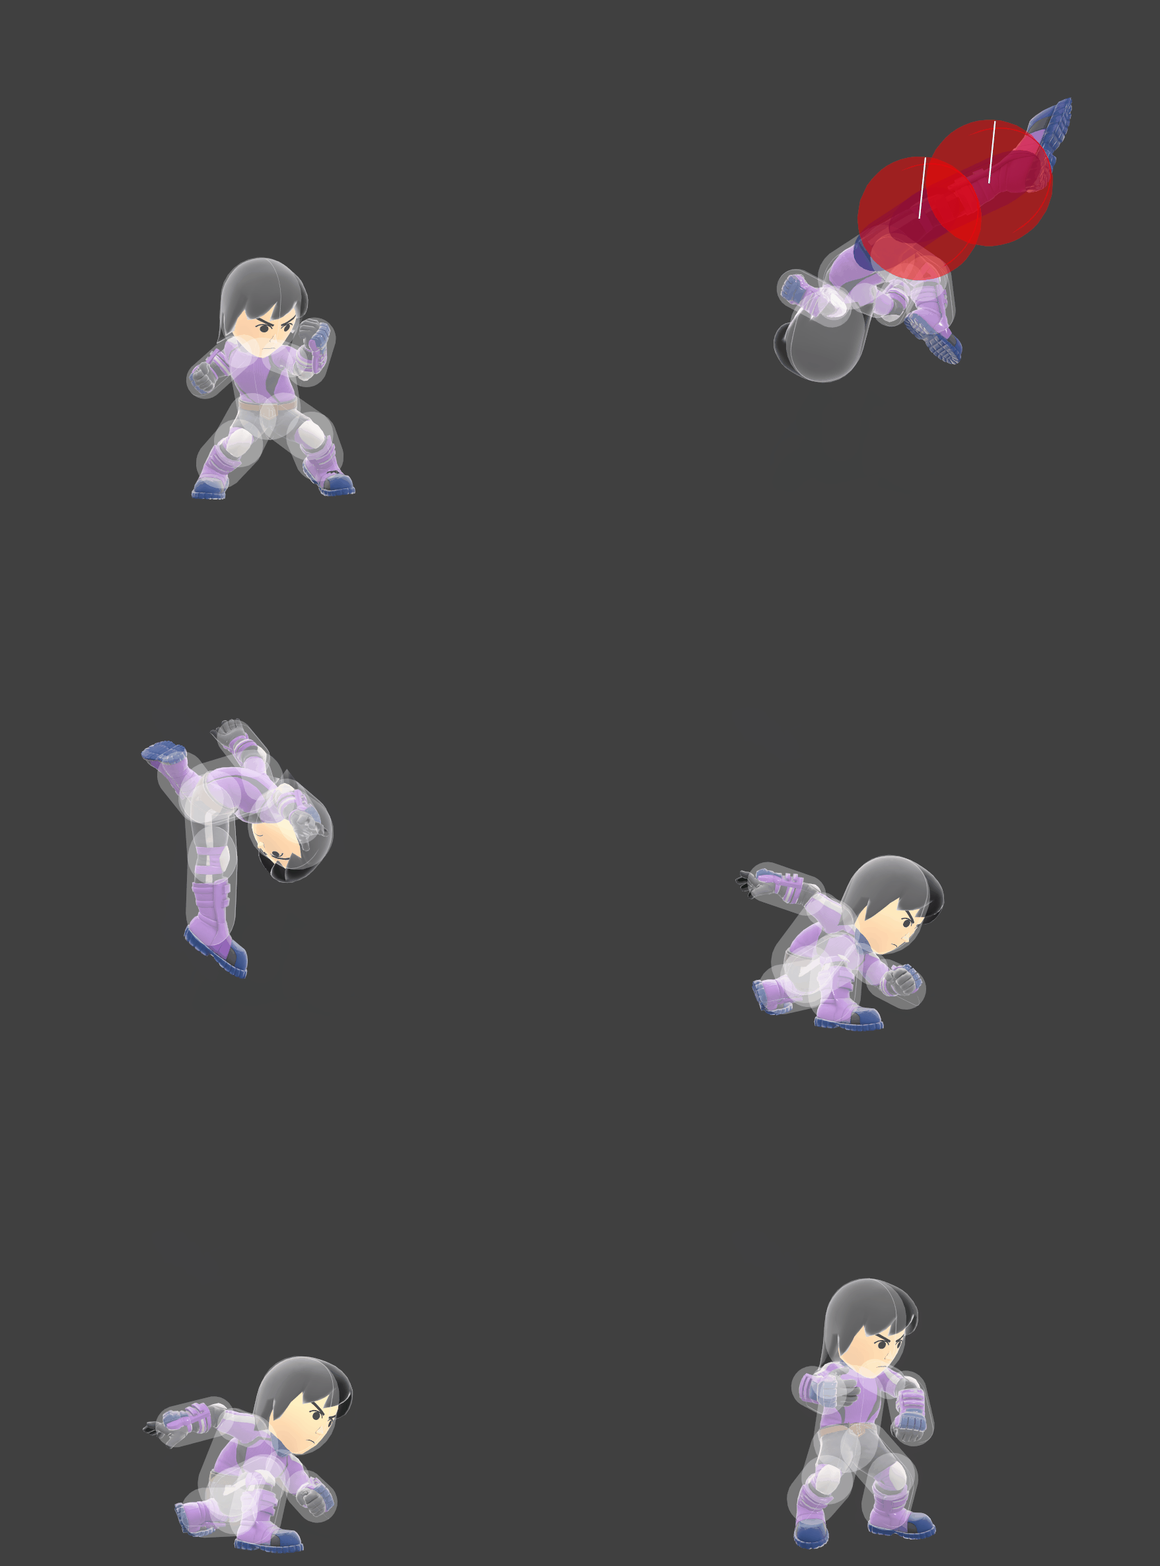
Mii Brawler performs a bicycle kick in the same vein as Fox's up smash. While looking very similar to the same move performed by Fox, Mii Brawler's up smash takes a frame longer to come out and kills later. In addition, it is much harder to confirm into, as it usually is only capable of connecting after neutral air if the opponent holds in for the first attack. Despite this, up smash is a reliable tool for kills, especially when used as an anti-air or out of an empty hop to bait the opponent into dropping their shield.
Update HistoryEdit
- Up smash's sweetspot has a longer duration, with its sourspot having a shorter duration.
HitboxesEdit
TimingEdit
| Charges between | 3-4 |
|---|---|
| Leg intangible | 8-12 |
| Clean hit | 8-12 |
| Late hit | 13-14 |
| Interruptible | 48 |
| Animation length | 61 |
| Hitboxes | |||||||||||||||||||||||||||||||||||||||||||||||||||||||||||||
|---|---|---|---|---|---|---|---|---|---|---|---|---|---|---|---|---|---|---|---|---|---|---|---|---|---|---|---|---|---|---|---|---|---|---|---|---|---|---|---|---|---|---|---|---|---|---|---|---|---|---|---|---|---|---|---|---|---|---|---|---|---|
| Leg |
| Lag time |
Charge interval |
Hitbox |
Hitbox change |
Vulnerable |
Intangible |
Interruptible |
|
