Wario (SSB4)/Down smash: Difference between revisions
From SmashWiki, the Super Smash Bros. wiki
Jump to navigationJump to search
(New Page: {{competitive expertise}} ==Hitboxes== {{SSB4HitboxTableHeader}} {{HitboxTableTitle|Hit 1|42}} {{SSB4HitboxTableRow |id=0 |part=0 |damage=13% |angle=30 |bk=30 |ks=80 |fkv=0 |r=5.0 |bn...) |
m (Text replacement - "== ([^=])" to "== $1") |
||
| (10 intermediate revisions by 8 users not shown) | |||
| Line 1: | Line 1: | ||
{{ | {{ArticleIcons|ssb4=y}} | ||
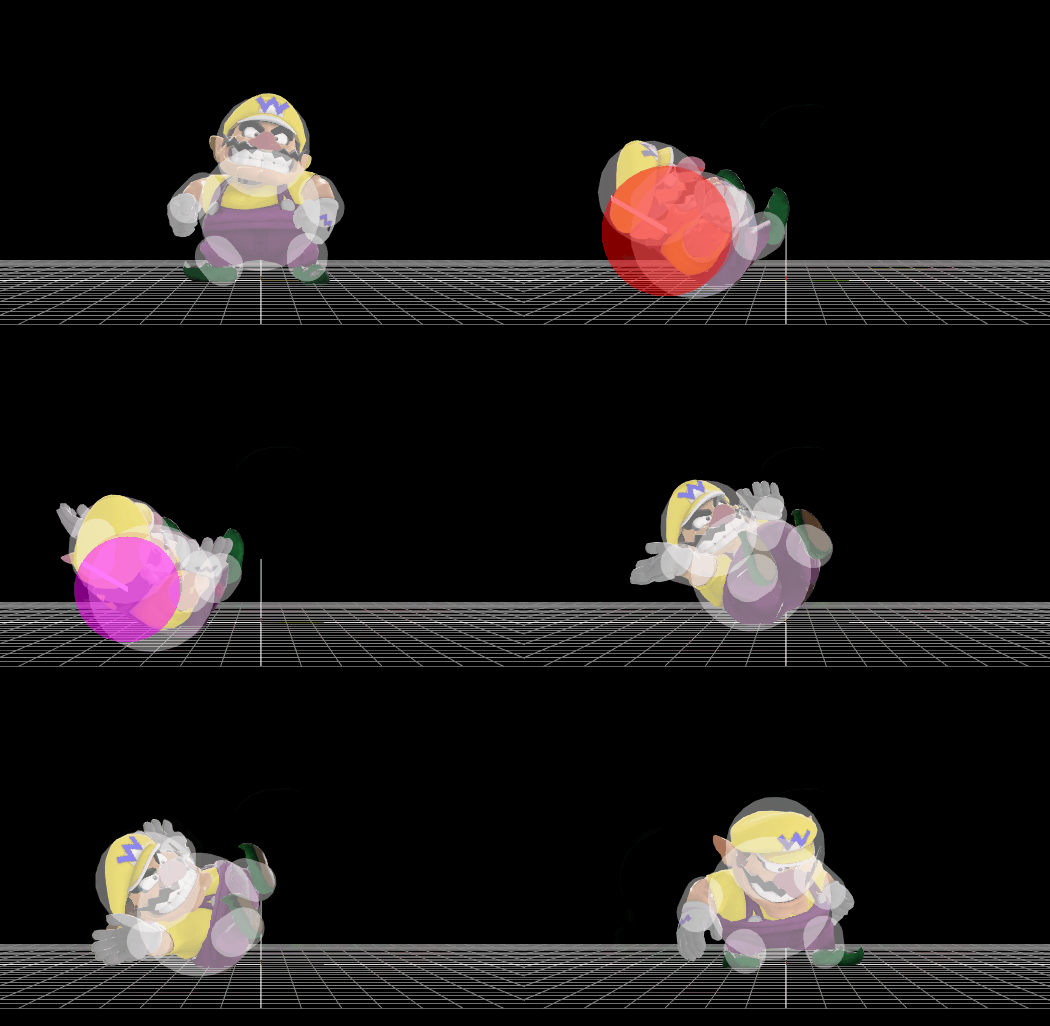
[[File:WarioDSmash.gif|thumb|270px|Hitbox visualization showing Wario's down smash.]] | |||
==Overview== | |||
Wario spins on his rear thrice to attack opponents. This move is relatively weak, being one of the weakest down smashes in the game, and the later hits get even weaker, but can still KO at reasonable percentages, barring the latest possible hit. Coupled with the mediocre hitbox that gets even smaller throughout and the lack of a multi-hit, it is extremely unsafe on shield or even on hit, due to its low knockback. It does however possess the ability to hit most characters hanging on the ledge, but Wario has better and safer options for hitting opponents on the ledge, such as dash attack or Waft. Relative to Wario's other attacks, it also comes out fairly quickly, especially for a smash attack. | |||
==Hitboxes== | ==Hitboxes== | ||
{{SSB4HitboxTableHeader}} | {{SSB4HitboxTableHeader}} | ||
{{HitboxTableTitle| | {{HitboxTableTitle|Clean hit|42}} | ||
{{SSB4HitboxTableRow | {{SSB4HitboxTableRow | ||
|id=0 | |id=0 | ||
|part=0 | |part=0 | ||
|damage=13 | |damage={{ChargedSmashDmgSSB4|13}} | ||
|angle=30 | |angle=30 | ||
|bk=30 | |bk=30 | ||
| Line 24: | Line 27: | ||
|slvl=L | |slvl=L | ||
}} | }} | ||
{{HitboxTableTitle| | {{HitboxTableTitle|Mid hit|42}} | ||
{{SSB4HitboxTableRow | {{SSB4HitboxTableRow | ||
|id=0 | |id=0 | ||
|part=0 | |part=0 | ||
|damage=10 | |damage={{ChargedSmashDmgSSB4|10}} | ||
|angle=30 | |angle=30 | ||
|bk=20 | |bk=20 | ||
| Line 44: | Line 47: | ||
|slvl=M | |slvl=M | ||
}} | }} | ||
{{HitboxTableTitle| | {{HitboxTableTitle|Late hit|42}} | ||
{{SSB4HitboxTableRow | {{SSB4HitboxTableRow | ||
|id=0 | |id=0 | ||
|part=0 | |part=0 | ||
|damage=5 | |damage={{ChargedSmashDmgSSB4|5}} | ||
|angle=30 | |angle=30 | ||
|bk=10 | |bk=10 | ||
| Line 66: | Line 69: | ||
|} | |} | ||
==Timing== | |||
{|class="wikitable" | |||
!Charges between | |||
|2-3 | |||
|- | |||
!Clean hit | |||
|8-17 | |||
|- | |||
!Mid hit | |||
|18-27 | |||
|- | |||
!Late hit | |||
|28-36 | |||
|- | |||
!Interruptible | |||
|68 | |||
|- | |||
!Animation length | |||
|71 | |||
|} | |||
{{FrameStripStart}} | |||
{{FrameStrip|t=Lag|c=2|e=LagChargeS}}{{FrameStrip|t=Lag|c=5|s=LagChargeE}}{{FrameStrip|t=Hitbox|c=10|e=HitboxChangeS}}{{FrameStrip|t=Hitbox|c=10|s=HitboxChangeE|e=HitboxChangeS}}{{FrameStrip|t=Hitbox|c=9|s=HitboxChangeE}}{{FrameStrip|t=Lag|c=31}}{{FrameStrip|t=Interruptible|c=4}} | |||
{{FrameStripEnd}} | |||
{{FrameIconLegend|lag=y|hitbox=y|hitboxchange=y|charge=y|interruptible=y}} | |||
{{MvSubNavWario|g=SSB4}} | {{MvSubNavWario|g=SSB4}} | ||
[[Category:Wario (SSB4)]] | |||
[[Category:Down smashes (SSB4)]] | |||
Latest revision as of 03:12, April 13, 2022
Overview[edit]
Wario spins on his rear thrice to attack opponents. This move is relatively weak, being one of the weakest down smashes in the game, and the later hits get even weaker, but can still KO at reasonable percentages, barring the latest possible hit. Coupled with the mediocre hitbox that gets even smaller throughout and the lack of a multi-hit, it is extremely unsafe on shield or even on hit, due to its low knockback. It does however possess the ability to hit most characters hanging on the ledge, but Wario has better and safer options for hitting opponents on the ledge, such as dash attack or Waft. Relative to Wario's other attacks, it also comes out fairly quickly, especially for a smash attack.
Hitboxes[edit]
Timing[edit]
| Charges between | 2-3 |
|---|---|
| Clean hit | 8-17 |
| Mid hit | 18-27 |
| Late hit | 28-36 |
| Interruptible | 68 |
| Animation length | 71 |
Lag time |
Charge interval |
Hitbox |
Hitbox change |
Interruptible |
|
