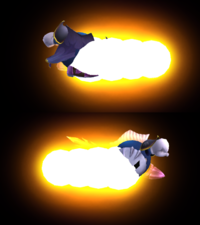
Meta Knight (SSBB)/Down smash
Overview
Meta Knight slashes in front of him and then quickly slashes behind him, with the back slash being stronger than the front. This is considered Meta Knight's best KO move, having a combination of extremely fast start-up lag, great transcendent reach, and the back slash being his second strongest move from neutral. It is also considered the best down smash in Brawl, as not only is it one of the stronger down smashes, but it is also among the fastest start-up lag wise, tied with Wolf's for fastest in overall duration, and has among the best reach. The move is also difficult to punish if used and spaced correctly, due to rather low ending lag and outreaching the majority of attacks in Brawl.
Both slashes have high base knockback, and can KO especially well near blast lines. Their knockback scaling isn't as high, though the back slash has enough to still KO heavier characters reliably even with DI and momentum cancelling factored. The front slash however can have difficulty KOing under 150% under the aforementioned conditions (though due to its start-up, it can often catch opponents offguard and keep them from DIing properly). Due to the back slash still coming out reasonably fast, Meta Knights will often turn around before using down smash to land the stronger back slash (the back slash is also less punishable, due to greater shield stun and the move being nearer to the end of its duration). While usually conserved by competent Meta Knights to keep the move fresh, its effective capability as a "get off me" move see it used as a stronger alternative to Shuttle Loop and Mach Tornado when the Meta Knight is being pressured.
Overall it's an excellent and not difficult to use move that is heavily used in all levels of play, and that is commonly seen as straddling the broken threshold.
Post hit data
| Hitbox | Base knockback | Knockback scaling | KO percent with poor DI | KO percent with no DI | KO percent with good DI |
|---|---|---|---|---|---|
| Front slash | 2485 | 28.863 | 113.12% | 128.71% | 150.37% |
| Back slash | 2575 | 32.267 | 98.40% | 112.34% | 131.71% |
Hitboxes
Timing
| Charges between | 1-2 |
|---|---|
| Hitboxes | 5-6, 10-11 |
| Animation length | 34 |
Lag time |
Charge interval |
Hitbox |
|
