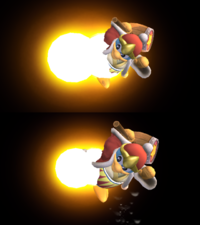
King Dedede (SSBB)/Back aerial: Difference between revisions
From SmashWiki, the Super Smash Bros. wiki
Jump to navigationJump to search
(→Overview: Technical data is present) |
SuperSqank (talk | contribs) m (→Hitboxes) |
||
| (4 intermediate revisions by 3 users not shown) | |||
| Line 6: | Line 6: | ||
==Hitboxes== | ==Hitboxes== | ||
{{BrawlHitboxTableHeader}} | {{BrawlHitboxTableHeader}} | ||
{{HitboxTableTitle|Clean hit|24}} | {{HitboxTableTitle|Clean hit|24}} | ||
| Line 18: | Line 17: | ||
|fkv=0 | |fkv=0 | ||
|r=510000 | |r=510000 | ||
|bn=16 | |bn=16 | ||
|xpos=0.0 | |xpos=0.0 | ||
|ypos=0.0 | |ypos=0.0 | ||
| Line 39: | Line 38: | ||
|fkv=0 | |fkv=0 | ||
|r=510000 | |r=510000 | ||
|bn=16 | |bn=16 | ||
|xpos=360000.0 | |xpos=360000.0 | ||
|ypos=0.0 | |ypos=0.0 | ||
| Line 61: | Line 60: | ||
|fkv=0 | |fkv=0 | ||
|r=420000 | |r=420000 | ||
|bn=16 | |bn=16 | ||
|xpos=0.0 | |xpos=0.0 | ||
|ypos=0.0 | |ypos=0.0 | ||
| Line 82: | Line 81: | ||
|fkv=0 | |fkv=0 | ||
|r=420000 | |r=420000 | ||
|bn=16 | |bn=16 | ||
|xpos=360000.0 | |xpos=360000.0 | ||
|ypos=0.0 | |ypos=0.0 | ||
| Line 95: | Line 94: | ||
}} | }} | ||
|} | |} | ||
==Timing== | ==Timing== | ||
{|class="wikitable" | {|class="wikitable" | ||
!Initial autocancel | |||
|1-4 | |||
|- | |||
!Clean hit | !Clean hit | ||
|6-8 | |6-8 | ||
| Line 115: | Line 116: | ||
{{FrameStrip|t=Lag|c=5}}{{FrameStrip|t=Hitbox|c=3|e=HitboxChangeS}}{{FrameStrip|t=Hitbox|c=17|s=HitboxChangeE}}{{FrameStrip|t=Lag|c=7}} | {{FrameStrip|t=Lag|c=5}}{{FrameStrip|t=Hitbox|c=3|e=HitboxChangeS}}{{FrameStrip|t=Hitbox|c=17|s=HitboxChangeE}}{{FrameStrip|t=Lag|c=7}} | ||
|- | |- | ||
{{FrameStrip|t=Blank|c= | {{FrameStrip|t=Autocancel|c=4}}{{FrameStrip|t=Blank|c=21}}{{FrameStrip|t=Autocancel|c=7}} | ||
{{FrameStripEnd}} | {{FrameStripEnd}} | ||
| Line 132: | Line 133: | ||
*Shield stun: 4, 3 | *Shield stun: 4, 3 | ||
*Shield hitlag: 10, 8 | *Shield hitlag: 10, 8 | ||
*Advantage on shield: - | *Advantage on shield: -17/-18 (jump/grab OoS), -10/-11 (normal shield drop) | ||
*The late hit is supposed to only be active until frame 21 however due to a timing error (with the auto-cancel window on frame 26 being listed before the timer to remove the hitboxes on frame 22), the late hit is active until frame 25. This is also reflected by the move's animation as Dedede clearly starts to move his foot back after frame 21 yet the hitboxes are still active. | *The late hit is supposed to only be active until frame 21 however due to a timing error (with the auto-cancel window on frame 26 being listed before the timer to remove the hitboxes on frame 22), the late hit is active until frame 25. This is also reflected by the move's animation as Dedede clearly starts to move his foot back after frame 21 yet the hitboxes are still active. | ||
Latest revision as of 11:04, December 13, 2021
Overview[edit]
King Dedede sticks out a foot behind himself, doing 13% damage with the initial hitbox and 9% with the subsequent hitbox. It functions as a sex kick due to becoming weaker the longer it is out, but the knockback does not decrease that much. The move has far horizontal reach, a long-lasting hitbox, strong horizontal knockback, and very fast startup. The move is great for edgeguarding and can be used as a WoP technique at low percentages in conjunction with his forward aerial. It also has above average KO power and is a reliable KO move when not stale. While the move has minor landing lag, it is difficult to punish. It is considered to be one of the best back aerials in the game, and also King Dedede's best attack.
Hitboxes[edit]
Timing[edit]
| Initial autocancel | 1-4 |
|---|---|
| Clean hit | 6-8 |
| Late hit | 9-25 |
| Ending autocancel | 26- |
| Animation length | 32 |
Landing lag[edit]
| Animation length | 21 |
|---|
Lag time |
Hitbox |
Autocancel |
Notes[edit]
- Shield stun: 4, 3
- Shield hitlag: 10, 8
- Advantage on shield: -17/-18 (jump/grab OoS), -10/-11 (normal shield drop)
- The late hit is supposed to only be active until frame 21 however due to a timing error (with the auto-cancel window on frame 26 being listed before the timer to remove the hitboxes on frame 22), the late hit is active until frame 25. This is also reflected by the move's animation as Dedede clearly starts to move his foot back after frame 21 yet the hitboxes are still active.
|
