Giant Punch: Difference between revisions
No edit summary |
(→Stages: New data for the elbow, i'll get KOing percents later) |
||
| Line 26: | Line 26: | ||
!g|Damage | !g|Damage | ||
!g|Percent that can KO | !g|Percent that can KO | ||
!g|Elbow damage | |||
!g|Elbow percent that can KO | |||
|- | |- | ||
!Stage 1 | !Stage 1 | ||
| Line 31: | Line 33: | ||
| 10% | | 10% | ||
| 196% | | 196% | ||
| 12% | |||
| 162% | |||
|- | |- | ||
!Stage 2 | !Stage 2 | ||
| Line 36: | Line 40: | ||
| 12% | | 12% | ||
| 165% | | 165% | ||
| 14% | |||
| 138% | |||
|- | |- | ||
!Stage 3 | !Stage 3 | ||
| Line 41: | Line 47: | ||
| 14% | | 14% | ||
| 141% | | 141% | ||
| 16% | |||
| 119% | |||
|- | |- | ||
!Stage 4 | !Stage 4 | ||
| Line 46: | Line 54: | ||
| 16% | | 16% | ||
| 122% | | 122% | ||
| 18% | |||
| 104% | |||
|- | |- | ||
!Stage 5 | !Stage 5 | ||
| Line 51: | Line 61: | ||
| 18% | | 18% | ||
| 106% | | 106% | ||
| 20% | |||
| 91% | |||
|- | |- | ||
!Stage 6 | !Stage 6 | ||
| Line 56: | Line 68: | ||
| 20% | | 20% | ||
| 93% | | 93% | ||
| 22% | |||
| 80% | |||
|- | |- | ||
!Stage 7 | !Stage 7 | ||
| Line 61: | Line 75: | ||
| 22% | | 22% | ||
| 81% | | 81% | ||
| 24% | |||
| 70% | |||
|- | |- | ||
!Stage 8 | !Stage 8 | ||
| Line 66: | Line 82: | ||
| 24% | | 24% | ||
| 71% | | 71% | ||
| 26% | |||
| 61% | |||
|- | |- | ||
!Stage 9 | !Stage 9 | ||
| Line 71: | Line 89: | ||
| 26% | | 26% | ||
| 63% | | 63% | ||
| 28% | |||
| 53% | |||
|- | |- | ||
!Stage 10 | !Stage 10 | ||
| Line 76: | Line 96: | ||
| 28% | | 28% | ||
| 55% | | 55% | ||
| 30% | |||
| 46% | |||
|- | |- | ||
!Stage 11 | !Stage 11 | ||
| Line 81: | Line 103: | ||
| 28% | | 28% | ||
| 81% | | 81% | ||
| 18% | |||
| 113% | |||
|- | |- | ||
!Aerial stage 1 | !Aerial stage 1 | ||
| Line 86: | Line 110: | ||
| 6% | | 6% | ||
| 338% | | 338% | ||
| 8% | |||
| | |||
|- | |- | ||
!Aerial stage 2 | !Aerial stage 2 | ||
| Line 91: | Line 117: | ||
| 8% | | 8% | ||
| 259% | | 259% | ||
| 10% | |||
| | |||
|- | |- | ||
!Aerial stage 3 | !Aerial stage 3 | ||
| Line 96: | Line 124: | ||
| 10% | | 10% | ||
| 215% | | 215% | ||
| 12% | |||
| | |||
|- | |- | ||
!Aerial stage 4 | !Aerial stage 4 | ||
| Line 101: | Line 131: | ||
| 12% | | 12% | ||
| 179% | | 179% | ||
| 14% | |||
| | |||
|- | |- | ||
!Aerial stage 5 | !Aerial stage 5 | ||
| Line 106: | Line 138: | ||
| 14% | | 14% | ||
| 153% | | 153% | ||
| 16% | |||
| | |||
|- | |- | ||
!Aerial stage 6 | !Aerial stage 6 | ||
| Line 111: | Line 145: | ||
| 16% | | 16% | ||
| 131% | | 131% | ||
| 18% | |||
| | |||
|- | |- | ||
!Aerial stage 7 | !Aerial stage 7 | ||
| Line 116: | Line 152: | ||
| 18% | | 18% | ||
| 117% | | 117% | ||
| 20% | |||
| | |||
|- | |- | ||
!Aerial stage 8 | !Aerial stage 8 | ||
| Line 121: | Line 159: | ||
| 20% | | 20% | ||
| 100% | | 100% | ||
| 22% | |||
| | |||
|- | |- | ||
!Aerial stage 9 | !Aerial stage 9 | ||
| Line 126: | Line 166: | ||
| 22% | | 22% | ||
| 89% | | 89% | ||
| 24% | |||
| | |||
|- | |- | ||
!Aerial stage 10 | !Aerial stage 10 | ||
| Line 131: | Line 173: | ||
| 24% | | 24% | ||
| 79% | | 79% | ||
| 26% | |||
| | |||
|- | |- | ||
!Aerial stage 11 | !Aerial stage 11 | ||
| Line 136: | Line 180: | ||
| 25% | | 25% | ||
| 105% | | 105% | ||
| 15% | |||
| | |||
|- | |- | ||
|} | |} | ||
*Note, not only does a stage ten Giant Punch have more knockback than a fully charged punch, but stages eight and nine also have more knockback. | *Note, not only does a stage ten Giant Punch have more knockback than a fully charged punch, but stages eight and nine also have more knockback. | ||
*The sweet spot for a Giant Punch is at the elbow. | |||
==Gallery== | ==Gallery== | ||
Revision as of 05:59, April 23, 2011
| Giant Punch | |
|---|---|
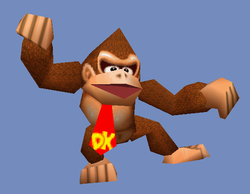
 Giant Punch in Super Smash Bros.. | |
| User | Donkey Kong |
| Universe | Donkey Kong |
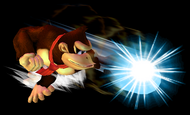
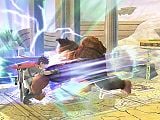
Giant Punch is Donkey Kong's neutral special move. By pressing the special move button, DK will start swinging his arm around, charging a punch. Pressing the button once more will deliver the blow, which gains power for every completed swing. If no button is pressed, after ten swings DK will become fully charged and stop winding up; his head will start smoking to indicate this. The fully charged punch can then be delivered at any time by pressing the special move button; the punch is weaker when used in midair.
If the player presses a shield button or presses the control stick left or right while charging, DK will save whatever charge he has and shield or roll. He can then continue charging later. Being hit while charging will cancel out any charge.
In Super Smash Bros. Brawl, DK gains launch resistance when he throws a fully charged punch, making it very hard to interrupt, and can be saved to defend against an incoming KO move. On the other hand, a punch that's just under full charge has significantly more KO'ing power.
In Super Smash Bros. Melee and Brawl, this move puts Donkey Kong into a helpless state if used in midair. However, it has less ending lag in Brawl, and more invincibility frames.
Reverse Giant Punch
When using Giant Punch in Brawl, if the control stick/D-Pad is quickly hit in the opposite direction during the first few frames, Donkey Kong will turn around very quickly (there is no animation, he simply faces the opposite direction) and will use Giant Punch in the new direction. Every character (with the exception of Sonic and Samus) can do the same with their neutral special as well.
Stages
Giant Punch has stages of being charged, these are recorded in swings of Donkey Kong's arm, each swing DK does increases damage and knockback for the punch, the charge has eleven stages in total, the eleventh stage is the fully charged stage. A fully charged Giant Punch will have a quicker animation resulting in a quicker punch and do the most damage but is weaker in knockback. All stages of the punch are weaker when used in mid-air.
| Number of swings | Damage | Percent that can KO | Elbow damage | Elbow percent that can KO | |
|---|---|---|---|---|---|
| Stage 1 | 1 | 10% | 196% | 12% | 162% |
| Stage 2 | 2 | 12% | 165% | 14% | 138% |
| Stage 3 | 3 | 14% | 141% | 16% | 119% |
| Stage 4 | 4 | 16% | 122% | 18% | 104% |
| Stage 5 | 5 | 18% | 106% | 20% | 91% |
| Stage 6 | 6 | 20% | 93% | 22% | 80% |
| Stage 7 | 7 | 22% | 81% | 24% | 70% |
| Stage 8 | 8 | 24% | 71% | 26% | 61% |
| Stage 9 | 9 | 26% | 63% | 28% | 53% |
| Stage 10 | 10 | 28% | 55% | 30% | 46% |
| Stage 11 | 11 | 28% | 81% | 18% | 113% |
| Aerial stage 1 | 1 | 6% | 338% | 8% | |
| Aerial stage 2 | 2 | 8% | 259% | 10% | |
| Aerial stage 3 | 3 | 10% | 215% | 12% | |
| Aerial stage 4 | 4 | 12% | 179% | 14% | |
| Aerial stage 5 | 5 | 14% | 153% | 16% | |
| Aerial stage 6 | 6 | 16% | 131% | 18% | |
| Aerial stage 7 | 7 | 18% | 117% | 20% | |
| Aerial stage 8 | 8 | 20% | 100% | 22% | |
| Aerial stage 9 | 9 | 22% | 89% | 24% | |
| Aerial stage 10 | 10 | 24% | 79% | 26% | |
| Aerial stage 11 | 11 | 25% | 105% | 15% |
- Note, not only does a stage ten Giant Punch have more knockback than a fully charged punch, but stages eight and nine also have more knockback.
- The sweet spot for a Giant Punch is at the elbow.
Gallery
Trivia
- In SSB, instead of DK's head steaming to show he's fully charged, his fist will spark.
- In Donkey Kong Country Returns, DK uses a move similiar to this when he is falling, charging his punch and striking the moon.

