SSBB Icon.png

Bowser (SSBB)/Up smash: Difference between revisions

From SmashWiki, the Super Smash Bros. wiki
Jump to navigationJump to search
mNo edit summary
No edit summary
 
(One intermediate revision by one other user not shown)
Line 1: Line 1:
{{ArticleIcons|ssbb=y}}
 
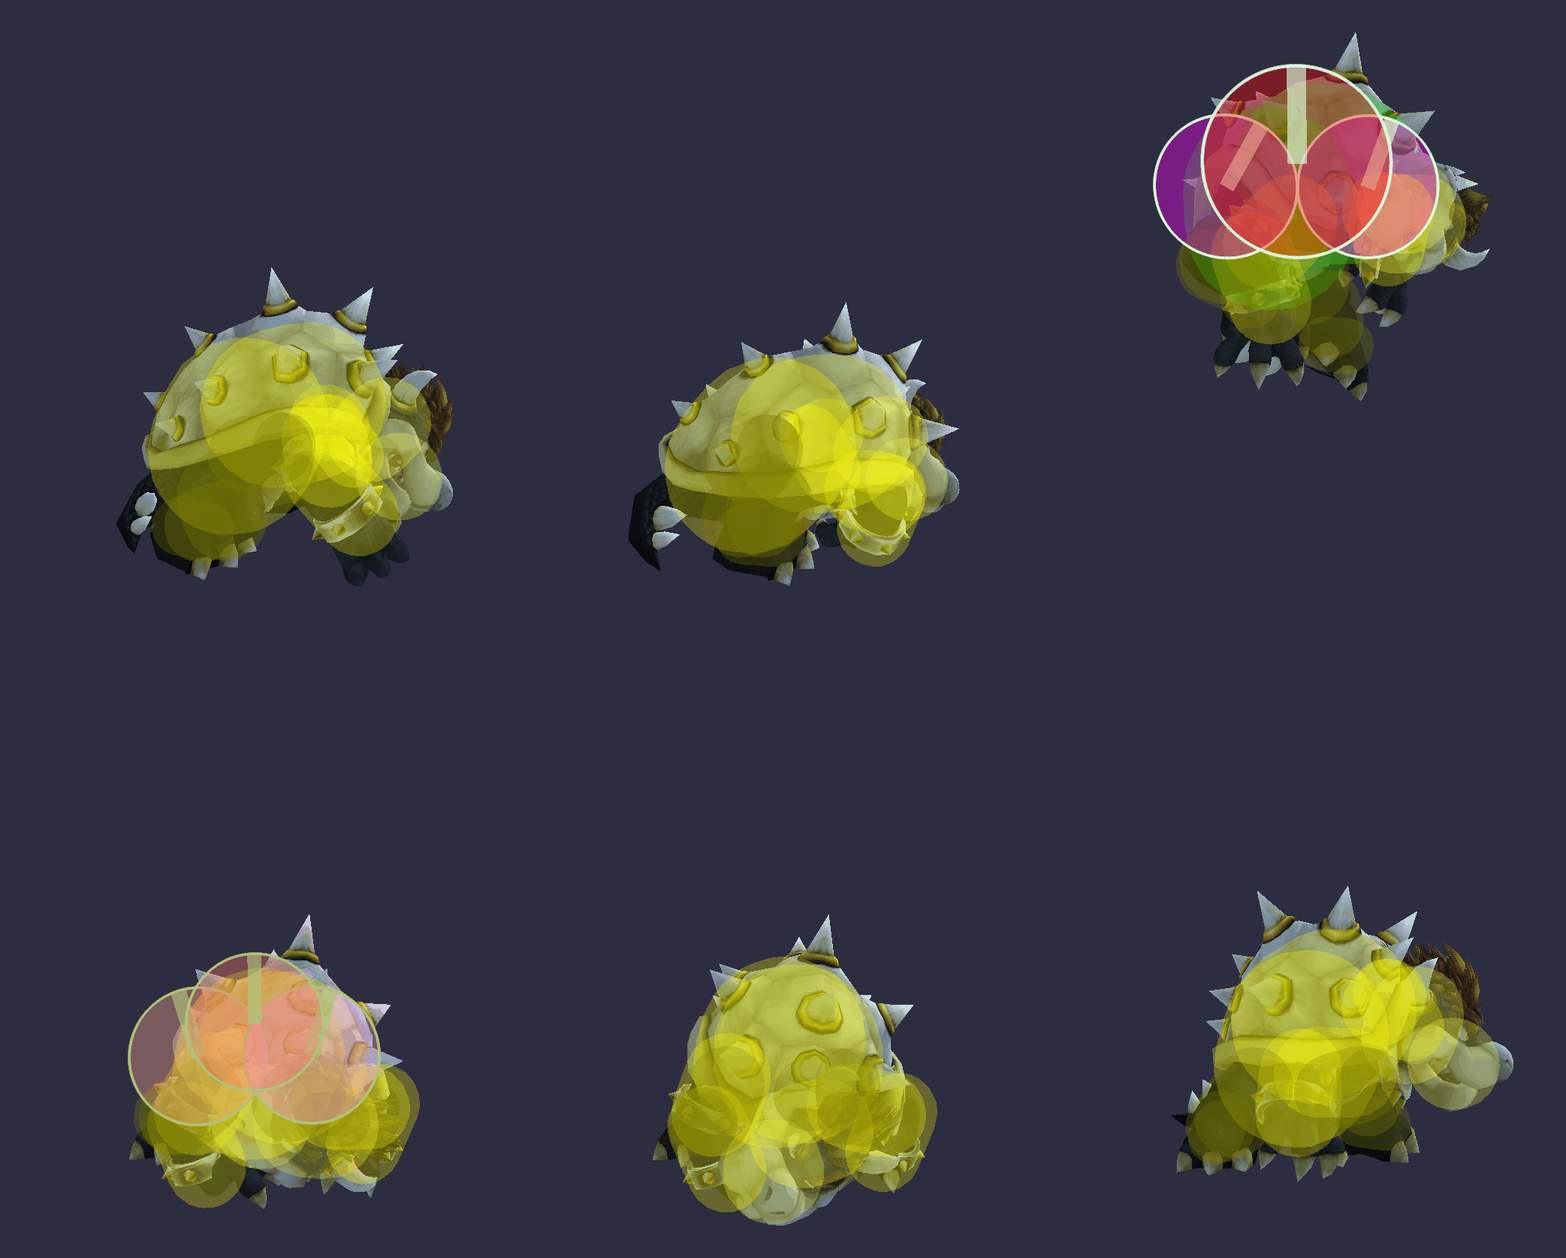
[[File:BowserUSmashSSBB.gif|thumb|400px|Hitbox visualization showing Bowser's up smash.]]
==Overview==
==Overview==
{{Competitive expertise}}
Crouches down on all four of his limbs and jumps straight up, hitting with his shell. Hitting with the sides of the attack does less [[damage]]. Opponents who only [[shield]] his jump may be hit by his landing (this only applies to grounded opponents). Very high [[knockback]] (one of the strongest up smashes in the game), [[KO]]ing at 100% when uncharged and 62% when fully charged in {{SSBB|Final Destination}}.
==Hitboxes==
==Hitboxes==
Line 7: Line 8:
{{HitboxTableTitle|Hit|24}}
{{BrawlHitboxTableRow
|char=bowser
|bn=4
|bn=4
|id=0
|id=0
Line 26: Line 26:
}}
}}
{{BrawlHitboxTableRow
|char=bowser
|bn=4
|bn=4
|id=1
|id=1
Line 45: Line 44:
}}
}}
{{BrawlHitboxTableRow
|char=bowser
|bn=4
|bn=4
|id=2
|id=2
Line 65: Line 63:
{{HitboxTableTitle|Landing|24}}
{{BrawlHitboxTableRow
|char=bowser
|bn=4
|bn=4
|id=0
|id=0
Line 84: Line 81:
}}
}}
{{BrawlHitboxTableRow
|char=bowser
|bn=4
|bn=4
|id=1
|id=1
Line 103: Line 99:
}}
}}
{{BrawlHitboxTableRow
|char=bowser
|bn=4
|bn=4
|id=2
|id=2

Latest revision as of 00:16, May 28, 2024

Hitbox visualization showing Bowser's up smash.

Overview[edit]

Competitive.png This article or section may require competitive expertise.
You can discuss this issue on the talk page or edit this page to improve it.

Crouches down on all four of his limbs and jumps straight up, hitting with his shell. Hitting with the sides of the attack does less damage. Opponents who only shield his jump may be hit by his landing (this only applies to grounded opponents). Very high knockback (one of the strongest up smashes in the game), KOing at 100% when uncharged and 62% when fully charged in Final Destination.

Hitboxes[edit]

ID Part Damage SD Angle BK KS FKV Radius Bone Offset SDIx T% Clang Rebound Type Effect G A Sound Direct
Hit
0 0 20% 0 AngleIcon90.png 23 80 0 8.0 4 0.0 10.0 0.0 1.0x 1.0x 0% HitboxTableIcon(Clang).png HitboxTableIcon(NoRebound).png TypeIcon(Body).png EffectIcon(Slash).png HitboxTableIcon(GroundedTrue).png HitboxTableIcon(AerialTrue).png L Burn SpecialsDirect.png
1 0 15% 0 AngleIcon70.png 23 90 0 6.0 4 0.0 8.0 6.0 1.0x 1.0x 0% HitboxTableIcon(Clang).png HitboxTableIcon(NoRebound).png TypeIcon(Body).png EffectIcon(Slash).png HitboxTableIcon(GroundedTrue).png HitboxTableIcon(AerialTrue).png M Kick SpecialsDirect.png
2 0 15% 0 AngleIcon120.png 23 90 0 6.0 4 0.0 8.0 -6.0 1.0x 1.0x 0% HitboxTableIcon(Clang).png HitboxTableIcon(NoRebound).png TypeIcon(Body).png EffectIcon(Slash).png HitboxTableIcon(GroundedTrue).png HitboxTableIcon(AerialTrue).png M Kick SpecialsDirect.png
Landing
0 0 12% 0 AngleIcon90.png 60 100 0 6.0 4 0.0 12.0 0.0 1.0x 1.0x 0% HitboxTableIcon(Clang).png HitboxTableIcon(Rebound).png TypeIcon(Body).png EffectIcon(Normal).png HitboxTableIcon(GroundedTrue).png HitboxTableIcon(AerialFalse).png L Kick SpecialsDirect.png
1 0 10% 0 AngleIcon74.png 60 100 0 6.0 4 0.0 9.0 5.0 1.0x 1.0x 0% HitboxTableIcon(Clang).png HitboxTableIcon(Rebound).png TypeIcon(Body).png EffectIcon(Normal).png HitboxTableIcon(GroundedTrue).png HitboxTableIcon(AerialFalse).png L Kick SpecialsDirect.png
2 0 10% 0 AngleIcon74.png 60 100 0 6.0 4 0.0 9.0 -5.0 1.0x 1.0x 0% HitboxTableIcon(Clang).png HitboxTableIcon(Rebound).png TypeIcon(Body).png EffectIcon(Normal).png HitboxTableIcon(GroundedTrue).png HitboxTableIcon(AerialFalse).png L Kick SpecialsDirect.png

Timing[edit]

Charges between 9-10
Shell invincible 14-27
Attack 16-21
Landing 31
Interruptible 52
Animation length 59
Hitboxes  FrameIcon(Lag).png FrameIcon(Lag).png FrameIcon(Lag).png FrameIcon(Lag).png FrameIcon(Lag).png FrameIcon(Lag).png FrameIcon(Lag).png FrameIcon(Lag).png FrameIcon(LagChargeS).png FrameIcon(LagChargeE).png FrameIcon(Lag).png FrameIcon(Lag).png FrameIcon(Lag).png FrameIcon(Lag).png FrameIcon(Lag).png FrameIcon(Hitbox).png FrameIcon(Hitbox).png FrameIcon(Hitbox).png FrameIcon(Hitbox).png FrameIcon(Hitbox).png FrameIcon(Hitbox).png FrameIcon(Lag).png FrameIcon(Lag).png FrameIcon(Lag).png FrameIcon(Lag).png FrameIcon(Lag).png FrameIcon(Lag).png FrameIcon(Lag).png FrameIcon(Lag).png FrameIcon(Lag).png FrameIcon(Hitbox).png FrameIcon(Lag).png FrameIcon(Lag).png FrameIcon(Lag).png FrameIcon(Lag).png FrameIcon(Lag).png FrameIcon(Lag).png FrameIcon(Lag).png FrameIcon(Lag).png FrameIcon(Lag).png FrameIcon(Lag).png FrameIcon(Lag).png FrameIcon(Lag).png FrameIcon(Lag).png FrameIcon(Lag).png FrameIcon(Lag).png FrameIcon(Lag).png FrameIcon(Lag).png FrameIcon(Lag).png FrameIcon(Lag).png FrameIcon(Lag).png FrameIcon(Interruptible).png FrameIcon(Interruptible).png FrameIcon(Interruptible).png FrameIcon(Interruptible).png FrameIcon(Interruptible).png FrameIcon(Interruptible).png FrameIcon(Interruptible).png FrameIcon(Interruptible).png
Shell  FrameIcon(Vulnerable).png FrameIcon(Vulnerable).png FrameIcon(Vulnerable).png FrameIcon(Vulnerable).png FrameIcon(Vulnerable).png FrameIcon(Vulnerable).png FrameIcon(Vulnerable).png FrameIcon(Vulnerable).png FrameIcon(Vulnerable).png FrameIcon(Vulnerable).png FrameIcon(Vulnerable).png FrameIcon(Vulnerable).png FrameIcon(Vulnerable).png FrameIcon(Invincible).png FrameIcon(Invincible).png FrameIcon(Invincible).png FrameIcon(Invincible).png FrameIcon(Invincible).png FrameIcon(Invincible).png FrameIcon(Invincible).png FrameIcon(Invincible).png FrameIcon(Invincible).png FrameIcon(Invincible).png FrameIcon(Invincible).png FrameIcon(Invincible).png FrameIcon(Invincible).png FrameIcon(Invincible).png FrameIcon(Vulnerable).png FrameIcon(Vulnerable).png FrameIcon(Vulnerable).png FrameIcon(Vulnerable).png FrameIcon(Vulnerable).png FrameIcon(Vulnerable).png FrameIcon(Vulnerable).png FrameIcon(Vulnerable).png FrameIcon(Vulnerable).png FrameIcon(Vulnerable).png FrameIcon(Vulnerable).png FrameIcon(Vulnerable).png FrameIcon(Vulnerable).png FrameIcon(Vulnerable).png FrameIcon(Vulnerable).png FrameIcon(Vulnerable).png FrameIcon(Vulnerable).png FrameIcon(Vulnerable).png FrameIcon(Vulnerable).png FrameIcon(Vulnerable).png FrameIcon(Vulnerable).png FrameIcon(Vulnerable).png FrameIcon(Vulnerable).png FrameIcon(Vulnerable).png FrameIcon(Vulnerable).png FrameIcon(Vulnerable).png FrameIcon(Vulnerable).png FrameIcon(Vulnerable).png FrameIcon(Vulnerable).png FrameIcon(Vulnerable).png FrameIcon(Vulnerable).png FrameIcon(Vulnerable).png
Legend (1 square = 1 frame)
FrameIcon(Lag).png
Lag time
FrameIcon(LagChargeS).pngFrameIcon(LagChargeE).png
Charge interval
FrameIcon(Hitbox).png
Hitbox
FrameIcon(Interruptible).png
Interruptible