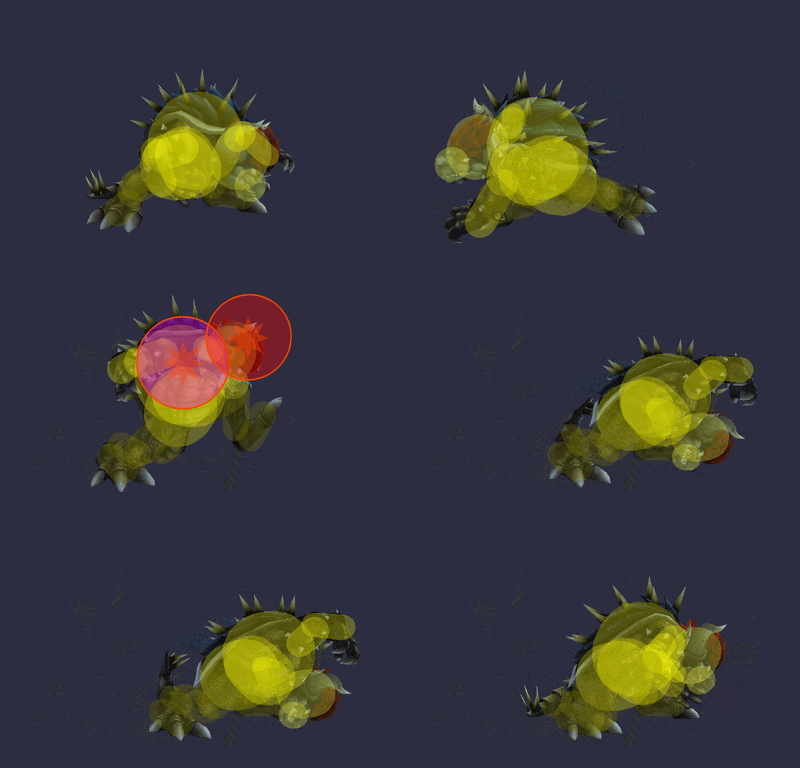
Giga Bowser (SSBB)/Forward smash
From SmashWiki, the Super Smash Bros. wiki
Jump to navigationJump to search
Overview[edit]
Differences from Bowser[edit]
Giga Bowser's forward smash received a mix of buffs and nerfs compared to Bowser's version, but was slightly nerfed overall.
 It has a flame effect, which the original didn't have.
 It is now a single hit instead of a multi-hit.
 This makes its damage output more consistent, and increases its minimum damage output (10% → 24%). The lack of a first hit also prevents a common issue with Bowser's version where the first hit knocks the opponent out of range of the second hit.
 The maximum damage output is lower (33% → 28%), and the startup is the same as Bowser's hit 2, making the earliest hit occur later (frame 26 → 28).
 It has more active frames (4 → 13), and due to the rearranged hitboxes, it is much easier to get the sweetspot as opposed to the sourspot.
 it has a lower hitlag multiplier (1.2× to 1.0×) making it harder to DI.
 It has significantly reduced knockback values compared to Bowser's sweetspot (25 (base)/81 (scaling) → 5/60), KOing later despite its increased base damage.
 It lacks the IASA frames that Bowser's has, increasing its ending lag (FAF 66 → 70).
Hitboxes[edit]
Timing[edit]
| Charges between | 11-12 |
|---|---|
| Hitboxes | 28-40 |
| Animation length | 69 |
Lag time |
Charge interval |
Hitbox |
Similar moves[edit]
|

