Mewtwo (SSB4)/Down tilt: Difference between revisions
From SmashWiki, the Super Smash Bros. wiki
Jump to navigationJump to search
No edit summary |
SuperSqank (talk | contribs) No edit summary |
||
| Line 1: | Line 1: | ||
{{ArticleIcons|ssb4=y}} | {{ArticleIcons|ssb4=y}} | ||
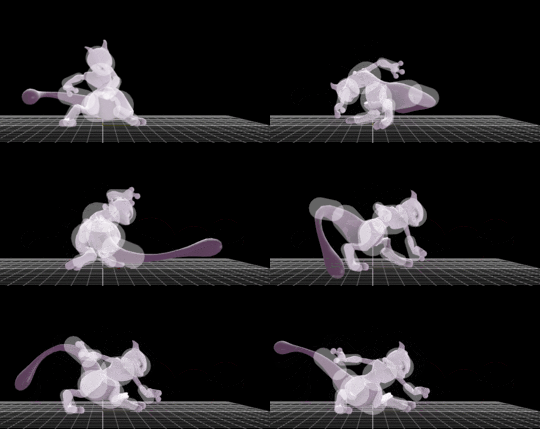
[[File:MewtwoDTilt.gif|thumb|270px|Hitbox visualization showing Mewtwo's down tilt.]] | [[File:MewtwoDTilt.gif|thumb|270px|Hitbox visualization showing Mewtwo's down tilt.]] | ||
==Overview== | ==Overview== | ||
Rotates low to the ground, swinging its tail ahead. Easily Mewtwo's quickest tilt attack, as it comes out as early as frame 6. Not only does this make the tilt a good out of shield option, but it is also a very reliable combo starter. Notable follow-ups include neutral attack, up tilt, up smash, neutral aerial, forward aerial, and up aerial. Can also succeed a neutral aerial that dragged the opponent to the floor with it, though this is admittedly situational, as the enemy could land on either side of the character. | Rotates low to the ground, swinging its tail ahead. Easily Mewtwo's quickest tilt attack, as it comes out as early as frame 6. Not only does this make the tilt a good out of shield option, but it is also a very reliable combo starter. Notable follow-ups include neutral attack, up tilt, up smash, neutral aerial, forward aerial, and up aerial. Can also succeed a neutral aerial that dragged the opponent to the floor with it, though this is admittedly situational, as the enemy could land on either side of the character. | ||
==Hitboxes== | ==Hitboxes== | ||
{{SSB4HitboxTableHeader}} | |||
{{SSB4HitboxTableRow | |||
|id=0 | |||
|part=0 | |||
|damage=5% | |||
|angle=80 | |||
|bk=60 | |||
|ks=82 | |||
|fkv=0 | |||
|r=4.3 | |||
|bn=1003 | |||
|type=Tail | |||
|sdi=1.0 | |||
|sfx=Punch | |||
|slvl=M | |||
}} | |||
{{SSB4HitboxTableRow | |||
|id=1 | |||
|part=0 | |||
|damage=4.5% | |||
|angle=70 | |||
|bk=65 | |||
|ks=84 | |||
|fkv=0 | |||
|r=3.8 | |||
|bn=1005 | |||
|xpos=1.0 | |||
|type=Tail | |||
|sdi=1.0 | |||
|sfx=Punch | |||
|slvl=S | |||
}} | |||
{{SSB4HitboxTableRow | |||
|id=2 | |||
|part=0 | |||
|damage=4% | |||
|angle=60 | |||
|bk=60 | |||
|ks=70 | |||
|fkv=0 | |||
|r=3.2 | |||
|bn=1007 | |||
|type=Tail | |||
|sdi=1.0 | |||
|sfx=Punch | |||
|slvl=S | |||
}} | |||
|} | |||
==Timing== | ==Timing== | ||
Revision as of 17:08, May 19, 2021
Overview
Rotates low to the ground, swinging its tail ahead. Easily Mewtwo's quickest tilt attack, as it comes out as early as frame 6. Not only does this make the tilt a good out of shield option, but it is also a very reliable combo starter. Notable follow-ups include neutral attack, up tilt, up smash, neutral aerial, forward aerial, and up aerial. Can also succeed a neutral aerial that dragged the opponent to the floor with it, though this is admittedly situational, as the enemy could land on either side of the character.
Hitboxes
Timing
| Hitboxes | 6-7 |
|---|---|
| Interruptible | 21 |
| Animation length | 30 |
Lag time |
Hitbox |
Interruptible |
|
