SSB4 Icon.png

Falco (SSB4)/Neutral attack/Hit 2: Difference between revisions

From SmashWiki, the Super Smash Bros. wiki
Jump to navigationJump to search
(added an overview for the move.)
Line 3: Line 3:


==Overview==
==Overview==
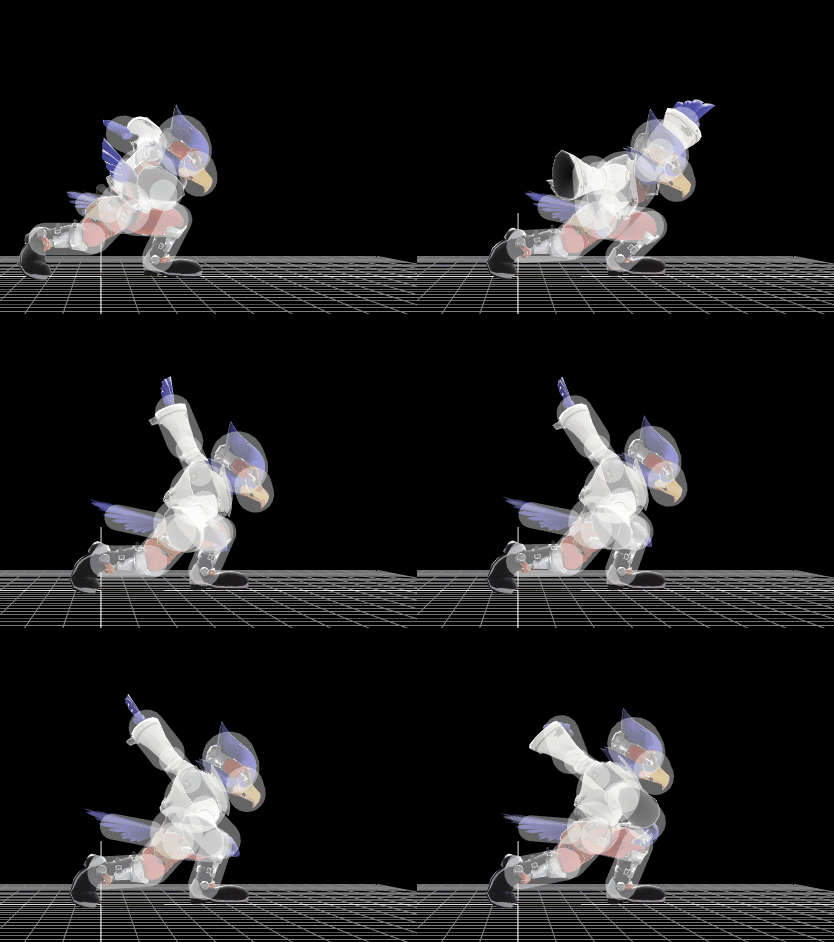
Falco performs a second knifehand strike with the same arm, but in the opposite direction of the first. Compared to jab 1, it isn't used much for[[jab cancel]]ing unless as a mixup, as it has slightly lower damage and can be hard to follow up from. It also can have a bit of trouble connecting into the rapid jab. as the knockback growth can hinder it at higher percentages.
Falco performs a second knifehand strike with the same arm, but in the opposite direction of the first. Compared to [[Falco (SSB4)/Neutral attack/Hit 1|the first hit]], it isn't used much for [[jab cancel]]ing unless as a mixup, as it has slightly lower damage and can be hard to follow up from. It also can have a bit of trouble connecting into the rapid jab. as the knockback growth can hinder it at higher percentages.


==Hitboxes==
==Hitboxes==

Revision as of 01:35, January 16, 2019

Hitbox visualization showing Falco's second jab.

Overview

Falco performs a second knifehand strike with the same arm, but in the opposite direction of the first. Compared to the first hit, it isn't used much for jab canceling unless as a mixup, as it has slightly lower damage and can be hard to follow up from. It also can have a bit of trouble connecting into the rapid jab. as the knockback growth can hinder it at higher percentages.

Hitboxes

ID Part Damage SD Angle BK KS FKV Radius Bone Offset SDIx T% Clang Rebound Type Effect G A Sound Direct
0 0 2% 0 AngleIcon80.png 30 30 0 4.0 16 4.5 0.0 0.0 1.0x 1.0x 0% HitboxTableIcon(Clang).png HitboxTableIcon(Rebound).png TypeIcon(Hand).png EffectIcon(Slash).png HitboxTableIcon(GroundedTrue).png HitboxTableIcon(AerialTrue).png M Slash SpecialsDirect.png
1 0 2% 0 AngleIcon50.png 30 30 0 3.0 16 1.5 0.0 0.0 1.0x 1.0x 0% HitboxTableIcon(Clang).png HitboxTableIcon(Rebound).png TypeIcon(Hand).png EffectIcon(Slash).png HitboxTableIcon(GroundedTrue).png HitboxTableIcon(AerialTrue).png M Slash SpecialsDirect.png
2 0 2% 0 AngleIcon45.png 30 30 0 5.0 15 -0.5 0.0 0.0 1.0x 1.0x 0% HitboxTableIcon(Clang).png HitboxTableIcon(Rebound).png TypeIcon(Hand).png EffectIcon(Slash).png HitboxTableIcon(GroundedTrue).png HitboxTableIcon(AerialTrue).png M Slash SpecialsDirect.png

Timing

Hitboxes 3-5
Earliest continuable frame 17
Interruptible 26
Animation length 39
FrameIcon(Lag).png FrameIcon(Lag).png FrameIcon(Hitbox).png FrameIcon(Hitbox).png FrameIcon(Hitbox).png FrameIcon(Lag).png FrameIcon(Lag).png FrameIcon(Lag).png FrameIcon(Lag).png FrameIcon(Lag).png FrameIcon(Lag).png FrameIcon(Lag).png FrameIcon(Lag).png FrameIcon(Lag).png FrameIcon(Lag).png FrameIcon(LagContinuableS).png FrameIcon(LagContinuableE).png FrameIcon(Lag).png FrameIcon(Lag).png FrameIcon(Lag).png FrameIcon(Lag).png FrameIcon(Lag).png FrameIcon(Lag).png FrameIcon(Lag).png FrameIcon(Lag).png FrameIcon(Interruptible).png FrameIcon(Interruptible).png FrameIcon(Interruptible).png FrameIcon(Interruptible).png FrameIcon(Interruptible).png FrameIcon(Interruptible).png FrameIcon(Interruptible).png FrameIcon(Interruptible).png FrameIcon(Interruptible).png FrameIcon(Interruptible).png FrameIcon(Interruptible).png FrameIcon(Interruptible).png FrameIcon(Interruptible).png FrameIcon(Interruptible).png
Legend (1 square = 1 frame)
FrameIcon(Lag).png
Lag time
FrameIcon(Hitbox).png
Hitbox
FrameIcon(BlankContinuableS).pngFrameIcon(BlankContinuableE).png
Earliest continuable point
FrameIcon(Interruptible).png
Interruptible