Cloud (SSB4)/Forward throw: Difference between revisions
From SmashWiki, the Super Smash Bros. wiki
Jump to navigationJump to search
(New Page: {{ArticleIcons|ssb4=y}} ==Overview== Cloud dropkicks the opponent away with both legs. It is similar to {{SSB4|Wii Fit Trainer}}'s back throw. The throw's animation is similar to t...) |
SuperSqank (talk | contribs) No edit summary |
||
| (One intermediate revision by one other user not shown) | |||
| Line 1: | Line 1: | ||
{{ArticleIcons|ssb4=y}} | {{ArticleIcons|ssb4=y}} | ||
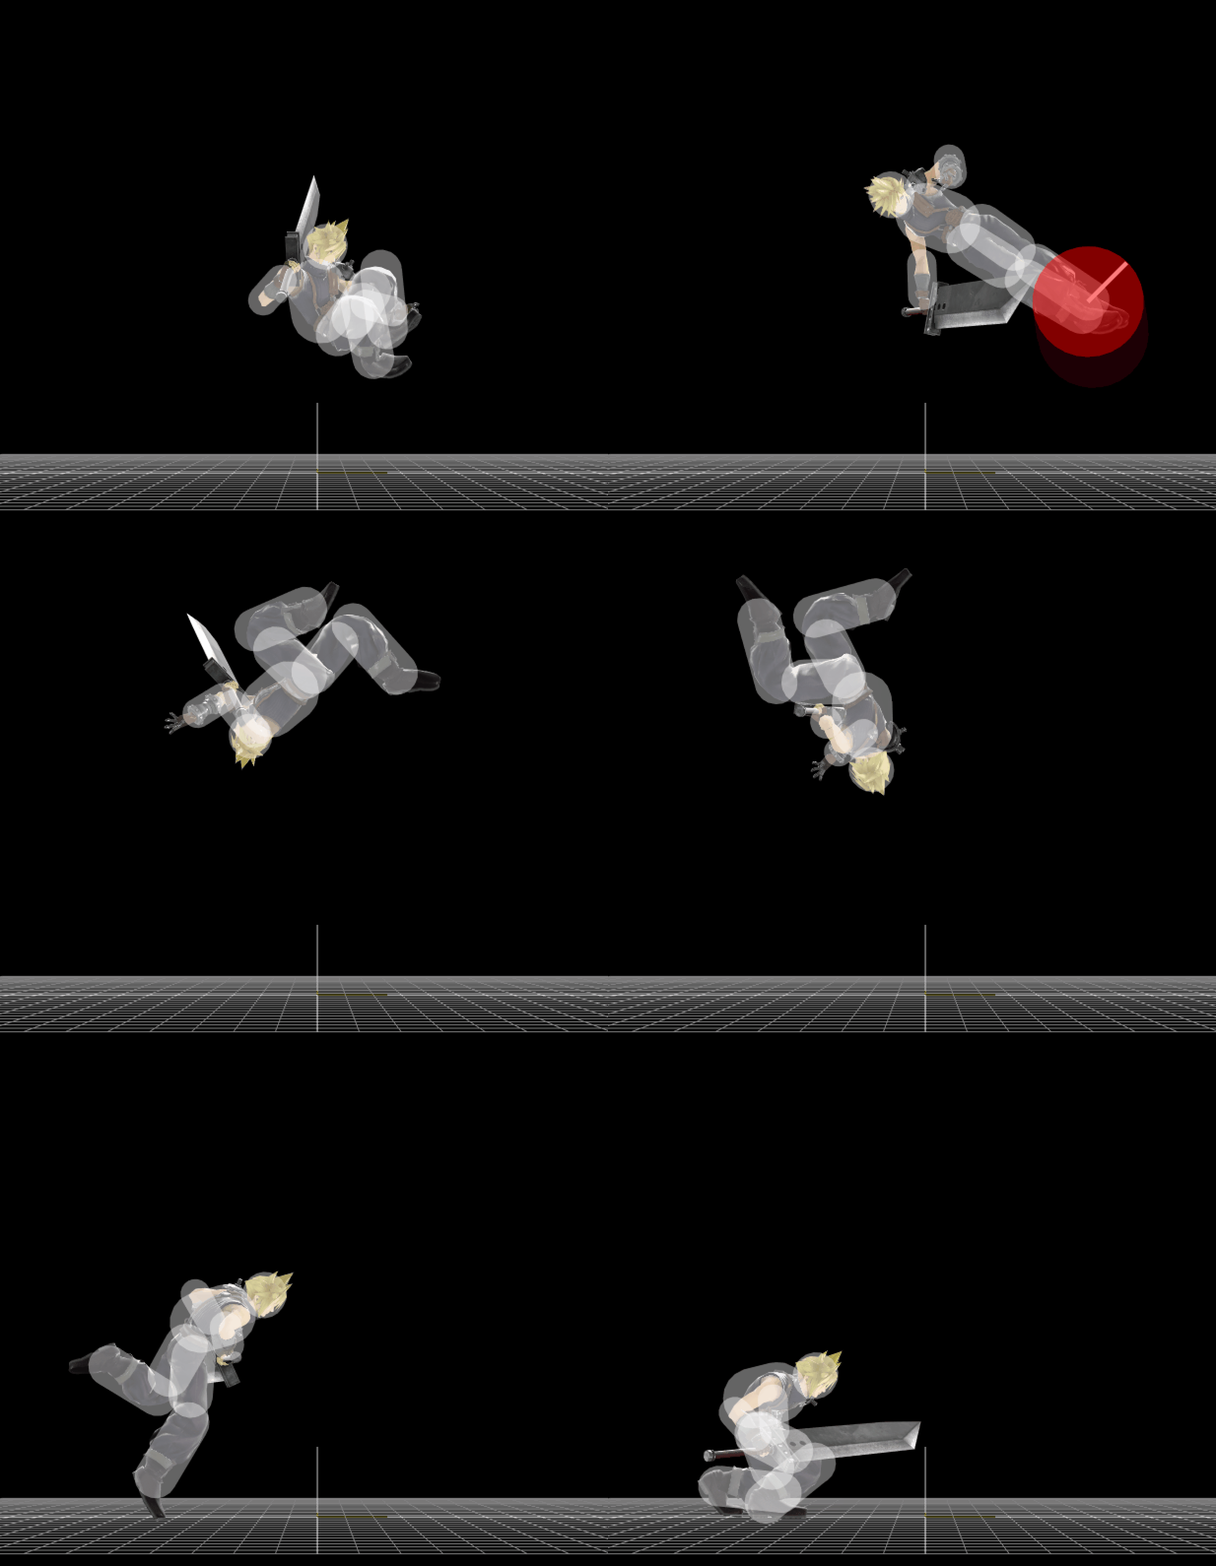
[[File:CloudThrowF.gif|thumb|300px|Hitbox visualization showing Cloud's forward throw.]] | |||
==Overview== | ==Overview== | ||
Cloud dropkicks the opponent away with both legs. It is similar to {{SSB4|Wii Fit Trainer}}'s [[back throw]]. | Cloud dropkicks the opponent away with both legs. It is similar to {{SSB4|Wii Fit Trainer}}'s [[back throw]]. | ||
| Line 5: | Line 7: | ||
The throw's animation is similar to the '''Somersault''' ''Limit Break'' used by Tifa Lockhart in ''Final Fantasy VII''. | The throw's animation is similar to the '''Somersault''' ''Limit Break'' used by Tifa Lockhart in ''Final Fantasy VII''. | ||
== | ==Throw and Hitbox Data== | ||
{{ | {{SSB4HitboxTableHeader|special=y}} | ||
{{HitboxTableTitle|Hitbox|42}} | |||
{{SSB4SpecialHitboxTableRow | |||
|id=0 | |||
|damage=4% | |||
|angle=45 | |||
|af=3 | |||
|bk=60 | |||
|ks=120 | |||
|fkv=0 | |||
|r=4.0 | |||
|bn=6 | |||
|ff=1.5 | |||
|type=Foot | |||
|effect=Normal | |||
|sfx=Kick | |||
|slvl=M | |||
|clang=f | |||
|rebound=f | |||
}} | |||
|} | |||
{{SSB4ThrowTableHeader}} | |||
{{HitboxTableTitle|Throw|24}} | |||
{{SSB4ThrowTableRow | |||
|id=0 | |||
|type=Throwing | |||
|damage=3% | |||
|angle=53 | |||
|bk=48 | |||
|ks=115 | |||
|fkv=0 | |||
|bn=0 | |||
|effect=Normal | |||
|sfx=None | |||
|slvl=S | |||
}} | |||
{{SSB4ThrowTableRow | |||
|id=1 | |||
|damage=3% | |||
|angle=361 | |||
|af=3 | |||
|bk=60 | |||
|ks=100 | |||
|fkv=0 | |||
|noff=t | |||
|bn=0 | |||
|type=Throwing | |||
|sfx=None | |||
|slvl=S | |||
}} | |||
|} | |||
==Timing== | |||
{|class="wikitable" | {|class="wikitable" | ||
! | !Invincibility | ||
|1-18 | |||
|- | |- | ||
| Throw || | !Hitbox | ||
|7-8 | |||
|- | |||
!Throw Release | |||
|9 | |||
|- | |||
!Interruptible | |||
|36 | |||
|- | |||
!Animation length | |||
|54 | |||
|} | |} | ||
{{FrameStripStart}} | |||
{{FrameStrip|t=Lag|c=6}}{{FrameStrip|t=Hitbox|c=2|e=HitboxThrowS}}{{FrameStrip|t=Lag|c=27|s=LagThrowE}}{{FrameStrip|t=Interruptible|c=19}} | |||
|- | |||
{{FrameStrip|t=Invincible|c=18}}{{FrameStrip|t=Vulnerable|c=36}} | |||
{{FrameStripEnd}} | |||
{{FrameIconLegend|lag=y|hitbox=y|throw=y|interruptible=y|vulnerable=y|invincible=y}} | |||
{{MvSubNavCloud|g=SSB4}} | {{MvSubNavCloud|g=SSB4}} | ||
[[Category:Cloud (SSB4)]] | [[Category:Cloud (SSB4)]] | ||
[[Category:Forward throws (SSB4)]] | [[Category:Forward throws (SSB4)]] | ||
Latest revision as of 06:47, July 16, 2020
Overview[edit]
Cloud dropkicks the opponent away with both legs. It is similar to Wii Fit Trainer's back throw.
The throw's animation is similar to the Somersault Limit Break used by Tifa Lockhart in Final Fantasy VII.
Throw and Hitbox Data[edit]
| ID | Damage | Angle | BK | KS | FKV | Bone | FFx | Type | Effect | Sound | |||||||||||||
|---|---|---|---|---|---|---|---|---|---|---|---|---|---|---|---|---|---|---|---|---|---|---|---|
| Throw | |||||||||||||||||||||||
| 0 | 3% | Standard | 48 | 115 | 0 | 0 | None | ||||||||||||||||
| 1 | 3% | Forwards | 60 | 100 | 0 | 0 | None | ||||||||||||||||
Timing[edit]
| Invincibility | 1-18 |
|---|---|
| Hitbox | 7-8 |
| Throw Release | 9 |
| Interruptible | 36 |
| Animation length | 54 |
Lag time |
Hitbox |
Vulnerable |
Invincible |
Throw point |
Interruptible |
|
