Yoshi (SSB)/Up tilt: Difference between revisions
No edit summary |
SuperSqank (talk | contribs) m (→Timing) |
||
| (8 intermediate revisions by 3 users not shown) | |||
| Line 3: | Line 3: | ||
==Overview== | ==Overview== | ||
[[File:Yoshi Up Tilt Hitbox Smash 64.gif|thumb|Hitboxes of Yoshi's u-tilt]] | [[File:Yoshi Up Tilt Hitbox Smash 64.gif|thumb|Hitboxes of Yoshi's u-tilt]] | ||
Yoshi does an upwards headbutt, dealing | Yoshi does an upwards headbutt, dealing 12% damage, with moderate [[set knockback]]. It is very useful for setting up combos, and at any percentage, it can lead into an aerial such as a {{mvsub|Yoshi|SSB|back aerial}} or {{mvsub|Yoshi|SSB|up aerial}}), which can both KO at high percentages. It is also very useful for [[juggling]] [[combo]]s, and it can lead into a late-hitting {{mvsub|Yoshi|SSB|neutral aerial}} to followup with another up tilt. Against characters with moderate [[falling speed]]s, it can even lead into a [[Yoshi Bomb]] from the ground as a flashy way to KO. Additionally, a [[Z-cancel]]led {{mvsub|Yoshi|SSB|back aerial}} can combo straight into the move, which can be done in a variety of situations, either for the sake of landing an up tilt, or via techniques such as the [[DJC counter]]. Overall, a useful move that can be very powerful if used correctly. However, it is much less effective against the [[floaty|floatiest]] characters due to knocking them up too high to followup reliably, even at base percentages, with the only "true" followup options available being up aerial after a [[double jump]] or a well-timed [[Egg Throw]]. | ||
{{ | ==Hitboxes== | ||
===NTSC-J=== | |||
{{SSB64HitboxTableHeader}} | |||
{{SSB64HitboxTableRow | |||
|id=0 | |||
|part=0 | |||
|damage=12% | |||
|angle=100 | |||
|bk=0 | |||
|ks=100 | |||
|fkv=130 | |||
|r=195 | |||
|bn=7 | |||
|xpos=0 | |||
|ypos=40 | |||
|zpos=40 | |||
|type=Head | |||
|sfx=Kick | |||
|slvl=L | |||
}} | |||
{{SSB64HitboxTableRow | |||
|id=1 | |||
|part=0 | |||
|damage=12% | |||
|angle=100 | |||
|bk=0 | |||
|ks=100 | |||
|fkv=130 | |||
|r=120 | |||
|bn=6 | |||
|xpos=0 | |||
|ypos=0 | |||
|zpos=0 | |||
|type=Head | |||
|sfx=Kick | |||
|slvl=L | |||
}} | |||
|} | |||
===NTSC-U/PAL=== | |||
{{SSB64HitboxTableHeader}} | |||
{{SSB64HitboxTableRow | |||
|id=0 | |||
|part=0 | |||
|damage=12% | |||
|angle=100 | |||
|bk=0 | |||
|ks=100 | |||
|fkv=130 | |||
|r=195 | |||
|bn=7 | |||
|xpos=0 | |||
|ypos=40 | |||
|zpos=40 | |||
|type=Head | |||
|sfx=Kick | |||
|slvl=M | |||
|sbg=change | |||
}} | |||
{{SSB64HitboxTableRow | |||
|id=1 | |||
|part=0 | |||
|damage=12% | |||
|angle=100 | |||
|bk=0 | |||
|ks=100 | |||
|fkv=130 | |||
|r=120 | |||
|bn=6 | |||
|xpos=0 | |||
|ypos=0 | |||
|zpos=0 | |||
|type=Head | |||
|sfx=Kick | |||
|slvl=M | |||
|sbg=change | |||
}} | |||
|} | |||
====Summary==== | |||
*{{change|SFX changed from a heavy kick to a medium kick.}} | |||
==Timing== | |||
{|class="wikitable" | |||
!Hitboxes | |||
|7-10 | |||
|- | |||
!Head intangible | |||
|7-10 | |||
|- | |||
!Animation length | |||
|25 | |||
|} | |||
{{FrameStripStart}} | |||
|Hitboxes {{FrameStrip|t=Lag|c=6}}{{FrameStrip|t=Hitbox|c=4}}{{FrameStrip|t=Lag|c=15}} | |||
|- | |||
|Head {{FrameStrip|t=Vulnerable|c=6}}{{FrameStrip|t=Intangible|c=4}}{{FrameStrip|t=Vulnerable|c=15}} | |||
{{FrameStripEnd}} | |||
{{FrameIconLegend|lag=y|hitbox=y|vulnerable=y|intangible=y}} | |||
==Gallery== | ==Gallery== | ||
<gallery> | <gallery> | ||
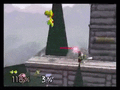
File:SSB64 Yoshi Combo.gif|A Yoshi combo involving juggling with the up tilt and using other aerials to combo into a {{mvsub|Yoshi|SSB|forward aerial}} [[meteor smash]]. | File:SSB64 Yoshi Combo.gif|A Yoshi combo involving juggling with the up tilt and using other aerials to combo into a {{mvsub|Yoshi|SSB|forward aerial}} [[meteor smash]]. | ||
</gallery> | </gallery> | ||
{{MvSubNavYoshi|g=SSB}} | {{MvSubNavYoshi|g=SSB}} | ||
[[Category:Yoshi (SSB)]] | [[Category:Yoshi (SSB)]] | ||
[[Category:Up tilts]] | [[Category:Up tilts (SSB)]] | ||
[[Category:Normal attacks]] | [[Category:Normal attacks (SSB)]] | ||
Latest revision as of 04:17, May 12, 2021
Overview[edit]

Yoshi does an upwards headbutt, dealing 12% damage, with moderate set knockback. It is very useful for setting up combos, and at any percentage, it can lead into an aerial such as a back aerial or up aerial), which can both KO at high percentages. It is also very useful for juggling combos, and it can lead into a late-hitting neutral aerial to followup with another up tilt. Against characters with moderate falling speeds, it can even lead into a Yoshi Bomb from the ground as a flashy way to KO. Additionally, a Z-cancelled back aerial can combo straight into the move, which can be done in a variety of situations, either for the sake of landing an up tilt, or via techniques such as the DJC counter. Overall, a useful move that can be very powerful if used correctly. However, it is much less effective against the floatiest characters due to knocking them up too high to followup reliably, even at base percentages, with the only "true" followup options available being up aerial after a double jump or a well-timed Egg Throw.
Hitboxes[edit]
NTSC-J[edit]
| ID | Part | Damage | SD | Angle | BK | KS | FKV | Radius | Bone | Offset | Clang | Effect | G | A | Sound | ||
|---|---|---|---|---|---|---|---|---|---|---|---|---|---|---|---|---|---|
| 0 | 0 | 12% | 0 | 0 | 100 | 130 | 195 | 7 | 0 | 40 | 40 | ||||||
| 1 | 0 | 12% | 0 | 0 | 100 | 130 | 120 | 6 | 0 | 0 | 0 | ||||||
NTSC-U/PAL[edit]
| ID | Part | Damage | SD | Angle | BK | KS | FKV | Radius | Bone | Offset | Clang | Effect | G | A | Sound | ||
|---|---|---|---|---|---|---|---|---|---|---|---|---|---|---|---|---|---|
| 0 | 0 | 12% | 0 | 0 | 100 | 130 | 195 | 7 | 0 | 40 | 40 | ||||||
| 1 | 0 | 12% | 0 | 0 | 100 | 130 | 120 | 6 | 0 | 0 | 0 | ||||||
Summary[edit]
 SFX changed from a heavy kick to a medium kick.
Timing[edit]
| Hitboxes | 7-10 |
|---|---|
| Head intangible | 7-10 |
| Animation length | 25 |
| Hitboxes | |||||||||||||||||||||||||
| Head |
Lag time |
Hitbox |
Vulnerable |
Intangible |
Gallery[edit]
A Yoshi combo involving juggling with the up tilt and using other aerials to combo into a forward aerial meteor smash.
