Raul Retana (talk | contribs) m (Added update history) |
No edit summary |
||
| (4 intermediate revisions by 3 users not shown) | |||
| Line 1: | Line 1: | ||
{{ArticleIcons|ssbu=y}} | {{ArticleIcons|ssbu=y}} | ||
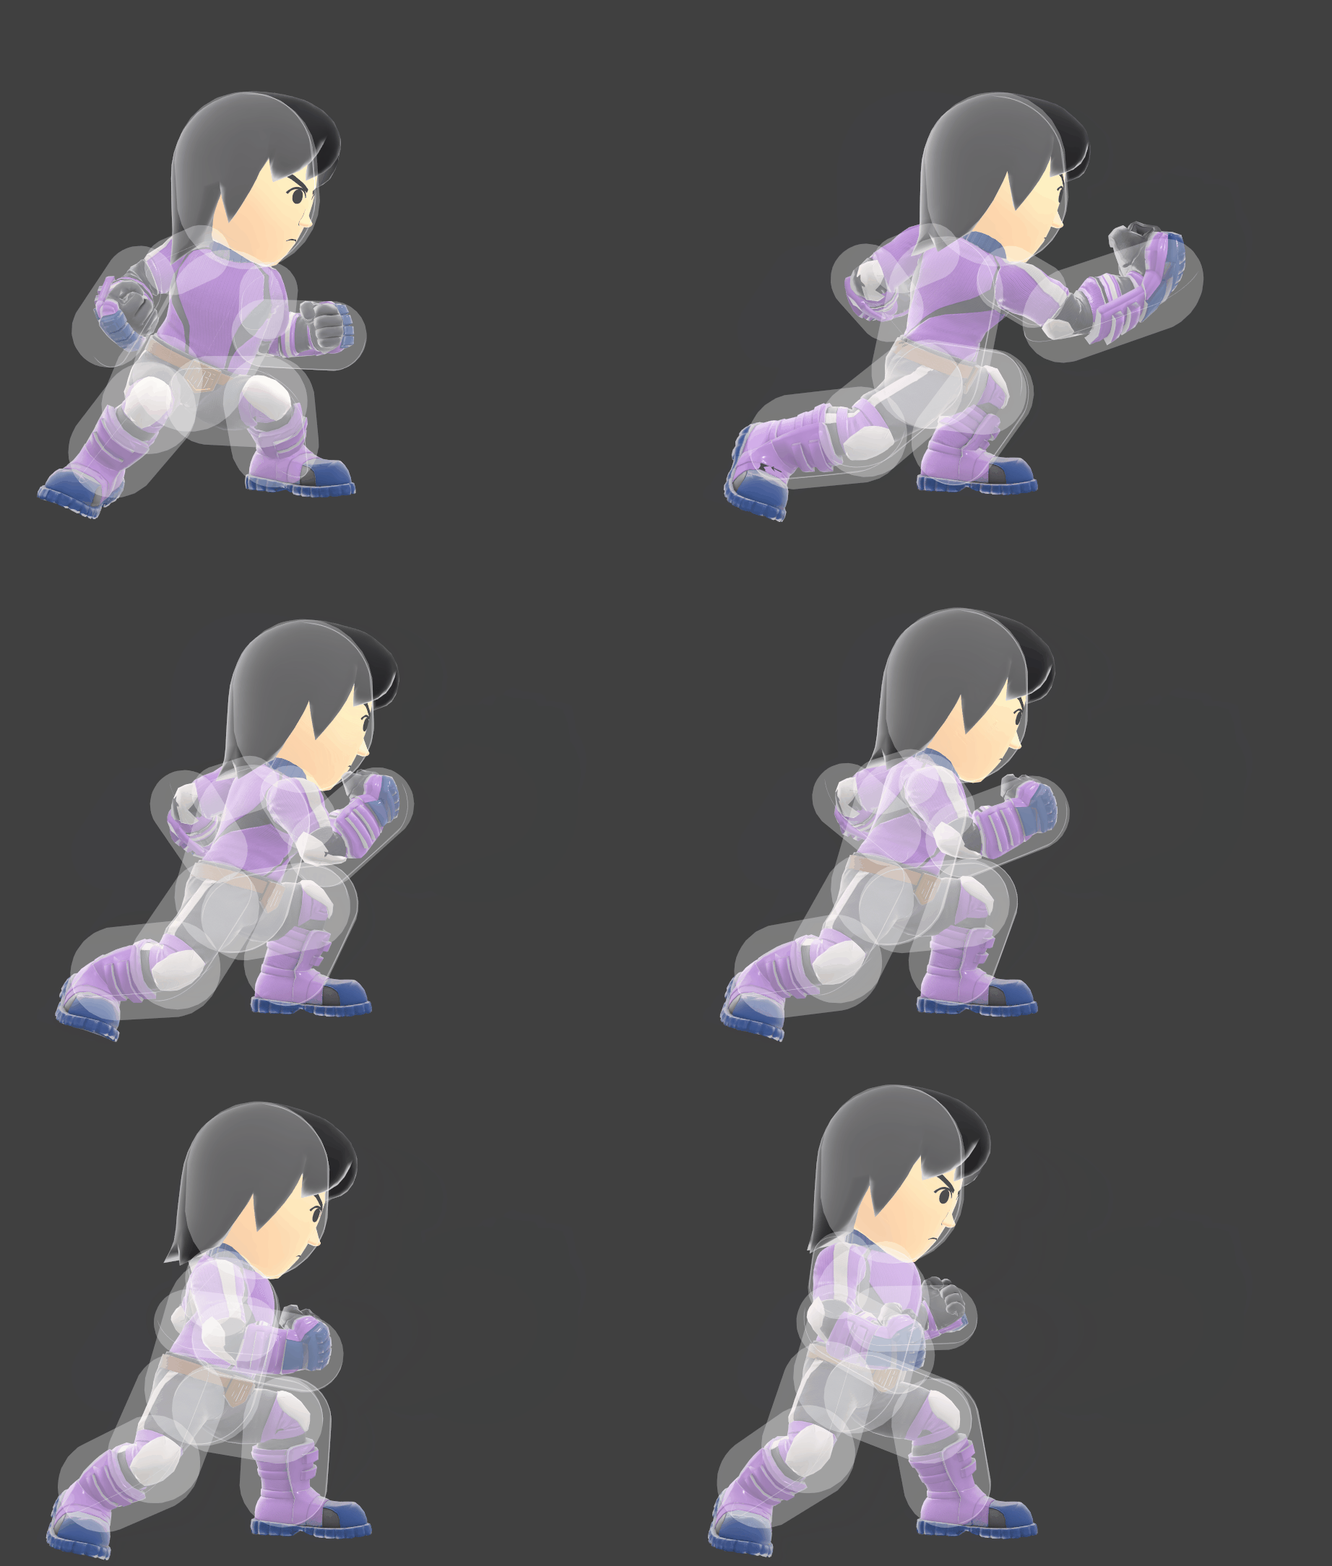
[[File:MiiBrawlerJab2SSBU.gif|thumb| | [[File:MiiBrawlerJab2SSBU.gif|thumb|250px|Hitbox visualization showing Mii Brawler's second jab.]] | ||
==Overview== | ==Overview== | ||
Mii Brawler jabs again, this time with their opposite hand. Like the first hit of jab, this move can also be used to jab lock, but is a weaker option as it has 3 more frames of endlag than jab 1. This extra endlag prevents certain punish options, such as forward smash. | |||
==Update History== | ==Update History== | ||
'''{{GameIcon|ssbu}} {{SSBU|3.1.0}}''' | '''{{GameIcon|ssbu}} {{SSBU|3.1.0}}''' | ||
*{{buff|Neutral attack 2 connects into neutral infinite more reliably.}} | *{{buff|Neutral attack 2 connects into neutral infinite more reliably.}} | ||
==Hitboxes== | ==Hitboxes== | ||
{{UltimateHitboxTableHeader}} | {{UltimateHitboxTableHeader}} | ||
| Line 12: | Line 13: | ||
|damage=1.0% | |damage=1.0% | ||
|angle=361 | |angle=361 | ||
|af=3 | |||
|bk=25 | |bk=25 | ||
|ks=25 | |ks=25 | ||
| Line 17: | Line 19: | ||
|r=3.0 | |r=3.0 | ||
|bn=top | |bn=top | ||
|ypos=7.5 | |ypos=7.5 | ||
|zpos=7.0 | |zpos=7.0 | ||
|ff=1.2 | |ff=1.2 | ||
|type=Hand | |type=Hand | ||
|sfx=Punch | |sfx=Punch | ||
|slvl=S | |slvl=S | ||
| Line 30: | Line 30: | ||
|damage=1.0% | |damage=1.0% | ||
|angle=180 | |angle=180 | ||
|af=3 | |||
|hitbits=Fighter only | |||
|bk=25 | |bk=25 | ||
|ks=20 | |ks=20 | ||
| Line 35: | Line 37: | ||
|r=3.5 | |r=3.5 | ||
|bn=top | |bn=top | ||
|ypos=7.5 | |ypos=7.5 | ||
|zpos=11.0 | |zpos=11.0 | ||
|ff=1.2 | |ff=1.2 | ||
|type=Hand | |type=Hand | ||
|sfx=Punch | |sfx=Punch | ||
|slvl=S | |slvl=S | ||
| Line 48: | Line 48: | ||
|damage=1.0% | |damage=1.0% | ||
|angle=361 | |angle=361 | ||
|af=3 | |||
|bk=25 | |bk=25 | ||
|ks=20 | |ks=20 | ||
| Line 53: | Line 54: | ||
|r=3.5 | |r=3.5 | ||
|bn=top | |bn=top | ||
|ypos=7.5 | |ypos=7.5 | ||
|zpos=11.0 | |zpos=11.0 | ||
|ff=1.2 | |ff=1.2 | ||
|type=Hand | |type=Hand | ||
|sfx=Punch | |sfx=Punch | ||
|slvl=S | |slvl=S | ||
}} | }} | ||
|} | |} | ||
==Timing== | ==Timing== | ||
Upon reaching the continuability window, the move transitions into the rapid jab if the button has been pressed and released at least 3 times since the neutral attack's first hit. | |||
{|class="wikitable" | {|class="wikitable" | ||
!Hitboxes | !colspan=2|Hitboxes | ||
|2-3 | |2-3 | ||
|- | |- | ||
! | !rowspan=2|Continuability!!Pressed repeatedly | ||
| | |5-18 | ||
|- | |||
!Held on hit | |||
|7 | |||
|- | |- | ||
!Interruptible | !colspan=2|Interruptible | ||
|19 | |19 | ||
|- | |- | ||
!Animation length | !colspan=2|Animation length | ||
|31 | |31 | ||
|} | |} | ||
{{FrameStripStart}} | {{FrameStripStart}} | ||
{{FrameStrip|t=Lag|c=1}}{{FrameStrip|t=Hitbox|c=2}}{{FrameStrip|t=Lag|c=2|e=LagContinuableS}}{{FrameStrip|t=Lag|c= | {{FrameStrip|t=Lag|c=1}}{{FrameStrip|t=Hitbox|c=2}}{{FrameStrip|t=Lag|c=1|e=LagContinuableS}}{{FrameStrip|t=Lag|c=2|s=LagContinuableE|e=LagContinuableS}}{{FrameStrip|t=Lag|c=12|s=LagContinuableE}}{{FrameStrip|t=Interruptible|c=13}} | ||
|- | |||
{{FrameStrip|t=Blank|c=4}}{{FrameStrip|t=Continuable|c=14}}{{FrameStrip|t=Blank|c=13}} | |||
{{FrameStripEnd}} | {{FrameStripEnd}} | ||
{{FrameIconLegend|lag=y|hitbox=y|earliestcontinuable=y|interruptible=y}} | {{FrameIconLegend|lag=y|hitbox=y|earliestcontinuable=y|continuable=y|interruptible=y}} | ||
{{MvSubNavMiiBrawler|g=SSBU}} | {{MvSubNavMiiBrawler|g=SSBU}} | ||
[[Category:Mii Brawler (SSBU)]] | [[Category:Mii Brawler (SSBU)]] | ||
[[Category:Neutral attacks (SSBU)]] | [[Category:Neutral attacks (SSBU)]] | ||
Latest revision as of 19:30, July 28, 2022
OverviewEdit
Mii Brawler jabs again, this time with their opposite hand. Like the first hit of jab, this move can also be used to jab lock, but is a weaker option as it has 3 more frames of endlag than jab 1. This extra endlag prevents certain punish options, such as forward smash.
Update HistoryEdit
- Neutral attack 2 connects into neutral infinite more reliably.
HitboxesEdit
TimingEdit
Upon reaching the continuability window, the move transitions into the rapid jab if the button has been pressed and released at least 3 times since the neutral attack's first hit.
| Hitboxes | 2-3 | |
|---|---|---|
| Continuability | Pressed repeatedly | 5-18 |
| Held on hit | 7 | |
| Interruptible | 19 | |
| Animation length | 31 | |
| Lag time |
Hitbox |
Continuable |
Earliest continuable point |
Interruptible |
|
