Super Smash Bros. Melee

Marth (SSBM)/Forward tilt: Difference between revisions

From SmashWiki, the Super Smash Bros. wiki
Jump to navigationJump to search
No edit summary
(→‎Overview: "crouch canceling" was not the right word for crouching out of a run, and the correct term is run not dash, you can't crouch out of a dash. Corrected for factual accuracy.)
 
(One intermediate revision by one other user not shown)
Line 1: Line 1:
{{ArticleIcons|ssbm=y}}
==Overview==
==Overview==
{{image|Needs a gif. of the hitboxes}}
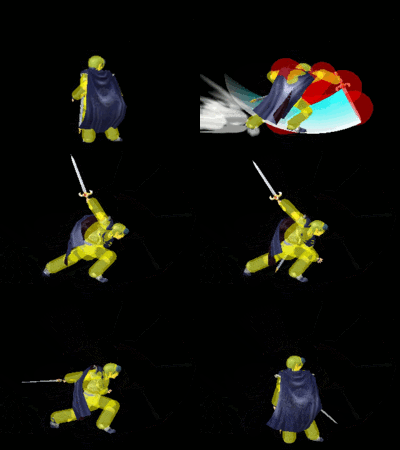
[[File:Marth Forward Tilt Hitbox Melee.gif|thumb|Hitbox duration of Marth's forward tilt.]]
Marth's forward tilt is a useful [[spacing]] tool, especially if [[tipper|tippered]]. If a [[wavedash]] was used before the forward tilt, it could follow up into another forward tilt at low percents. However, in most cases, a [[Marth (SSBM)/Down tilt|down tilt]] is generally preferred due to its lower [[lag]], longer range, and the fact that unlike forward tilt, down tilt can be [[crouch canceling|crouch canceled]] out of a [[dash]].
Marth's forward tilt is a useful [[spacing]] tool, especially if [[tipper]]ed. If a [[wavedash]] was used before the forward tilt, it could follow up into another forward tilt at low percents. However, in most cases, a {{mvsub|Marth|SSBM|down tilt|pos=y}} is generally preferred due to its lower [[lag]], longer range, and the fact that unlike forward tilt, down tilt can be more easily done when crouching out of a run.


==Hitboxes==
==Hitboxes==

Latest revision as of 03:48, May 21, 2016

Overview[edit]

Hitbox duration of Marth's forward tilt.

Marth's forward tilt is a useful spacing tool, especially if tippered. If a wavedash was used before the forward tilt, it could follow up into another forward tilt at low percents. However, in most cases, a down tilt is generally preferred due to its lower lag, longer range, and the fact that unlike forward tilt, down tilt can be more easily done when crouching out of a run.

Hitboxes[edit]

ID Part Damage SD Angle BK KS FKV Radius Bone Offset Clang Rebound Effect G A Sound
0 0 9% 0 Sakurai angle 30 70 0 3.906 76 0.0 0.0 0.0 HitboxTableIcon(Clang).png HitboxTableIcon(Rebound).png Slash (effect) HitboxTableIcon(GroundedTrue).png HitboxTableIcon(AerialTrue).png M Slash
1 0 9% 0 Sakurai angle 30 70 0 2.7342 71 0.0 0.0 0.0 HitboxTableIcon(Clang).png HitboxTableIcon(Rebound).png Slash (effect) HitboxTableIcon(GroundedTrue).png HitboxTableIcon(AerialTrue).png M Slash
2 0 9% 0 Sakurai angle 30 70 0 3.04668 25 0.0 0.0 0.0 HitboxTableIcon(Clang).png HitboxTableIcon(Rebound).png Slash (effect) HitboxTableIcon(GroundedTrue).png HitboxTableIcon(AerialTrue).png M Slash
3 0 13% 0 Sakurai angle 60 70 0 3.906 76 4.6872 0.0 0.0 HitboxTableIcon(Clang).png HitboxTableIcon(Rebound).png Slash (effect) HitboxTableIcon(GroundedTrue).png HitboxTableIcon(AerialTrue).png L Slash

Timing[edit]

Hitbox 7-10
Animation length 35
FrameIcon(Lag).png FrameIcon(Lag).png FrameIcon(Lag).png FrameIcon(Lag).png FrameIcon(Lag).png FrameIcon(Lag).png FrameIcon(Hitbox).png FrameIcon(Hitbox).png FrameIcon(Hitbox).png FrameIcon(Hitbox).png FrameIcon(Lag).png FrameIcon(Lag).png FrameIcon(Lag).png FrameIcon(Lag).png FrameIcon(Lag).png FrameIcon(Lag).png FrameIcon(Lag).png FrameIcon(Lag).png FrameIcon(Lag).png FrameIcon(Lag).png FrameIcon(Lag).png FrameIcon(Lag).png FrameIcon(Lag).png FrameIcon(Lag).png FrameIcon(Lag).png FrameIcon(Lag).png FrameIcon(Lag).png FrameIcon(Lag).png FrameIcon(Lag).png FrameIcon(Lag).png FrameIcon(Lag).png FrameIcon(Lag).png FrameIcon(Lag).png FrameIcon(Lag).png FrameIcon(Lag).png
Legend (1 square = 1 frame)
Lag
Lag time
Hitbox
Hitbox

Related moves[edit]