Meta Knight (SSB4)/Forward smash: Difference between revisions
Dhiaalhanai (talk | contribs) (Added info and data) |
m (→Overview) |
||
| (20 intermediate revisions by 12 users not shown) | |||
| Line 1: | Line 1: | ||
{{ | {{ArticleIcons|ssb4=y}} | ||
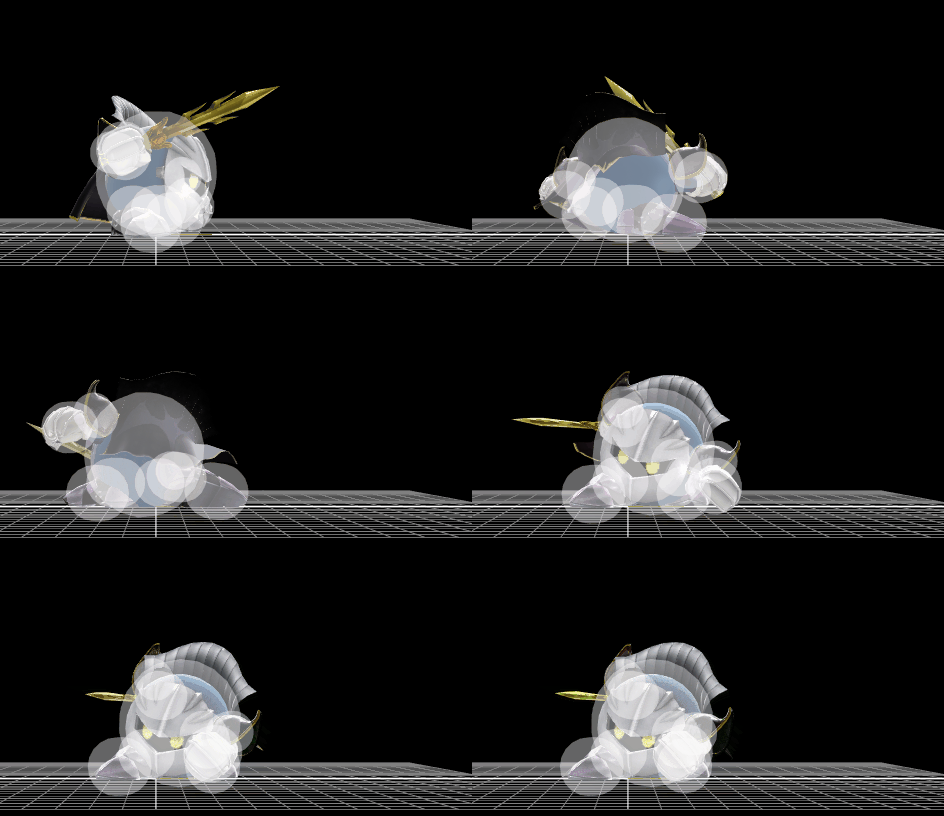
[[File:MetaKnightFSmash.gif|thumb|270px|Hitbox visualization showing Meta Knight's forward smash.]] | |||
Meta Knight pulls back | ==Overview== | ||
Meta Knight pulls Galaxia back and slashes outward. It takes some time to start up, but is released instantaneously after charging. This, coupled with its power, deceptive range and minimal ending lag, makes it a surprisingly good tool to use in mix-ups, and a very powerful way to punish mis-spaced moves from opponents. Due to the nature of this attack, it can also be used as an effective mindgame tool, if Meta Knight can keep his opponent guessing about when the attack will come out, as well as his options upon performing one on low-percentage-hit, shield or whiff. The move is only -6 on shield, making it completely safe against most of the cast provided he’s spaced far enough away to avoid punishment. | |||
With its unusual combination of low risk and high reward, it is considered to be one of the best forward smashes in the game. | |||
{|class="wikitable | |||
==Hitboxes== | |||
{{SSB4HitboxTableHeader}} | |||
{{SSB4HitboxTableRow | |||
|id=0 | |||
|damage={{ChargedSmashDmgSSB4|16}} | |||
|sd=0 | |||
|angle=361 | |||
|bk=30 | |||
|ks=108 | |||
|fkv=0 | |||
|r=6.2 | |||
|bn=0 | |||
|xpos=0.0 | |||
|ypos=5.0 | |||
|zpos=9.0 | |||
|trip=0 | |||
|type=Sword | |||
|effect=Slash | |||
|ff=1.5 | |||
|clang=t | |||
|slvl=L | |||
|sfx=Kick | |||
}} | |||
{{SSB4HitboxTableRow | |||
|id=1 | |||
|damage={{ChargedSmashDmgSSB4|16}} | |||
|sd=0 | |||
|angle=361 | |||
|bk=30 | |||
|ks=98 | |||
|fkv=0 | |||
|r=5.2 | |||
|bn=0 | |||
|xpos=0.0 | |||
|ypos=5.0 | |||
|zpos=17.0 to 13.0 | |||
|trip=0 | |||
|type=Sword | |||
|effect=Slash | |||
|clang=t | |||
|slvl=L | |||
|sfx=Kick | |||
}} | |||
|} | |||
==Timing== | |||
{|class="wikitable" | |||
!Charges between | |||
|20-21 | |||
|- | |||
!Hitboxes | |||
|24 | |||
|- | |||
!Interruptible | |||
|42 | |||
|- | |- | ||
! | !Animation length | ||
|64 | |||
| | |||
|} | |} | ||
{{FrameStripStart}} | |||
{{FrameStrip|t=Lag|c=20|e=LagChargeS}}{{FrameStrip|t=Lag|c=3|s=LagChargeE}}{{FrameStrip|t=Hitbox|c=1}}{{FrameStrip|t=Lag|c=17}}{{FrameStrip|t=Interruptible|c=23}} | |||
{{FrameStripEnd}} | |||
{{FrameIconLegend|lag=y|charge=y|hitbox=y|interruptible=y}} | |||
{{MvSubNavMetaKnight|g=SSB4}} | |||
[[Category:Meta Knight (SSB4)]] | |||
[[Category:Forward smashes (SSB4)]] | |||
Latest revision as of 21:44, July 4, 2021
Overview[edit]
Meta Knight pulls Galaxia back and slashes outward. It takes some time to start up, but is released instantaneously after charging. This, coupled with its power, deceptive range and minimal ending lag, makes it a surprisingly good tool to use in mix-ups, and a very powerful way to punish mis-spaced moves from opponents. Due to the nature of this attack, it can also be used as an effective mindgame tool, if Meta Knight can keep his opponent guessing about when the attack will come out, as well as his options upon performing one on low-percentage-hit, shield or whiff. The move is only -6 on shield, making it completely safe against most of the cast provided he’s spaced far enough away to avoid punishment.
With its unusual combination of low risk and high reward, it is considered to be one of the best forward smashes in the game.
Hitboxes[edit]
Timing[edit]
| Charges between | 20-21 |
|---|---|
| Hitboxes | 24 |
| Interruptible | 42 |
| Animation length | 64 |
Lag time |
Charge interval |
Hitbox |
Interruptible |
|
