SSBU Icon.png

Ice Climbers (SSBU)/Back throw: Difference between revisions

From SmashWiki, the Super Smash Bros. wiki
Jump to navigationJump to search
(→‎Overview: Stuff about Icies' back throw. Will elaborate more later on...)
(→‎Overview: Continuing to elaborate...)
Line 10: Line 10:
==Overview==
==Overview==
The leader of the duo heaves the opponent into the ground with one hand. Despite what the hefty animation would suggest, it deals low damage and has pitiful knockback growth, with high base knockback and ending lag on top of that. As such it lacks use in combos, kills, damage racking, or tech chasing.
When landing a grab while desynced, the partner can be made to buffer a smash attack as the leader throws the opponent, greatly enhancing their damage and launch power. Combining a back throw with an f-smash turns the otherwise very weak throw into a devastating kill move, with back-throw-forward-smash being the second strongest. (While the back throw variant releases opponents at a closer point to the blast zone, the forward throw variant has hitlag and a longer animation, allowing the partner climber to charge their f-smash for a moment before the throw connects and KO earlier) B-throw-f-smash's quicker startup makes it harder to DI, but also harder to time.


==Throw Data==
==Throw Data==

Revision as of 21:27, May 21, 2024

Competitive.png This article or section may require competitive expertise.
You can discuss this issue on the talk page or edit this page to improve it.
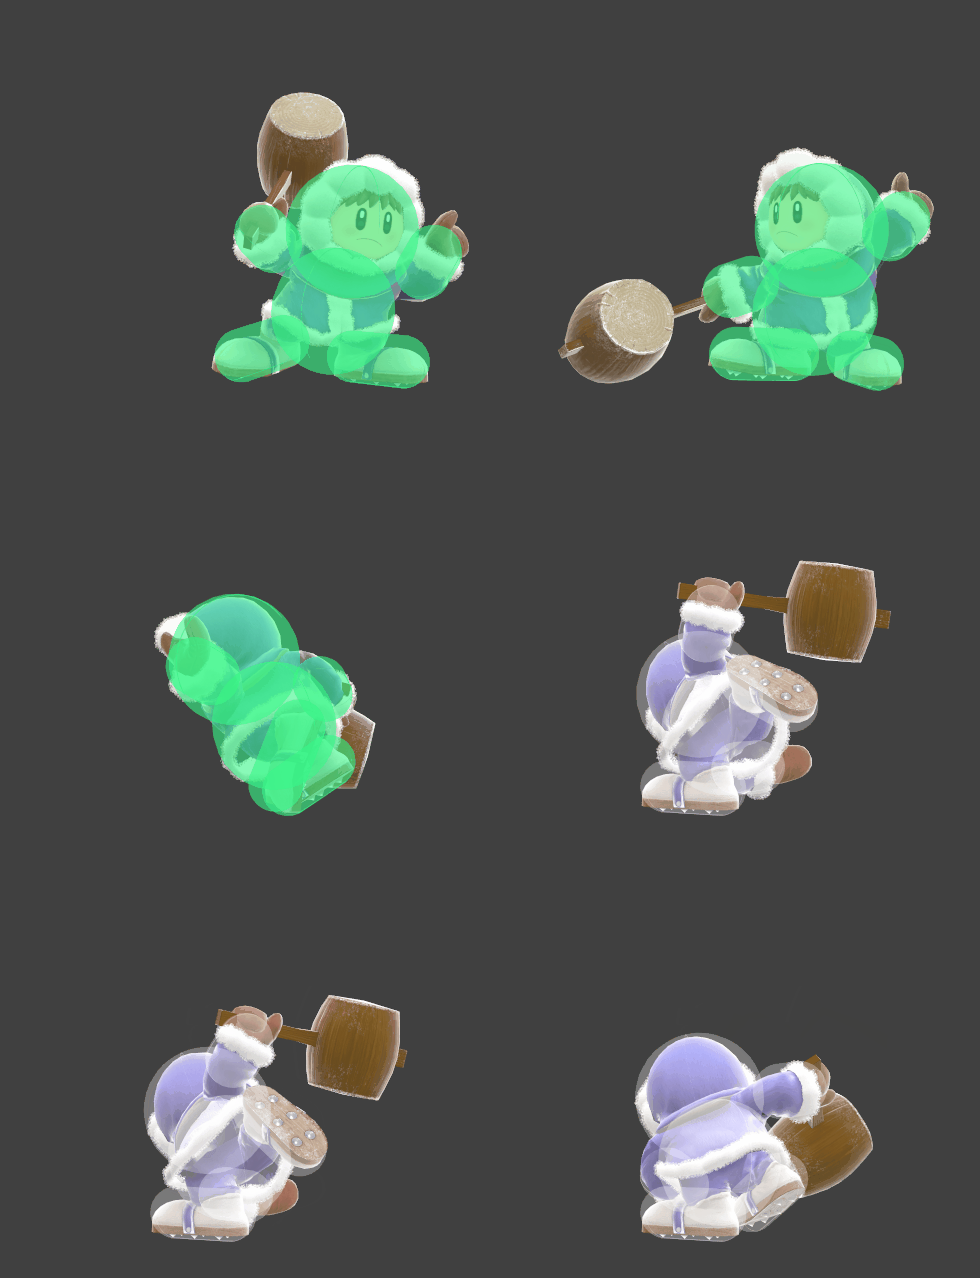
Ice Climbers back throw hurtbox visualization
PopoBThrowSSBU.gif

Overview

The leader of the duo heaves the opponent into the ground with one hand. Despite what the hefty animation would suggest, it deals low damage and has pitiful knockback growth, with high base knockback and ending lag on top of that. As such it lacks use in combos, kills, damage racking, or tech chasing.

When landing a grab while desynced, the partner can be made to buffer a smash attack as the leader throws the opponent, greatly enhancing their damage and launch power. Combining a back throw with an f-smash turns the otherwise very weak throw into a devastating kill move, with back-throw-forward-smash being the second strongest. (While the back throw variant releases opponents at a closer point to the blast zone, the forward throw variant has hitlag and a longer animation, allowing the partner climber to charge their f-smash for a moment before the throw connects and KO earlier) B-throw-f-smash's quicker startup makes it harder to DI, but also harder to time.

Throw Data

Kind ID Damage Angle Angle type BK KS FKV Effect Type Sound
Throw 0 6.0% AngleIcon60.png Forward 80 30 0 0.0× EffectIcon(Normal).png TypeIcon(Throwing).png S None
Break 0 3.0% Sakurai angle Forward 40 100 0 0.0× EffectIcon(Normal).png TypeIcon(Throwing).png S None

Timing

Invincibility 1-18
Turnaround 9
Throw release 18
Interruptible 40
Animation length 67
FrameIcon(Lag).png FrameIcon(Lag).png FrameIcon(Lag).png FrameIcon(Lag).png FrameIcon(Lag).png FrameIcon(Lag).png FrameIcon(Lag).png FrameIcon(Lag).png FrameIcon(Lag).png FrameIcon(Lag).png FrameIcon(Lag).png FrameIcon(Lag).png FrameIcon(Lag).png FrameIcon(Lag).png FrameIcon(Lag).png FrameIcon(Lag).png FrameIcon(LagThrowS).png FrameIcon(LagThrowE).png FrameIcon(Lag).png FrameIcon(Lag).png FrameIcon(Lag).png FrameIcon(Lag).png FrameIcon(Lag).png FrameIcon(Lag).png FrameIcon(Lag).png FrameIcon(Lag).png FrameIcon(Lag).png FrameIcon(Lag).png FrameIcon(Lag).png FrameIcon(Lag).png FrameIcon(Lag).png FrameIcon(Lag).png FrameIcon(Lag).png FrameIcon(Lag).png FrameIcon(Lag).png FrameIcon(Lag).png FrameIcon(Lag).png FrameIcon(Lag).png FrameIcon(Lag).png FrameIcon(Interruptible).png FrameIcon(Interruptible).png FrameIcon(Interruptible).png FrameIcon(Interruptible).png FrameIcon(Interruptible).png FrameIcon(Interruptible).png FrameIcon(Interruptible).png FrameIcon(Interruptible).png FrameIcon(Interruptible).png FrameIcon(Interruptible).png FrameIcon(Interruptible).png FrameIcon(Interruptible).png FrameIcon(Interruptible).png FrameIcon(Interruptible).png FrameIcon(Interruptible).png FrameIcon(Interruptible).png FrameIcon(Interruptible).png FrameIcon(Interruptible).png FrameIcon(Interruptible).png FrameIcon(Interruptible).png FrameIcon(Interruptible).png FrameIcon(Interruptible).png FrameIcon(Interruptible).png FrameIcon(Interruptible).png FrameIcon(Interruptible).png FrameIcon(Interruptible).png FrameIcon(Interruptible).png FrameIcon(Interruptible).png
FrameIcon(Invincible).png FrameIcon(Invincible).png FrameIcon(Invincible).png FrameIcon(Invincible).png FrameIcon(Invincible).png FrameIcon(Invincible).png FrameIcon(Invincible).png FrameIcon(InvincibleStateS).png FrameIcon(InvincibleStateE).png FrameIcon(Invincible).png FrameIcon(Invincible).png FrameIcon(Invincible).png FrameIcon(Invincible).png FrameIcon(Invincible).png FrameIcon(Invincible).png FrameIcon(Invincible).png FrameIcon(Invincible).png FrameIcon(Invincible).png FrameIcon(Vulnerable).png FrameIcon(Vulnerable).png FrameIcon(Vulnerable).png FrameIcon(Vulnerable).png FrameIcon(Vulnerable).png FrameIcon(Vulnerable).png FrameIcon(Vulnerable).png FrameIcon(Vulnerable).png FrameIcon(Vulnerable).png FrameIcon(Vulnerable).png FrameIcon(Vulnerable).png FrameIcon(Vulnerable).png FrameIcon(Vulnerable).png FrameIcon(Vulnerable).png FrameIcon(Vulnerable).png FrameIcon(Vulnerable).png FrameIcon(Vulnerable).png FrameIcon(Vulnerable).png FrameIcon(Vulnerable).png FrameIcon(Vulnerable).png FrameIcon(Vulnerable).png FrameIcon(Vulnerable).png FrameIcon(Vulnerable).png FrameIcon(Vulnerable).png FrameIcon(Vulnerable).png FrameIcon(Vulnerable).png FrameIcon(Vulnerable).png FrameIcon(Vulnerable).png FrameIcon(Vulnerable).png FrameIcon(Vulnerable).png FrameIcon(Vulnerable).png FrameIcon(Vulnerable).png FrameIcon(Vulnerable).png FrameIcon(Vulnerable).png FrameIcon(Vulnerable).png FrameIcon(Vulnerable).png FrameIcon(Vulnerable).png FrameIcon(Vulnerable).png FrameIcon(Vulnerable).png FrameIcon(Vulnerable).png FrameIcon(Vulnerable).png FrameIcon(Vulnerable).png FrameIcon(Vulnerable).png FrameIcon(Vulnerable).png FrameIcon(Vulnerable).png FrameIcon(Vulnerable).png FrameIcon(Vulnerable).png FrameIcon(Vulnerable).png FrameIcon(Vulnerable).png
Legend (1 square = 1 frame)
FrameIcon(Lag).png
Lag time
FrameIcon(Vulnerable).png
Vulnerable
FrameIcon(Invincible).png
Invincible
FrameIcon(BlankStateS).pngFrameIcon(BlankStateE).png
State change
FrameIcon(BlankThrowS).pngFrameIcon(BlankThrowE).png
Throw point
FrameIcon(Interruptible).png
Interruptible