Falco (SSBM)/Forward tilt: Difference between revisions
From SmashWiki, the Super Smash Bros. wiki
Jump to navigationJump to search
Laprasified (talk | contribs) (technical data added) |
mNo edit summary |
||
| Line 4: | Line 4: | ||
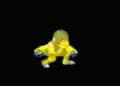
[[File:Falco Forward Tilt Hitbox Melee.gif|thumb|Hitbox duration of Falco's forward tilt.]] | [[File:Falco Forward Tilt Hitbox Melee.gif|thumb|Hitbox duration of Falco's forward tilt.]] | ||
Falco sticks his leg forward to poke the opponent. This move is decent for keeping opponents at bay in close range, and does not have significant [[ending lag]], although it is not too difficult to [[punish]] if overused. It is most commonly used after a [[short hop laser]] on opponents recovering close to the edge, as it can help the laser cover their options. When angled down, it can also [[gimp]] characters with linear recoveries who are recovering low near the edge. | Falco sticks his leg forward to poke the opponent. This move is decent for keeping opponents at bay in close range, and does not have significant [[ending lag]], although it is not too difficult to [[punish]] if overused. It is most commonly used after a [[short hop laser]] on opponents recovering close to the edge, as it can help the laser cover their options. When angled down, it can also [[gimp]] characters with linear recoveries who are recovering low near the edge. | ||
==Hitboxes== | ==Hitboxes== | ||
Latest revision as of 13:56, March 3, 2016
Overview[edit]

Falco sticks his leg forward to poke the opponent. This move is decent for keeping opponents at bay in close range, and does not have significant ending lag, although it is not too difficult to punish if overused. It is most commonly used after a short hop laser on opponents recovering close to the edge, as it can help the laser cover their options. When angled down, it can also gimp characters with linear recoveries who are recovering low near the edge.
Hitboxes[edit]
| ID | Part | Damage | SD | Angle | BK | KS | FKV | Radius | Bone | Offset | Clang | Rebound | Effect | G | A | Sound | ||
|---|---|---|---|---|---|---|---|---|---|---|---|---|---|---|---|---|---|---|
| 0 | 0 | 9% | 0 | 0 | 100 | 0 | 2.7342 | 13 | 4.1013 | 0.0 | 0.0 | |||||||
| 1 | 0 | 9% | 0 | 0 | 100 | 0 | 3.1248 | 12 | 2.3436 | 0.0 | 0.0 | |||||||
| 2 | 0 | 9% | 0 | 0 | 100 | 0 | 2.3436 | 4 | 0.0 | 0.0 | 0.0 | |||||||
Timing[edit]
| Hitbox out | 5-9 |
|---|---|
| Animation length | 26 |
Lag time |
Hitbox |
Gallery[edit]

Hitbox duration of the move when angled up.
Hitbox duration of the move when angled down.


|