SSBM Icon.png

Bowser (SSBM)/Neutral attack/Hit 2

From SmashWiki, the Super Smash Bros. wiki
Jump to navigationJump to search
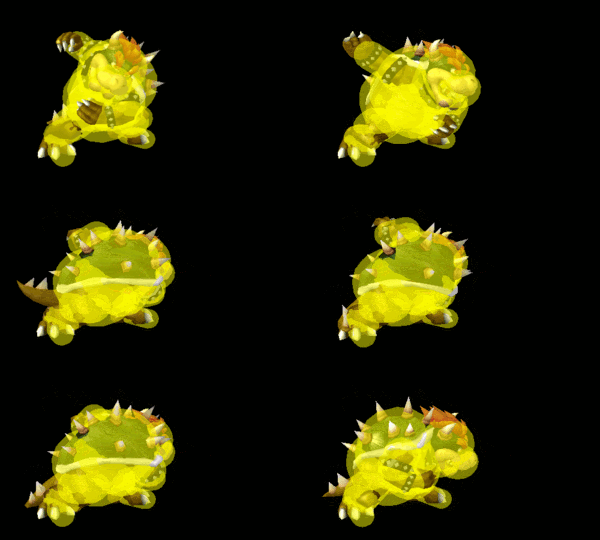
Hitbox visualization showing Bowser's second jab.

Overview[edit]

Bowser performs a claw swipe. It deals a good bit of hitstun, allowing for potential frame traps, but little else. Due to this coupled with the knockback, however, it has a niche for resetting neutral. The hitbox goes a bit beyond Bowser's model, giving it a minor disjoint; coupled with the large active frames this can be useful for Bowser. Its FAF is also decently low, being one of the safest moves Bowser has on whiff. It also has some KO potential if the opponent DIs poorly, KOing Mario at 183% at the edge of Battlefield. However, the KO percentages go above 200% with good DI, making this less useful given the rest of Bowser's kit KOs relatively well.

Hitboxes[edit]

ID Part Damage SD Angle BK KS FKV Radius Bone Offset Clang Rebound Effect G A Sound
0 0 6% 0 Sakurai angle 30 110 0 4.2966 65 0.0 0.0 0.0 HitboxTableIcon(Clang).png HitboxTableIcon(Rebound).png EffectIcon(Slash).png HitboxTableIcon(GroundedTrue).png HitboxTableIcon(AerialTrue).png M Slash
1 0 6% 0 Sakurai angle 30 110 0 3.906 61 0.0 0.0 0.0 HitboxTableIcon(Clang).png HitboxTableIcon(Rebound).png EffectIcon(Slash).png HitboxTableIcon(GroundedTrue).png HitboxTableIcon(AerialTrue).png M Slash
2 0 6% 0 Sakurai angle 30 110 0 1.953 61 0.0 0.0 0.0 HitboxTableIcon(Clang).png HitboxTableIcon(Rebound).png EffectIcon(Slash).png HitboxTableIcon(GroundedTrue).png HitboxTableIcon(AerialTrue).png M Slash

Timing[edit]

Hitboxes 8-10
Interruptible 26
Animation length 30
FrameIcon(Lag).png FrameIcon(Lag).png FrameIcon(Lag).png FrameIcon(Lag).png FrameIcon(Lag).png FrameIcon(Lag).png FrameIcon(Lag).png FrameIcon(Hitbox).png FrameIcon(Hitbox).png FrameIcon(Hitbox).png FrameIcon(Lag).png FrameIcon(Lag).png FrameIcon(Lag).png FrameIcon(Lag).png FrameIcon(Lag).png FrameIcon(Lag).png FrameIcon(Lag).png FrameIcon(Lag).png FrameIcon(Lag).png FrameIcon(Lag).png FrameIcon(Lag).png FrameIcon(Lag).png FrameIcon(Lag).png FrameIcon(Lag).png FrameIcon(Lag).png FrameIcon(Interruptible).png FrameIcon(Interruptible).png FrameIcon(Interruptible).png
Legend (1 square = 1 frame)
FrameIcon(Lag).png
Lag time
FrameIcon(Hitbox).png
Hitbox
FrameIcon(Interruptible).png
Interruptible