SSBU Icon.png

Wolf (SSBU)/Forward smash: Difference between revisions

From SmashWiki, the Super Smash Bros. wiki
Jump to navigationJump to search
mNo edit summary
Tag: Mobile edit
Line 3: Line 3:
{{competitive expertise}}
==Overview==
==Overview==
Wolf thrusts his hand forward and hits the opponent with a palm strike. One of Wolf's best KO moves as well as a reliable baiting tool. It has high [[startup]], coming out on frame 20, making it one of the slowest of its kind in the game. However, it has 4 active frames and its [[ending lag]] is extremely low, having an FAF of 42, meaning that the move only has 19 frames of cooldown once the hitbox ends. This makes it one of his best moves on the ground as the move has very high power, easily being able to KO middleweights near the ledge at high percents, and thanks to its low ending lag, it is safe on shield while also being difficult to punish even if it is whiffed. Lastly, due to the move being difficult to punish, it can be used to bait approaches and frame trap opponents, giving Wolf opportunities to dish out heavy damage or KO them at high percents with one of his finishers.
==Hitboxes==
==Hitboxes==
{{UltimateHitboxTableHeader}}

Revision as of 02:50, July 25, 2021

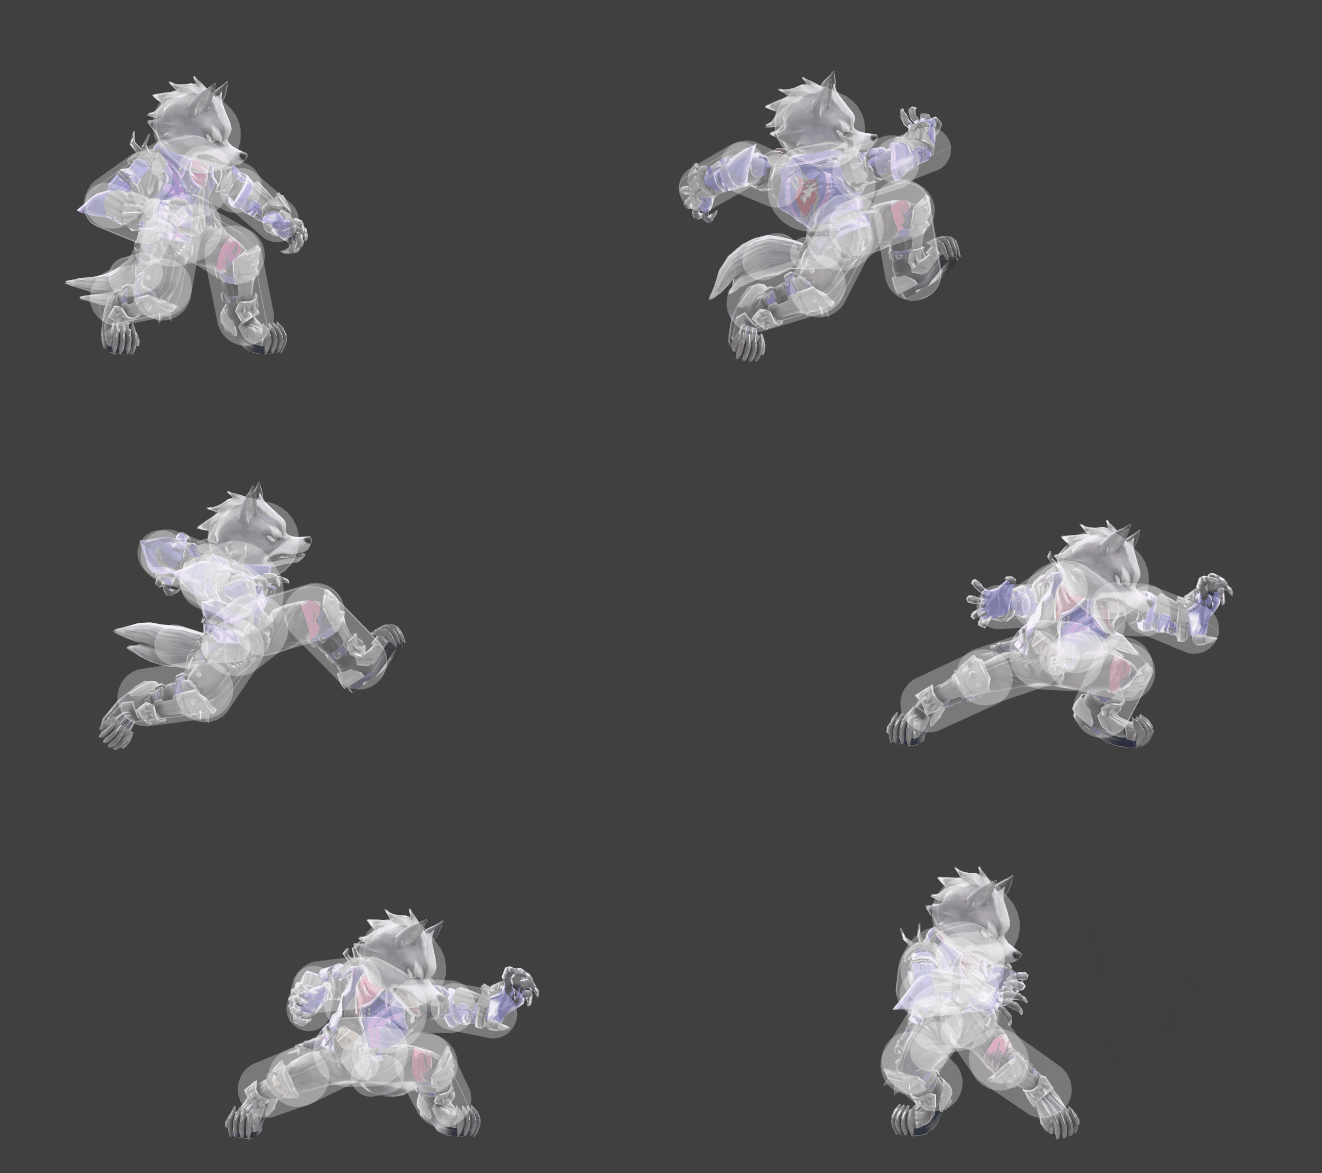
Hitbox visualization showing Wolf's forward smash.
Competitive.png This article or section may require competitive expertise.
You can discuss this issue on the talk page or edit this page to improve it.

Overview

Wolf thrusts his hand forward and hits the opponent with a palm strike. One of Wolf's best KO moves as well as a reliable baiting tool. It has high startup, coming out on frame 20, making it one of the slowest of its kind in the game. However, it has 4 active frames and its ending lag is extremely low, having an FAF of 42, meaning that the move only has 19 frames of cooldown once the hitbox ends. This makes it one of his best moves on the ground as the move has very high power, easily being able to KO middleweights near the ledge at high percents, and thanks to its low ending lag, it is safe on shield while also being difficult to punish even if it is whiffed. Lastly, due to the move being difficult to punish, it can be used to bait approaches and frame trap opponents, giving Wolf opportunities to dish out heavy damage or KO them at high percents with one of his finishers.

Hitboxes

ID Part Rehit rate Damage SD Angle Angle type BK KS FKV Set weight Radius Bone Offset SDI× T% Clang Rebound Effect Type G A Sound Direct Hit bits Hit part Blockable Reflectable Absorbable Flinchless No GFX Heedless
0 0 0 15.0% 0 Sakurai angle Standard 30 106 0 HitboxTableIcon(False).png 3.5 arml 3.0 0.0 -1.0 1.0× 1.0× 0% HitboxTableIcon(Clang).png HitboxTableIcon(Rebound).png EffectIcon(Normal).png TypeIcon(Hand).png HitboxTableIcon(GroundedTrue).png HitboxTableIcon(AerialTrue).png L Punch SpecialsDirect.png All All HitboxTableIcon(Blockable).png HitboxTableIcon(Unreflectable).png HitboxTableIcon(Unabsorbable).png HitboxTableIcon(False).png HitboxTableIcon(False).png HitboxTableIcon(False).png
1 0 0 15.0% 0 Sakurai angle Standard 30 106 0 HitboxTableIcon(False).png 3.0 arml -1.5 0.0 -0.3 1.0× 1.0× 0% HitboxTableIcon(Clang).png HitboxTableIcon(Rebound).png EffectIcon(Normal).png TypeIcon(Hand).png HitboxTableIcon(GroundedTrue).png HitboxTableIcon(AerialTrue).png L Punch SpecialsDirect.png All All HitboxTableIcon(Blockable).png HitboxTableIcon(Unreflectable).png HitboxTableIcon(Unabsorbable).png HitboxTableIcon(False).png HitboxTableIcon(False).png HitboxTableIcon(False).png

Timing

Charges between 6-7
Hitboxes 20-23
Interruptible 42
Animation length 48
FrameIcon(Lag).png FrameIcon(Lag).png FrameIcon(Lag).png FrameIcon(Lag).png FrameIcon(Lag).png FrameIcon(LagChargeS).png FrameIcon(LagChargeE).png FrameIcon(Lag).png FrameIcon(Lag).png FrameIcon(Lag).png FrameIcon(Lag).png FrameIcon(Lag).png FrameIcon(Lag).png FrameIcon(Lag).png FrameIcon(Lag).png FrameIcon(Lag).png FrameIcon(Lag).png FrameIcon(Lag).png FrameIcon(Lag).png FrameIcon(Hitbox).png FrameIcon(Hitbox).png FrameIcon(Hitbox).png FrameIcon(Hitbox).png FrameIcon(Lag).png FrameIcon(Lag).png FrameIcon(Lag).png FrameIcon(Lag).png FrameIcon(Lag).png FrameIcon(Lag).png FrameIcon(Lag).png FrameIcon(Lag).png FrameIcon(Lag).png FrameIcon(Lag).png FrameIcon(Lag).png FrameIcon(Lag).png FrameIcon(Lag).png FrameIcon(Lag).png FrameIcon(Lag).png FrameIcon(Lag).png FrameIcon(Lag).png FrameIcon(Lag).png FrameIcon(Interruptible).png FrameIcon(Interruptible).png FrameIcon(Interruptible).png FrameIcon(Interruptible).png FrameIcon(Interruptible).png FrameIcon(Interruptible).png FrameIcon(Interruptible).png
Legend (1 square = 1 frame)
FrameIcon(Lag).png
Lag time
FrameIcon(LagChargeS).pngFrameIcon(LagChargeE).png
Charge interval
FrameIcon(Hitbox).png
Hitbox
FrameIcon(Interruptible).png
Interruptible